If you don’t know how to create a desktop application using Tkinter then I recommend you to read this article, it can be useful for you before doing this application.
Introduction
Python is one of the most popular programming languages. Nowadays, you can find it in almost all the fields — data science, web development, machine learning, etc. And one of the utilities of Python is creating desktop applications. Several libraries help you to do that, but a particularly famous one is Tkinter: it is a user-friendly library and anyone can use it to create good and professional applications.
In this article, I will show you how you can create a desktop application that helps you to crop and save a portion of an image.
But to do this, there are some steps that you need to follow but don’t worry if you don’t have a lot of experience with this library, I will go with you step by step until the final application.
Steps that need to follow
Here are the steps that you need to make this application working:
- Create the skeleton of the application
- Make a button (function) that opens and puts the image in the work area.
- Use the mouse to draw the area that you want to crop, as we did in this blog.
- Return the drawn area (it will be only the edges).
- Fill the area returned to create a mask.
- Use the mask to return the area wanted.
- Display the portion.
- Save the portion.
Creating the skeleton of the application
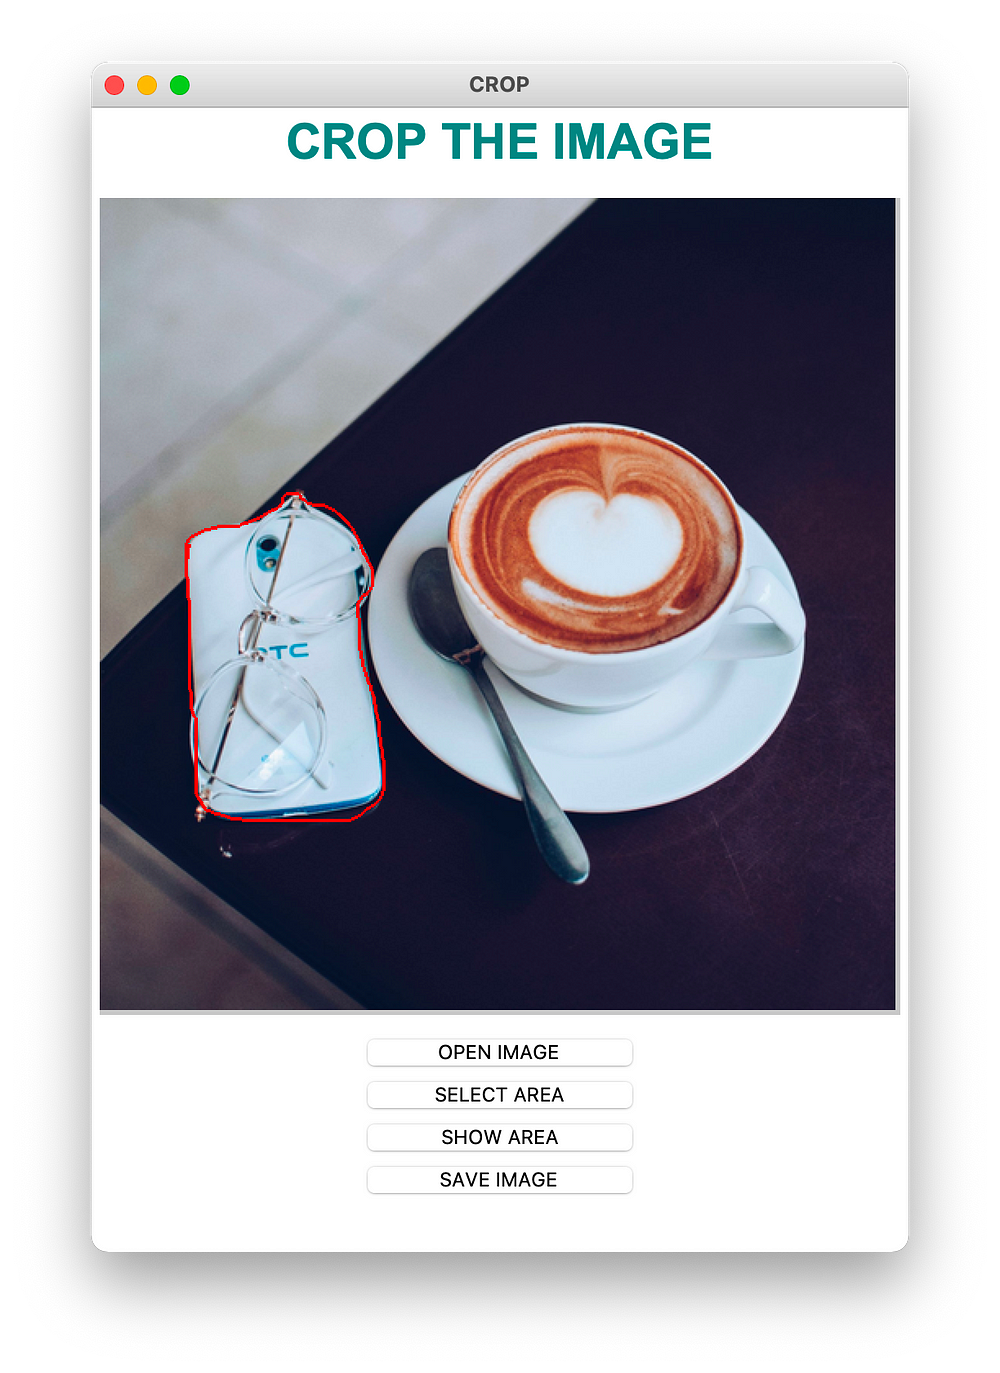
So this is the first step that we need to do. Because our subject is not the design, we can create a simple application only to plot an image. Here is the application that we will get.
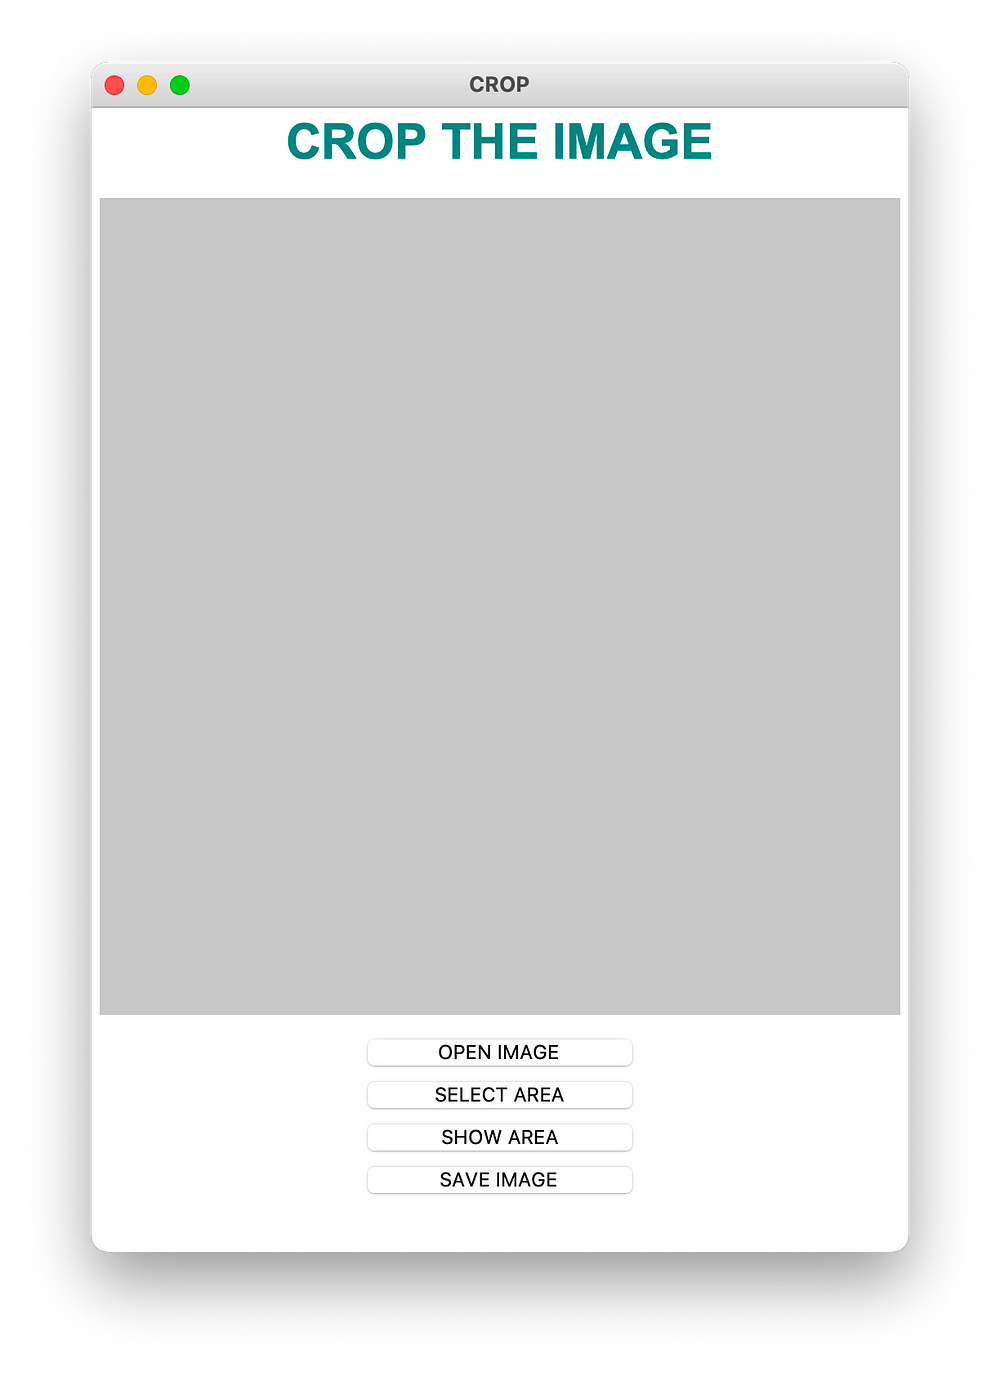
You can see that the design is very simple, we have the title which is a Tkinter Label, then the grey area which defines the area where we will put the image to crop, and finally the four buttons to do the different operations.
If you are curious about how the program of this part looks like, then here are the lines that you need to create this simple and cool skeleton.
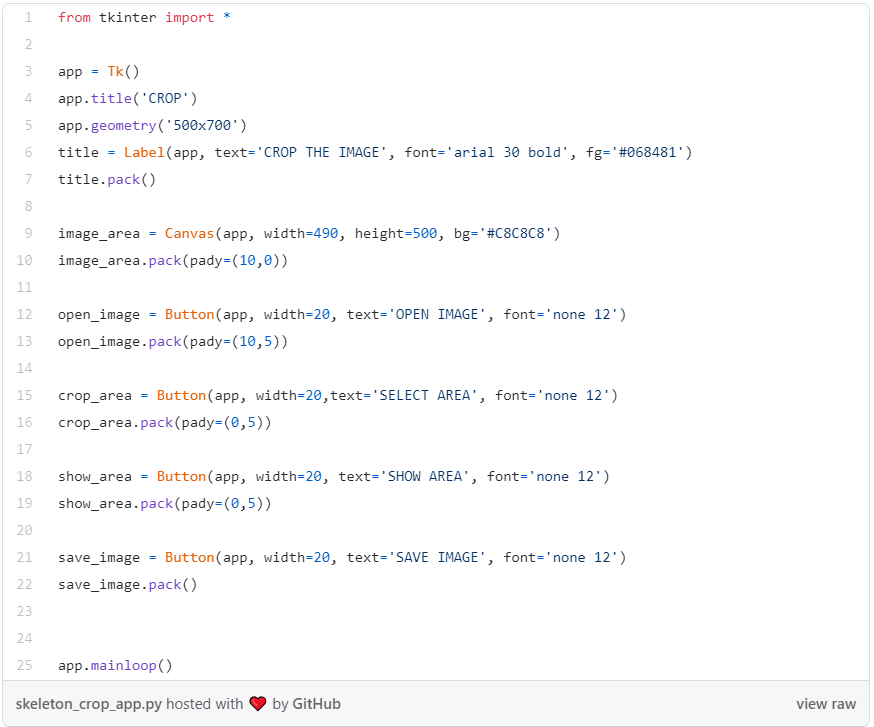
The button that opens and puts the image in the Canvas
As we are working with canvas so the idea here is to put the image as a background of that canvas for that we can save the coordinates after selecting the area wanted. But before that, we need to use the file dialog function to allow the user to choose any image he wants.
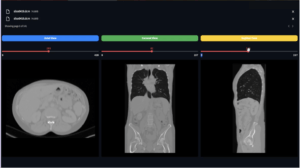
Here is the application with the image chosen as a background of the canvas.

So here is the function that will do this job, then I will explain.
Explanation
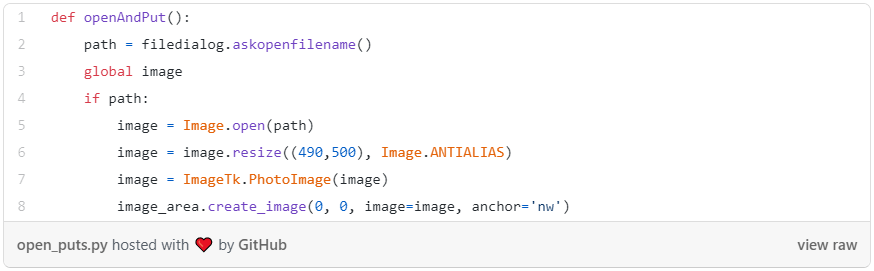
So as I was saying, this function has the role of opening and putting the image in the canvas so that we can use it to select the area wanted.
In the first line of the code, you can see that I called the function “askopenfilename” which will open a dialog window that we will use the select the image that we want to crop.
Then you should make sure of two things, the first one is to put the variable image as a global variable otherwise you can not see it in the canvas and the second thing is that you need to check if the path is not ‘empty’ before using it to open the image (because if you click in the button to choose the image then you don’t choose, you will have an error in this function)
And finally, I used Pillow to manipulate the image (opening and resizing), and I created the image for the canvas.
Select an area from the image using the mouse
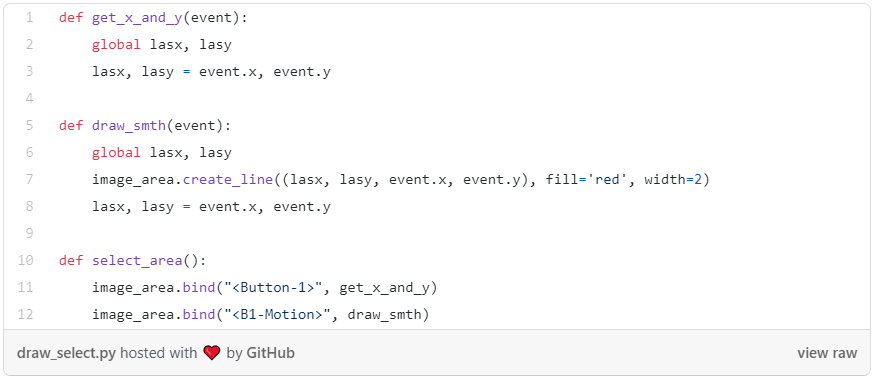
In this part, I will just copy the same function that I used in the blog of drawing on an image. Then we will add more stuff the save the coordinates.
(Sorry I am not a painter hahaha) but you can see the area selected, if you want to see the functions that did this work, then here are. The two first functions are for drawing and the last one is for the button ‘select area’ which means we can’t select anything before pressing on this button.
Return the selected area
Now for this step, you need to focus with me carefully. To do this job, we will create a matrix with the same dimension of the image, then we will use this matrix to store the coordinates of x and y after each step, for that we can use this matrix to return an image with white background and the area selected with black (only the edges selected).
You can ask me, why we are doing this. The answer is that we will use OpenCV here to take this area return then we will fill it so that we get the mask for the whole object.
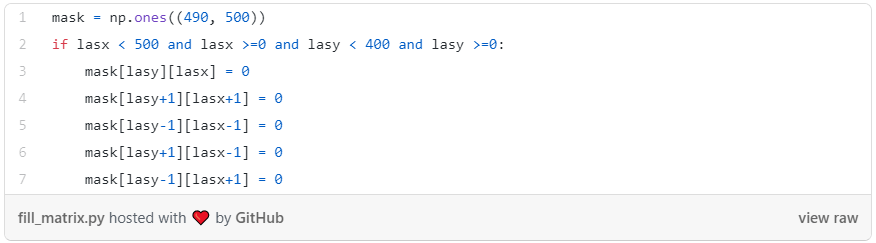
For that, I created the matrix mask with the same dimensions and I put it ones to get white pixels. Then the if statement I put it in the function that will create the line ‘draw_smth’ so that when we call this function to draw a line, we put the value 0 to those pixels.
You can see that I added four more lines to fill the neighbor pixels with the value 0 also. Don’t worry about that, because I did that to get thicker edges so that the next step (filling the area) will be easy.
Filling the area selected
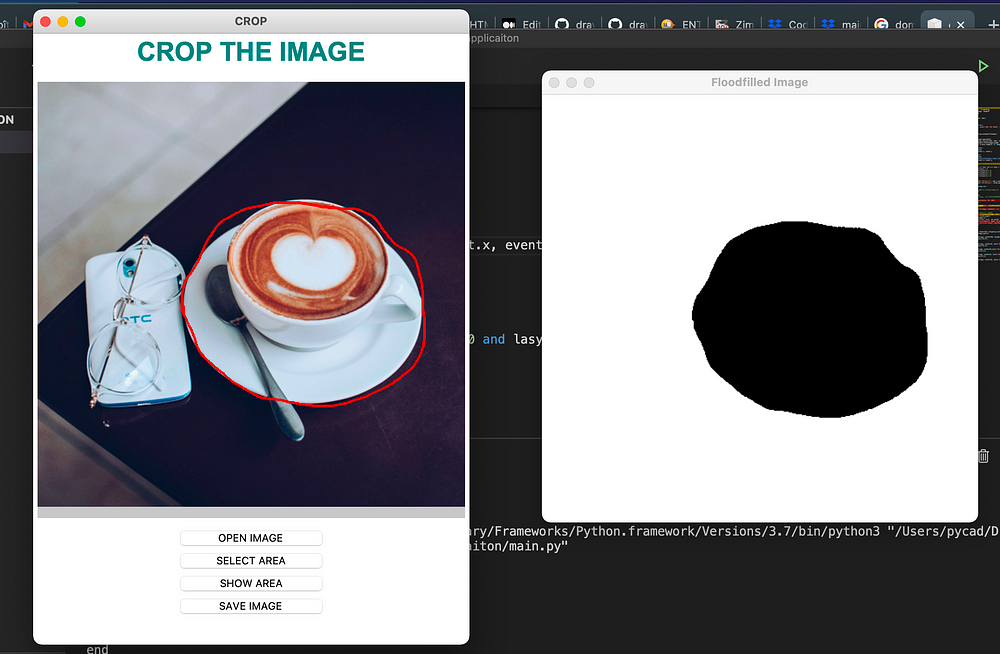
Now it comes the OpenCV part. For this step, I created a function that will take an image with edges as input, and returns the image with the mask.
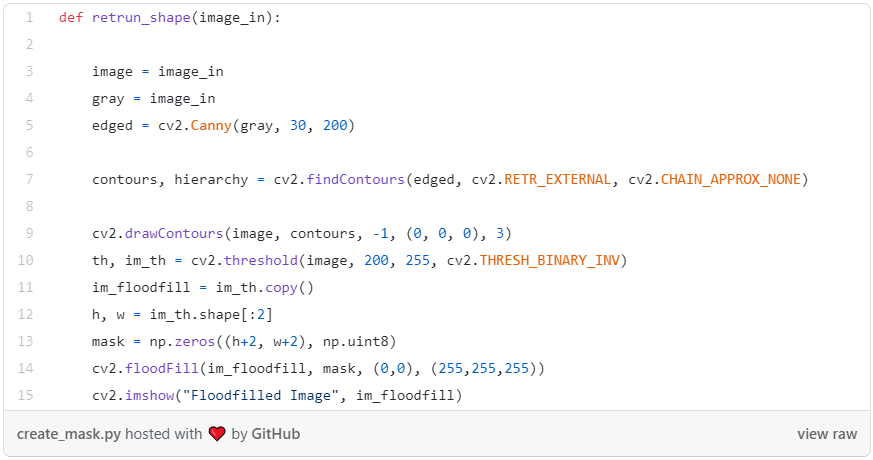
So this function will take the matrix that we have created (after multiplying it by 255) and it uses the canny function to detect the edges from the image because if you try to visualize the matrix created you will see that there are a lot of lines missing so to confirm the whole edge, you need to add the canny detection. After detecting the edges you need to draw them and finally there the function ‘floodFill’ (from OpenCV) that will take the edges as input and fill the whole area. This function is very sensitive if the area selected is not closed so it will fill nothing. For that, you can see that you need to detect the edges and the contour very carefully before passing the image to that function.
Here is the mask return by that function.
Note: you should notice that while calling the function ‘return shape’ you need to do this modification first to the matrix:
image_mattt = (mask*255).astype(np.uint8)
retrun_shape(image_mattt)
image_mattt = (mask * 255).astype(np.uint8)
return_shape(image_mattt)
Using the mask to return the area wanted
So in this part, we will use the mask obtained to return the real area from the image. It is very each actually because the mask is only 0 and 1 (255) which means if we multiply the mask by the image then we will get only the part multiplied by the white background of the mask which means the pixels that have 255.
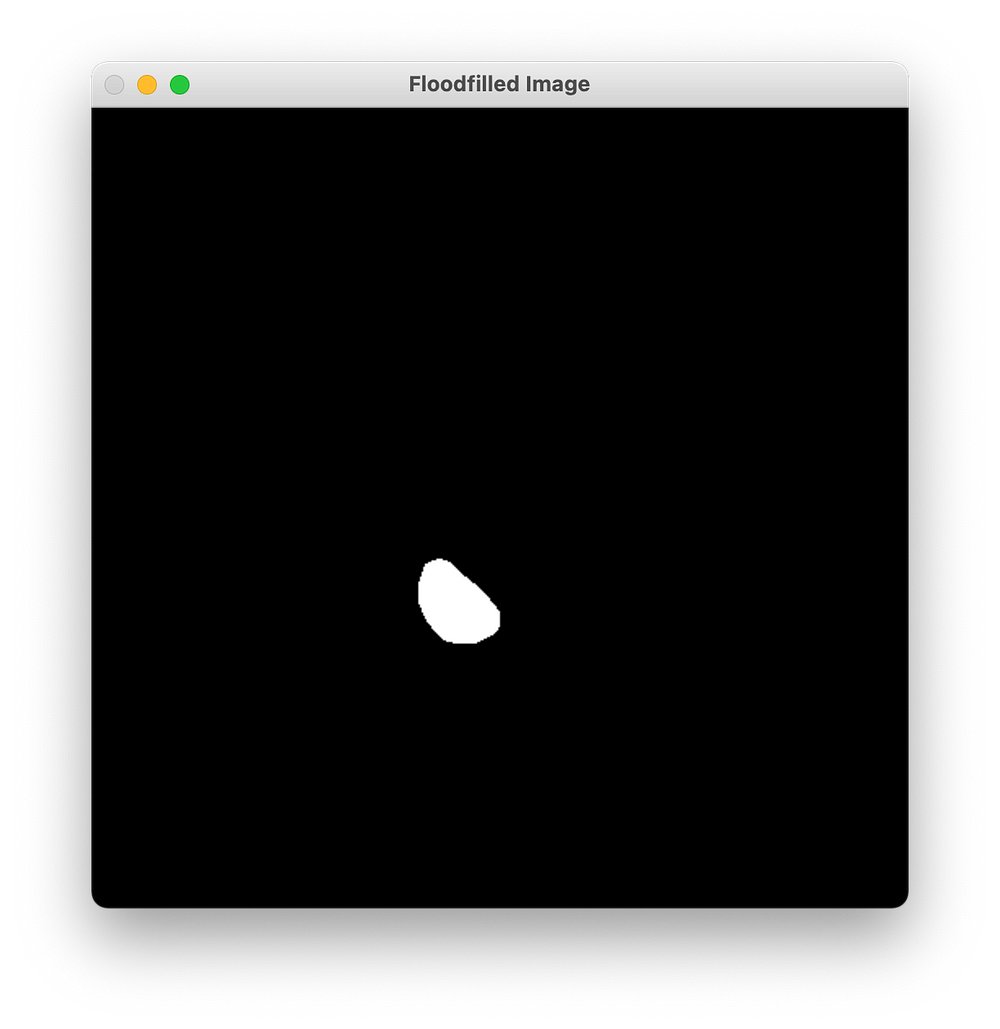
Looking at the mask that we have, we need to reverse its values. We can do this easily by adding this line at the end of the function ‘return_shape’.
im_floodfill = np.abs(im_floodfill — np.ones((490, 500)) * 255
This means that we will subtract 255 from each pixel of the image, for that the pixels having the value 255 will have 0 (became black) and the pixels having the value 0 will have -255 for that I added the abs before (absolute value).
Here is the mask that we will get.
Now to show the area selected, we need to create a matrix with the 3 channels so that we can multiply it by the real image. And do not forget to divide the mask by 255 so that the values will be either 0 or 1.
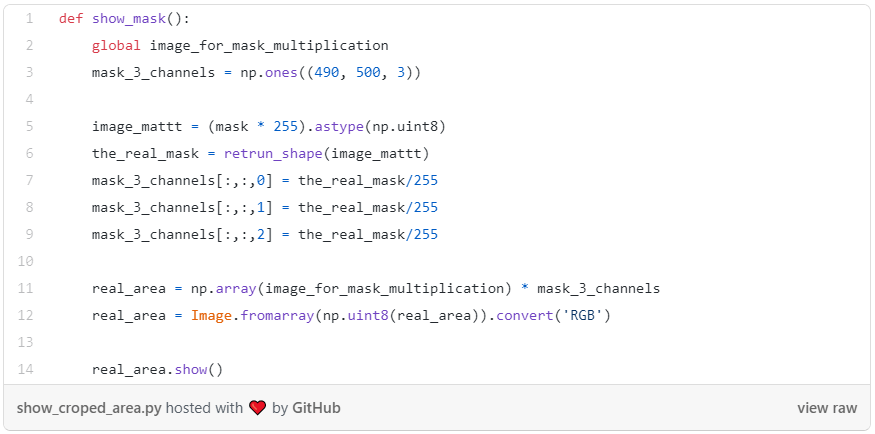
Then after multiplying the 3D mask by the image, we need to convert the NumPy array into a pillow image so that we can display it.
Here is the result.
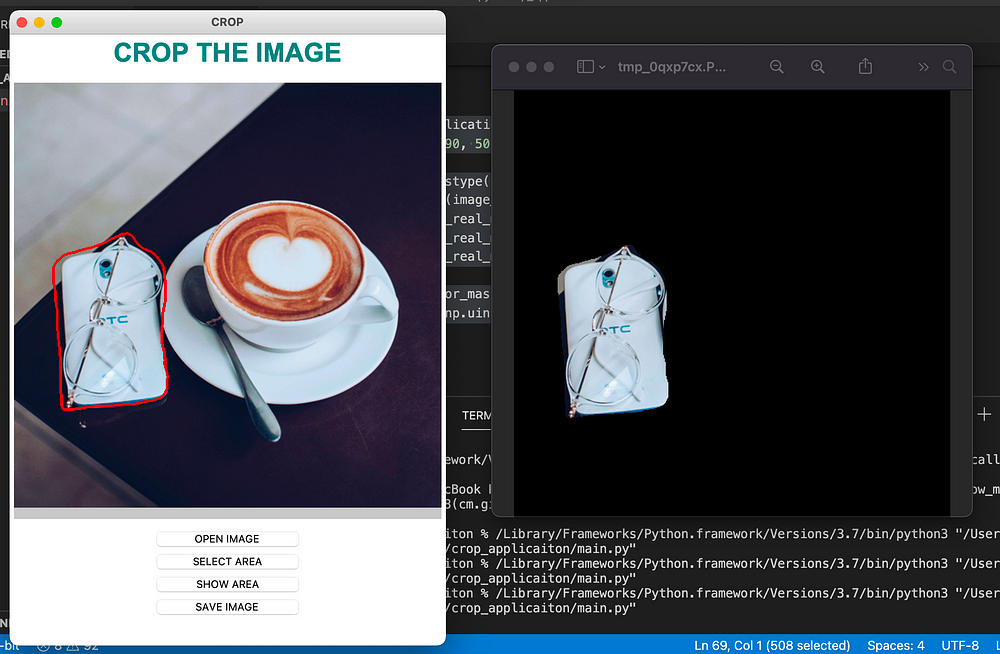
But here you can see that the image obtained has a black background, which is a little bit ugly. Because we did this crop to get the object only, so to fix that, we need to convert the image obtained into RGBA space so that we can control the alpha, and for that, we can create the transparent pixels.
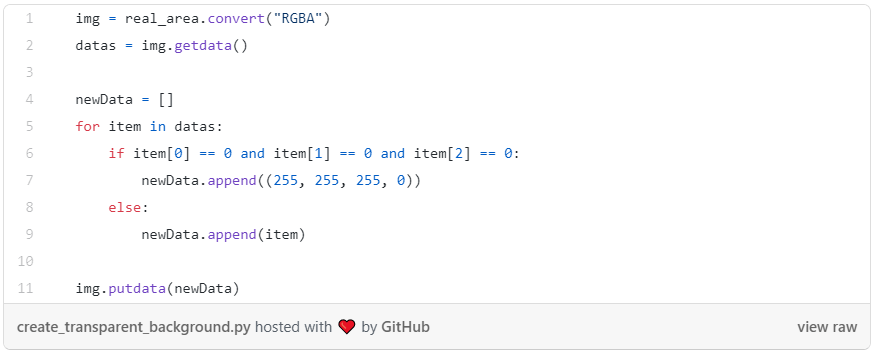
So that is the code that you need to add to the same function ‘show_mask’, which will put the opacity of the pixels not wanted into 0 after putting its values into 255 so that the transparency of white color will be better than a black color.
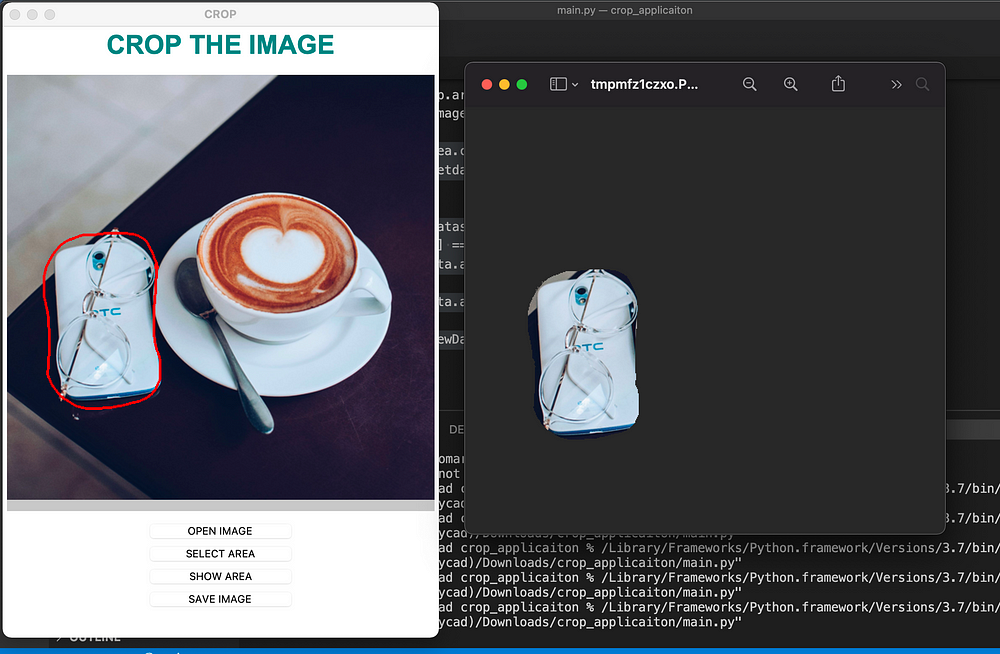
And here as you can see, we got the object with the transparent background as we wanted.
Saving the image
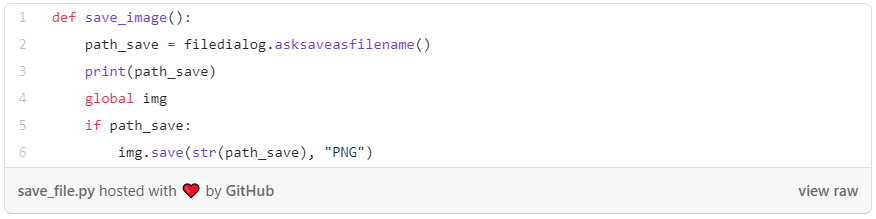
As we used the file dialog to open the image, the same thing we can use it to save the file. But actually, this file dialog will return only a path either of the image or of the directory where we want to save the image.
To really save the image, we need to use the file returned by this function and use it in the save function of pillow.
So this is the end of the article, hope that you enjoyed it. This application is very basic, so if you want you can add more stuff to it, otherwise you can put it in your portfolio.
Find a sponsor for your web site. Get paid for your great content. shareasale.com.You can get the code at this link.