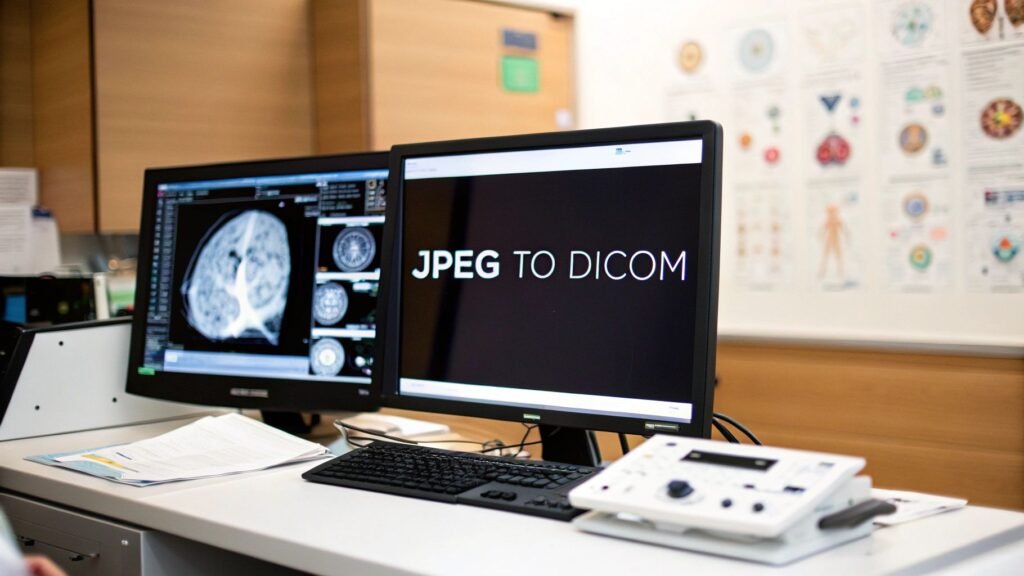
When you run a JPEG through a DICOM converter, you’re not just changing the file extension. You’re fundamentally transforming a simple picture into a clinically valuable piece of a patient's medical record. The real magic happens when critical patient metadata is embedded directly into the image file, making it instantly compatible with healthcare systems like a PACS.
This process is absolutely essential for integrating non-standard images—like those from a digital camera or smartphone—into a patient’s official electronic health record.
Why You Need More Than a Simple File Converter
It's a common misconception to think of JPEG to DICOM conversion as just a format switch, like changing a .doc to a .pdf. In reality, you're bridging a massive gap between a consumer-grade photograph and a professional medical image. A JPEG is little more than pixels on a screen. A DICOM file, on the other hand, is a comprehensive data object—a secure container holding both the image and all the context that gives it clinical meaning.
Imagine a dermatologist taking a high-resolution photo of a suspicious mole with their phone. Visually, that JPEG is clear and useful, but from a clinical standpoint, it's an island of data. It has no baked-in connection to the patient's record, no study date, and no unique identifier to track it. Without proper conversion, it can't be archived in the hospital's Picture Archiving and Communication System (PACS) or linked to the patient’s history. It’s just a floating picture.
The Critical Role of Metadata
The conversion process wraps that basic JPEG image with a structured header full of metadata. This isn’t just throwaway information; it's the very core of what makes a medical image trustworthy and functional. This data layer is what ensures the image can be:
- Correctly Identified: Patient Name, Patient ID, and Date of Birth are embedded directly into the file.
- Properly Organized: Details like Study Date, Study Description, and Modality (e.g., "OT" for "Other") allow systems to categorize and retrieve the image correctly.
- Traceable: Unique Identifiers (UIDs) are automatically generated to prevent dangerous mix-ups and guarantee the image’s integrity throughout its lifecycle.
This structured data is precisely what separates a casual photo from a piece of legitimate medical evidence. Having a grasp on the unique demands of healthcare data, especially specialized formats like DICOM, is a vital part of modern IT services healthcare solutions.
JPEG vs DICOM A Quick Comparison
To see the differences clearly, it helps to put them side-by-side. This table shows why a simple format change isn't enough for clinical use.
| Feature | JPEG (Joint Photographic Experts Group) | DICOM (Digital Imaging and Communications in Medicine) |
|---|---|---|
| Primary Use | General-purpose photography, web images. | Medical imaging (X-rays, MRIs, CT scans, etc.). |
| Metadata | Basic, optional (e.g., camera settings, date). | Extensive, mandatory patient & study data. |
| Patient Data | Not designed to store patient information securely. | Built-in fields for Patient ID, Name, DOB, etc. |
| Study Context | Lacks fields for study date, modality, or UIDs. | Standardized tags for all clinical context. |
| Interoperability | Universal for viewing, but not for clinical systems. | The global standard for medical image exchange. |
| Compliance | Does not meet HIPAA or other regulatory standards. | Designed specifically for clinical compliance. |
As you can see, DICOM is purpose-built for the rigorous demands of healthcare, where context and accuracy are non-negotiable.
Ensuring Interoperability and Compliance
The end goal is always seamless communication. When a JPEG is properly converted into a DICOM file, it can be sent to any compliant viewer, PACS, or electronic health record system, and it will just work. That interoperability is the bedrock of today's medical imaging workflows.
Healthcare has relied on DICOM for storing and exchanging images since the early 2000s, and the scale is staggering. By 2023, some top providers were handling nearly 400,000 DICOM images monthly for pathology alone. This just goes to show why a standard JPEG, which lacks all the necessary structure, needs a robust conversion process to become a useful part of this connected clinical world.
Key Takeaway: Converting a JPEG to DICOM isn't about changing the picture itself. It's about wrapping that picture in the essential metadata that provides context, ensures patient safety, and allows it to function correctly within the complex ecosystem of healthcare technology.
Getting Your Ducks in a Row Before Conversion

Before you write a single line of code or even think about clicking "convert," let's talk about prep work. From my experience, a successful conversion is 90% preparation and only 10% execution. Diving in headfirst is a surefire way to create corrupt files or, worse, mix up patient data.
Think of this as your pre-flight checklist. Getting these few things right from the start will save you a world of headaches down the road.
First things first: get organized. Create a main project folder, and inside it, make two separate subfolders—one for your original JPEGs and another for the DICOM files you're about to create. This simple step is a lifesaver. It keeps you from accidentally overwriting your source images and makes it a breeze to find what you need later.
Now, take a hard look at your JPEGs. Are they crisp and high-resolution? Or are they blurry, pixelated, or full of compression artifacts? Remember the old saying: garbage in, garbage out. A DICOM file can't magically fix a bad photo. A quick visual check now can prevent you from embedding a clinically useless image into a patient’s medical record.
Gather Your Metadata—The Sooner, The Better
With your images sorted, it's time for the most critical step: collecting the metadata. This isn't just administrative fluff; this is the data that gives the image its clinical context and identity. You absolutely need this information on hand before you start the conversion.
For each image or set of images, you'll need to pull together a few key details:
- Patient Info: Full Name, Patient ID, Date of Birth, and Sex.
- Study Info: Study Date, Study Time, and a quick Study Description (something like, "Clinical photo of left arm lesion").
- Image Details: The Modality for photographs is typically "OT" (which stands for Other).
I find it easiest to compile all of this into a simple spreadsheet or a text file. It makes the whole process of plugging this data into the DICOM tags systematic and keeps you from making typos.
A DICOM file without accurate metadata is just a picture. It's the corresponding patient and study information that makes it clinically valuable and safe. Always, always double-check your data source before you begin.
Setting Up Your Workspace
Alright, let's get your technical environment sorted. If you're looking for a reliable and flexible jpeg to dicom converter, building a simple Python script is the way to go. To keep things clean and avoid messing with other projects on your machine, you'll want to set up a dedicated environment.
You’ll be leaning heavily on a fantastic Python library called pydicom. It does all the heavy lifting for creating and manipulating DICOM files.
Installing it is straightforward—just run pip install pydicom. The documentation is incredibly helpful, so keep that link handy. A pro tip: set up a Python virtual environment before you install it. This isolates the library and its dependencies, ensuring your project stays neat and self-contained.
A Hands-On Guide to the Conversion Script
Alright, let's get our hands dirty. We've done the prep work, and now it's time to see how a bit of Python can stitch a standard JPEG and its metadata together into a proper DICOM file. We'll be using the fantastic pydicom library to build our script, and I'll walk you through it piece by piece so you understand what’s happening under the hood.
Instead of just dumping a huge block of code on you, we're going to assemble it logically. This way, you'll see exactly how the script reads the image, builds the DICOM structure, plugs in the metadata we collected, and spits out a clinically useful file. The whole point is to build a reliable jpeg to dicom converter right on your own machine.
Building the DICOM Dataset from Scratch
Think of a DICOM file as a highly organized container. The very first thing our script needs to do is create an empty one. With pydicom, we can do this by creating a FileDataset object, which is basically the skeleton of our new file—like an empty patient chart waiting for information.
This object isn't completely blank, though. It needs a few mandatory header elements right out of the gate, specifically a FileMetaInformation block. This little chunk of data at the top of the file is crucial; it tells PACS systems and DICOM viewers how to interpret everything that follows, including things like the character set and the specific DICOM syntax used. Getting this header right is non-negotiable for creating a valid file.
The process is pretty straightforward: first, create the main dataset, then add the meta info. Once that foundation is solid, we can start filling in the patient and study details that give the image its real-world context.
The infographic below gives you a bird's-eye view of the workflow, from the original image to the final DICOM file ready for download.
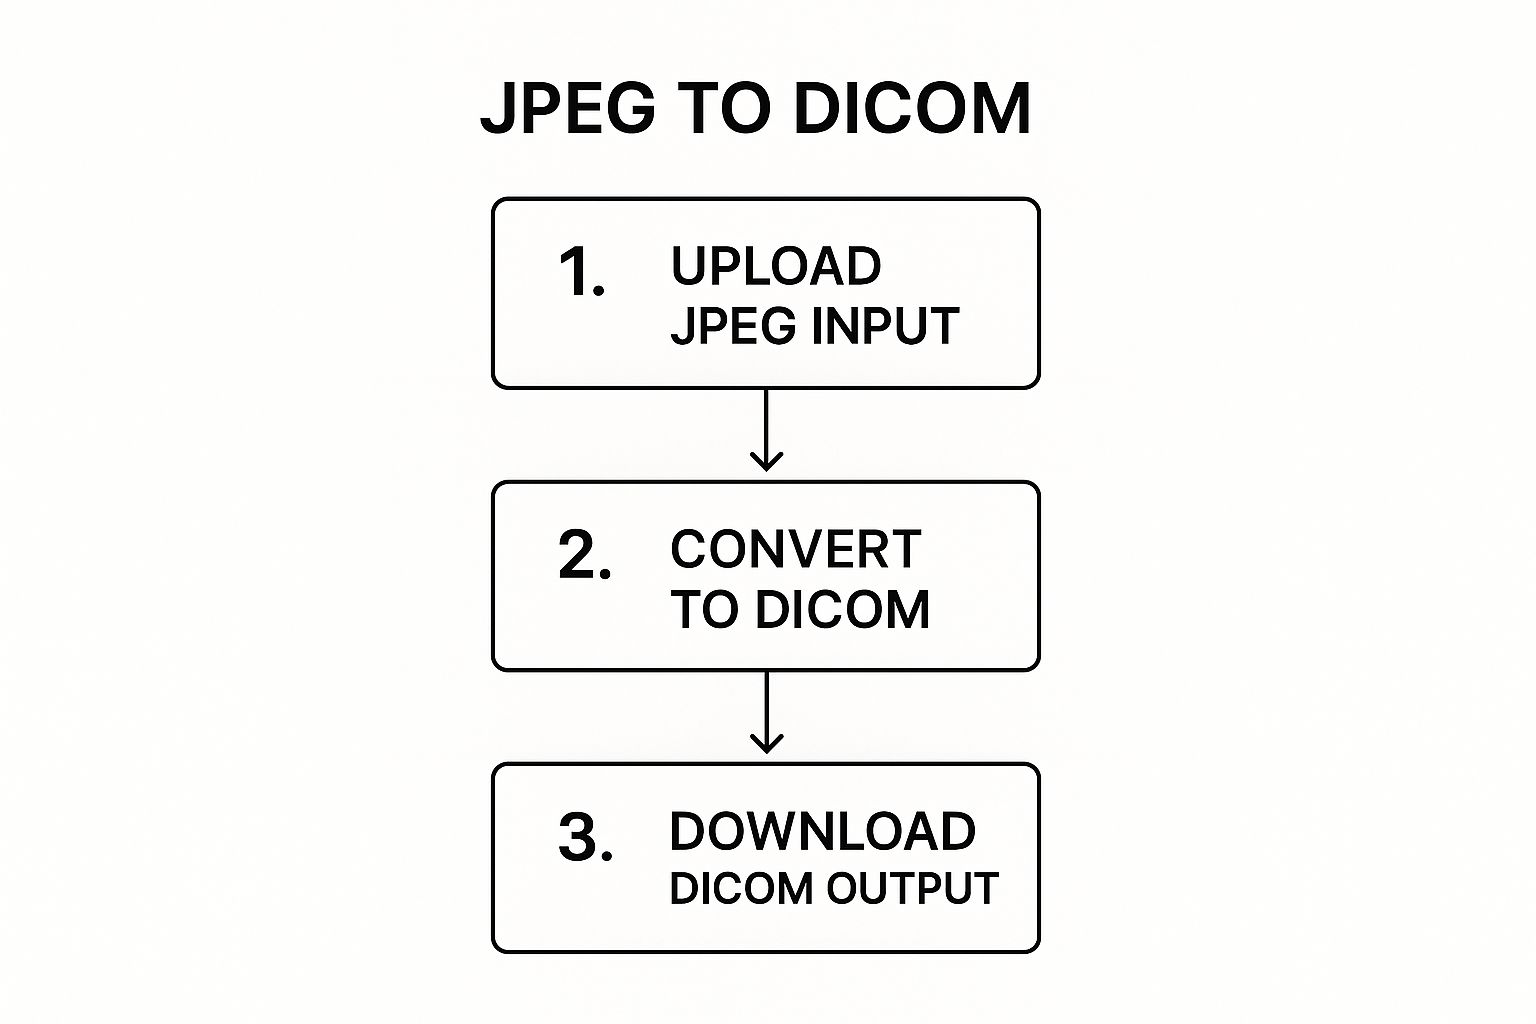
As you can see, the script is the engine that takes a simple picture and enriches it with the necessary structure, turning it into a compliant medical image.
Populating the Essential Metadata Tags
Now we put all that metadata we gathered earlier to good use. We’re going to programmatically add the patient and study information to our empty DICOM dataset. Every single piece of data, from the patient’s name to the study date, gets assigned to a specific DICOM tag.
You’ll be adding data elements for tags like:
- (0010,0010) PatientName: The full name of the patient.
- (0010,0020) PatientID: The patient's unique medical record number.
- (0008,0020) StudyDate: The date the image was taken.
- (0020,000D) StudyInstanceUID: A globally unique ID for this specific study.
The pydicom library makes this surprisingly simple. You just assign your values to the correct tags on your dataset object. Now, one of the most critical parts of this step is generating the Unique Identifiers (UIDs). These long, dotted numbers absolutely must be unique across every study, series, and image instance in the world. Thankfully, pydicom comes with a helper function to generate these for you, which helps you avoid the chaos of duplicate UIDs in a clinical system.
Pro Tip: Don't ever try to make up UIDs or reuse old ones. Seriously. Always use a generation function to ensure they are globally unique. A UID collision is a nightmare for data integrity in any medical environment.
Encoding and Embedding the Pixel Data
With all the "who, what, and when" metadata in place, the last piece of the puzzle is the image itself. This involves a couple of distinct steps. Your script will first need to open the JPEG file and load its raw pixel data into memory. I find that a library like Pillow (a fork of PIL) is perfect for this, as it plays very nicely with pydicom.
Once the pixels are loaded, there are a few final DICOM tags you have to add to describe the image's technical specs. These are essential for any viewer to display it correctly:
- Rows and Columns: The image's height and width in pixels.
- SamplesPerPixel: For a standard color JPEG, this will be 3 (for Red, Green, and Blue).
- PhotometricInterpretation: You'll set this to "RGB" to tell the viewer software how to render the colors.
- PixelData: This is the big one. It's where the actual raw pixel values from your JPEG get stored.
After adding these final tags, your DICOM object is complete. The very last command in your script saves the FileDataset to a new file, usually with a .dcm extension. And just like that, you’ve created a valid DICOM file from a JPEG, complete with all the necessary clinical context, ready to be validated and used.
Mastering Metadata for Clinical Compliance
A DICOM file without the right metadata is just a picture in a fancy wrapper. While the pixel data gives you the image, it's the metadata that tells the story—who the patient is, what kind of scan it was, and when it happened. This is where the real work of the conversion happens, turning a simple photo into a legitimate, clinically useful medical record.
To get the most out of any jpeg to dicom converter, you have to get this part right. It isn’t just about plugging data into fields. It’s about knowing which pieces of information are absolutely non-negotiable for patient safety and for ensuring the file plays nicely with other medical systems.
Decoding DICOM Tag Types
All that metadata is organized by tags, and each one has a specific job. The key thing to remember is that not all tags carry the same weight. Understanding the difference is what separates a compliant file from one that a PACS will instantly reject.
- Type 1 (Mandatory): These are the essentials. Without them, your DICOM file is invalid. We're talking about fundamental identifiers like
PatientIDorStudyInstanceUID. - Type 2 (Conditional): These tags are required if you have the information. For example, if you know the patient's date of birth, you are obligated to include the
PatientBirthDatetag. - Type 3 (Optional): These are truly optional. They can add helpful context, like
PatientComments, but leaving them out won’t break the file.
In any real-world clinical setting, you should treat both Type 1 and Type 2 tags as mandatory. Being this thorough is what ensures your converted file will actually integrate into a patient's electronic health record without a hitch.
Sidestepping Common Metadata Traps
When you're filling in these tags, it's surprisingly easy to make a small mistake that renders the DICOM file useless—or worse, dangerous. One of the most common slip-ups I see is incorrect date formatting. DICOM demands a very strict YYYYMMDD format, and anything else, like slashes or dashes, will cause it to fail validation.
Another huge pitfall is messing up Unique Identifiers (UIDs). Every study, series, and image instance requires a globally unique ID. If you reuse UIDs or create them incorrectly, you could end up with a catastrophic data mix-up where one patient's scan gets attached to another's record. Always use a proper UID generation library or tool.
Crucial Insight: The integrity of a patient's entire medical record can hinge on the accuracy of your metadata. A misspelled name or an incorrect ID isn't just a typo; it's a serious patient safety risk that can lead to misdiagnosis or improper treatment.
Aligning with Data Privacy Regulations
Getting the metadata right isn't just a technical requirement; it's a legal and ethical one. Regulations like the Health Insurance Portability and Accountability Act (HIPAA) in the U.S. strictly govern how patient health information is handled. The moment you embed identifying data into a DICOM file, you're creating a protected health record.
This means you have a responsibility to make sure every piece of information is accurate and secure. Use the conversion process as a final checkpoint to confirm that the PatientName, PatientID, and other identifiers are a perfect match for the source records. Converting a JPEG to a DICOM file is more than a technical step—it’s the act of creating a permanent, legally recognized piece of a patient's medical history. Your attention to detail is everything.
You've created a DICOM file. Great. But don't pop the champagne just yet. The job isn't finished until you’ve confirmed it actually works where it matters.
A file that looks perfect on your computer could easily get kicked back by a hospital's PACS or render incorrectly on a radiologist's diagnostic viewer. This final check—validation—is what separates a potentially useful image from a clinically reliable one. It's your quality assurance step, ensuring the converted image is truly ready for a medical environment.
Think of it as the final inspection before a file becomes part of a patient's permanent medical record. You're verifying not just the image quality, but the integrity of all the data packed inside it.
Give It a Once-Over with a DICOM Viewer
The simplest place to start is with a proper DICOM viewer. I'm not talking about a standard image previewer; you need a tool built to interpret every tag and pixel of a DICOM file. There are some excellent free options out there—I often recommend Horos to Mac users or RadiAnt DICOM Viewer for those on Windows.
Once you open your new .dcm file, here's what to look for:
- Image Integrity: First, just look at it. Does the image display clearly? Are there any weird artifacts, distortions, or color problems?
- Metadata Accuracy: Next, dig into the tags. Use the viewer’s tag inspector and check the basics. Is the
PatientNamewhat you expect? Is theStudyDatecorrect? - Data Completeness: Make sure all the critical tags are present. You should see a
PatientID,StudyInstanceUID, andModality(which for this kind of conversion, should be "OT" for Other).
This quick visual check is surprisingly effective. In my experience, it catches over 80% of the most common conversion mistakes, like botched pixel data encoding or malformed tags.
Figuring Out Why a PACS Rejected Your File
Now for the real test. Even if a file looks great in your viewer, a PACS can be much less forgiving. These systems have strict rules, and if your file gets rejected, it’s almost always for one of two reasons.
The first is a UID conflict. Every DICOM instance needs a globally unique identifier. If the SOPInstanceUID you generated happens to already exist in the PACS for a different image, the system will reject your file to prevent a catastrophic patient data mix-up. The only way to fix this is to go back, generate a completely new UID for that instance, and resave the file.
The second common culprit is a validation protocol failure. Some PACS have their own unique requirements and might expect specific tags that you didn't include. The good news is the rejection log from the PACS administrator will usually tell you exactly which DICOM tag caused the failure. You can then add the missing tag and resubmit.
Key Insight: Remember, a DICOM file isn't just a picture with some text. It's a highly structured dataset. Validation is how you confirm every single part of that dataset—from the patient's ID down to the last pixel—is correct, compliant, and ready for clinical use.
The need for this level of technical precision is why the market for specialized tools like a jpeg to dicom converter is growing. The broader image converters market was valued at a substantial US$127.3 million in 2024 and is projected to reach US$198.4 million by 2032. This growth is fueled by the ever-increasing demand for compliant medical imaging solutions that can handle the complexities of metadata and PACS integration. To see the full picture, you can explore more data on this expanding market and understand the driving trends.
Answering Common Questions About JPEG to DICOM Conversion
Even when the conversion process seems straightforward, a few key questions always pop up. Let's tackle some of the most common ones I hear, because getting these details right is what makes your final DICOM files clinically useful.
Can I Group Multiple JPEGs into One DICOM Series?
Absolutely. This is probably the most frequent question, and the answer is a resounding yes. Think about a series of dermatology photos tracking a skin lesion over several weeks. You'd want to view those as a single, related set.
The trick is in the metadata you assign. Here’s how you make it work:
- Same Study & Series: Every image in the group must share the exact same Study Instance UID and Series Instance UID. This is what tells the PACS system "these all belong together."
- Unique Image ID: Each individual DICOM file needs its own, completely unique SOP Instance UID.
- Sequential Numbering: You also need to assign an incrementing Instance Number to each file (1, 2, 3, etc.). This ensures they display in the correct order.
Nail these UIDs, and any DICOM viewer will correctly group and display your images as a cohesive series.
What’s the Biggest Pitfall to Avoid?
If there's one mistake that can render your work useless—or even dangerous—it's getting the metadata wrong. Simply dumping a JPEG into a DICOM wrapper without accurate, verified patient and study data is a massive misstep. It's not just a technical error; it's a serious data integrity risk.
My Core Advice: Always, always double-check that your Unique Identifiers (UIDs) are genuinely unique. And just as importantly, make sure every piece of demographic information matches the patient's record perfectly.
It's also crucial to remember the inherent difference between a converted JPEG and a native DICOM image straight from a scanner. A photo you've converted should always be considered secondary information—a visual reference. It will never have the rich acquisition data, like scanner settings or precise pixel spacing, that you get from a CT or MRI.
While it’s perfect for adding context, it's not the right tool for primary diagnosis where precise measurements are critical.
At PYCAD, we build the specialized, AI-driven tools needed to manage complex medical imaging tasks with the precision this field demands. Learn how our expertise can support your medical imaging projects.