As some of you have already seen, our latest course on YouTube is about vertebrae segmentation using nnUNet. The course involves training a deep learning model for automatic spine segmentation using the nnUNet model. The process of training the model was documented by my brother Nour Islam Mokhtari in his blog post. A video version is also available on our YouTube channel for those interested in training the model.
The subject of this post is how to use 3D Slicer for automatic spine segmentation. For your information, 3D Slicer itself doesn’t have an integrated module to do this, but you need to use an extension from Kitware that helps you integrate your nnUNet model into 3D Slicer. This method allows you to use your model to predict the initial version of the segmentation mask. If you feel the output needs adjustments, you can use all the available tools in 3D Slicer (the classical ones) to edit the segmentation made by the AI model.
Let me show you the steps…
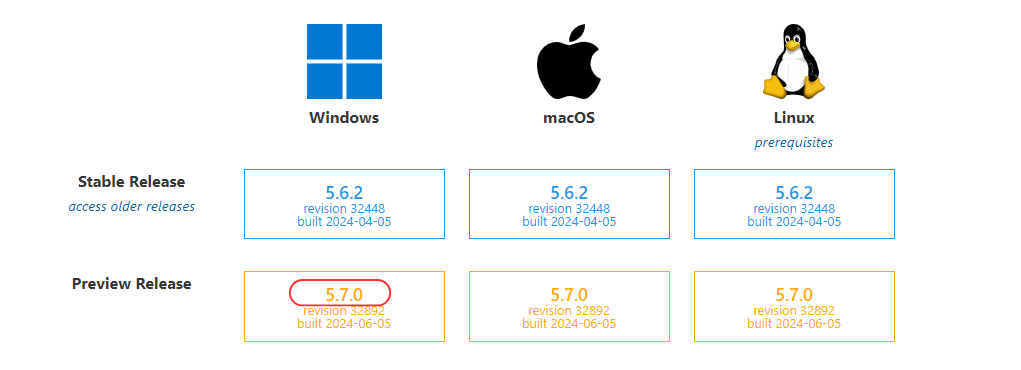
Install Slicer
The first thing you need to do (if you haven’t already) is to install 3D Slicer, but not just any version. You should specifically install version 5.7 or greater. At the time of writing this blog, there is no stable 5.7 version; it is only available in the preview release. However, this is not an issue. I tested it myself, and it worked very well. I didn’t encounter any problems using the preview release (as of now).
Setting up nnUNet
After getting 3D Slicer up and running, you need to install one more thing: the extension that allows you to run an nnUNet model inside 3D Slicer. Additionally, you need to install the packages required to run the nnUNet model. These packages can be installed using one button in the nnUNet extension, so don’t worry about this.
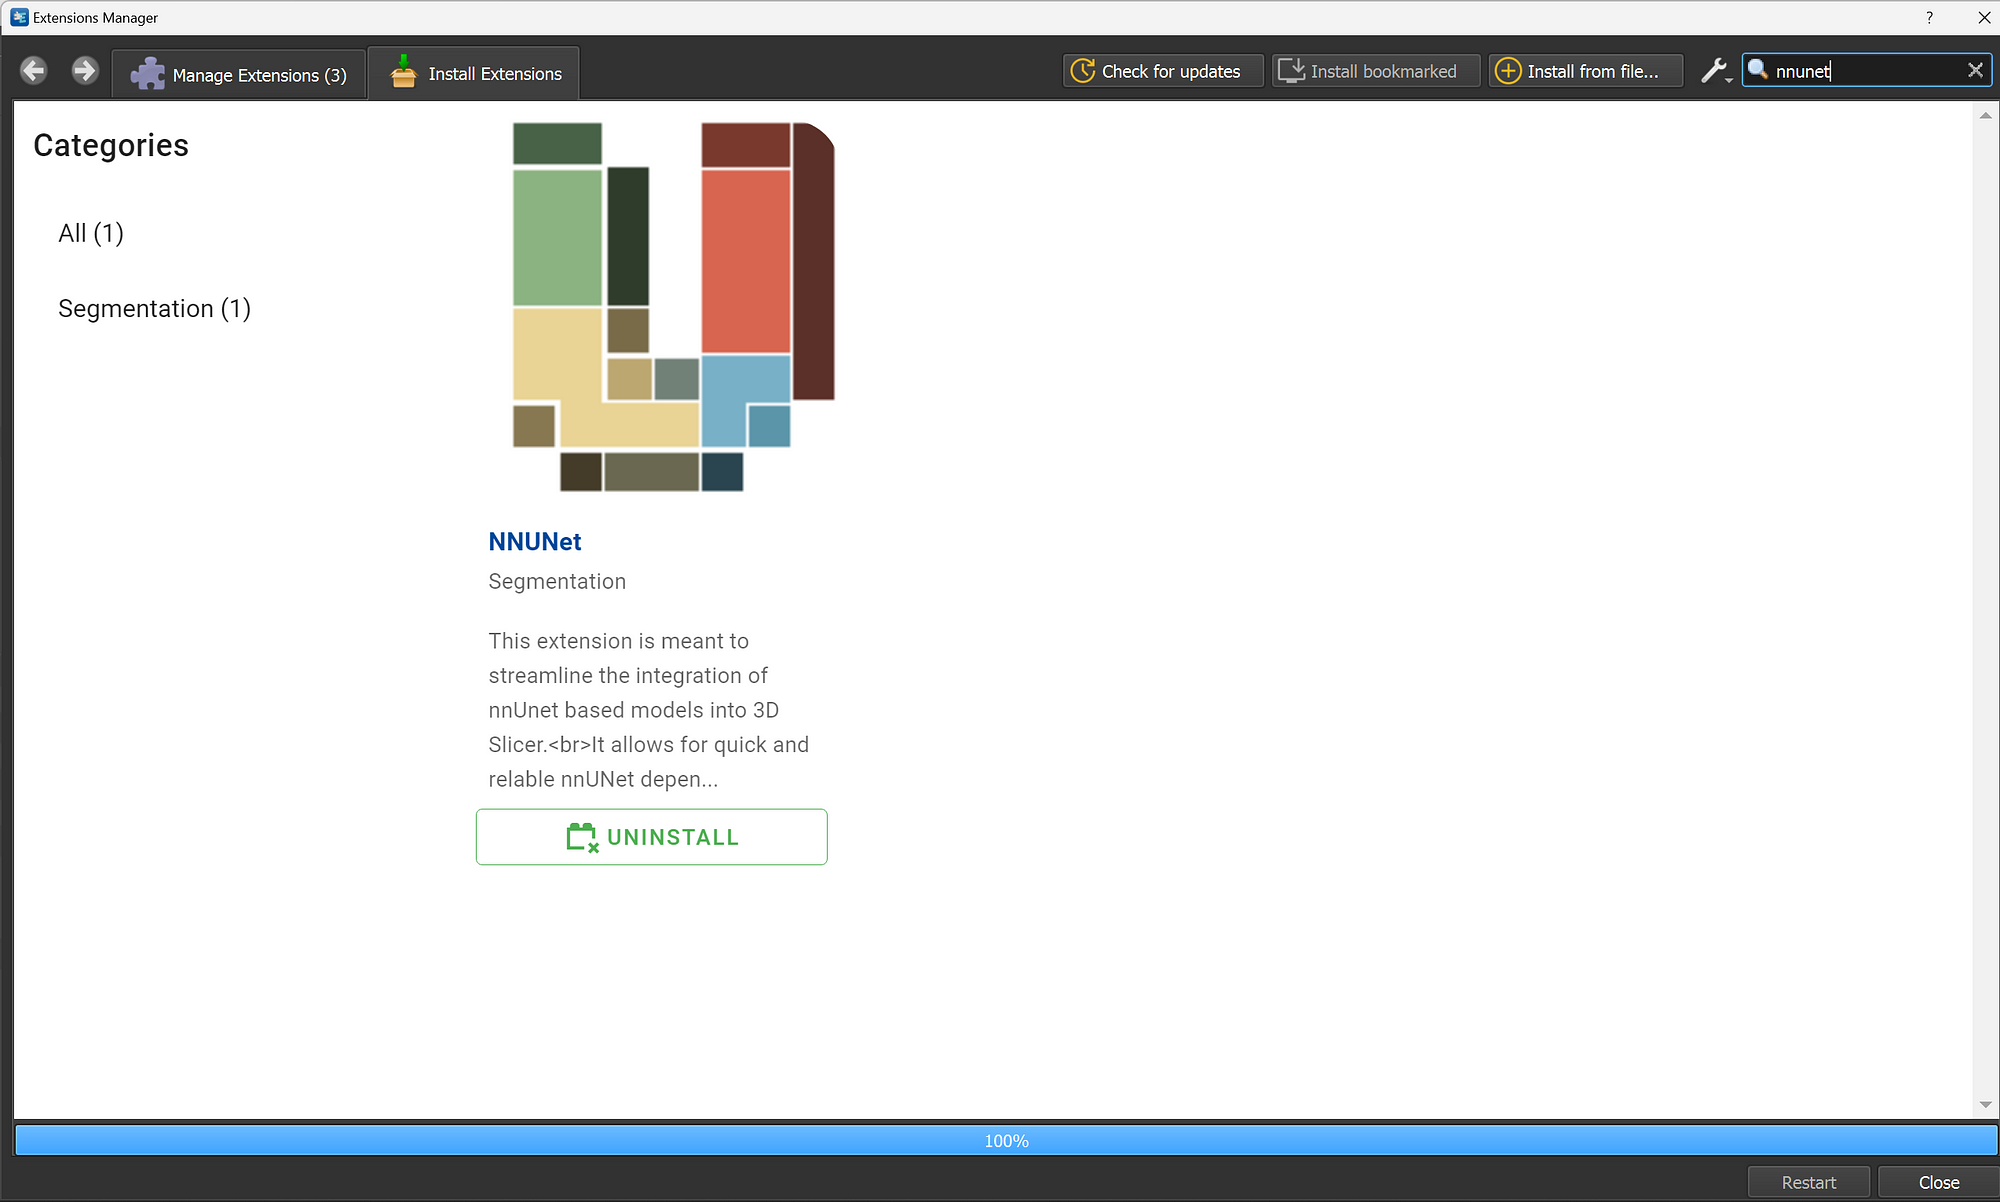
Installing nnUNet extension
You can go to the extension manager in 3D Slicer and type nnUNet:
After installing the extension, you can click on the restart button to restart 3D Slicer, this will help intializing the extension.
Installing nnUNet dependencies
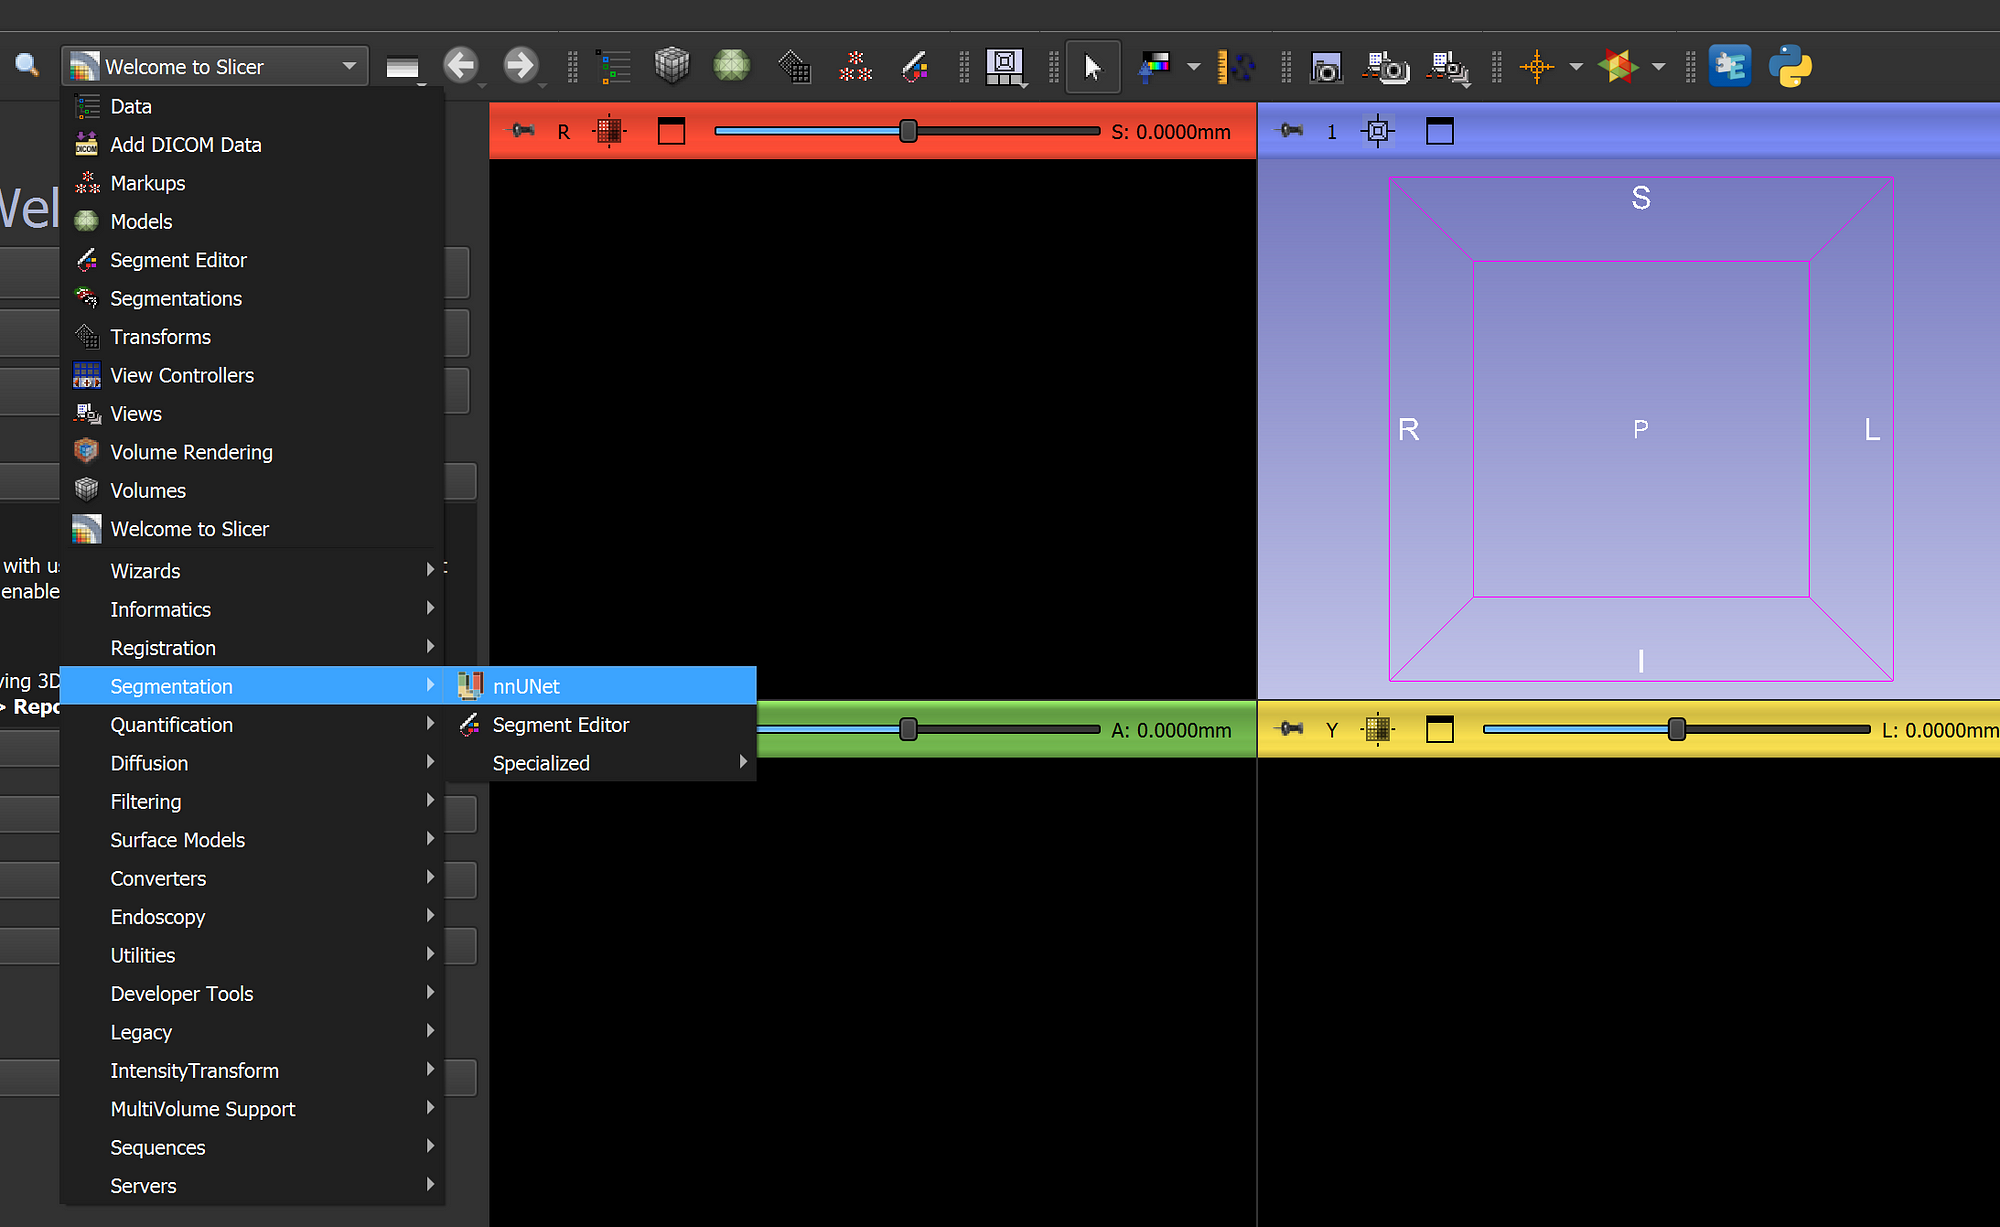
To run nnUNet in any environment, we need to install some Python dependencies, which is mandatory. However, with this extension, all the installations will be done using one button, so there’s nothing to worry about. In 3D Slicer, you need to navigate to the extension (Segmentation/nnUNet):
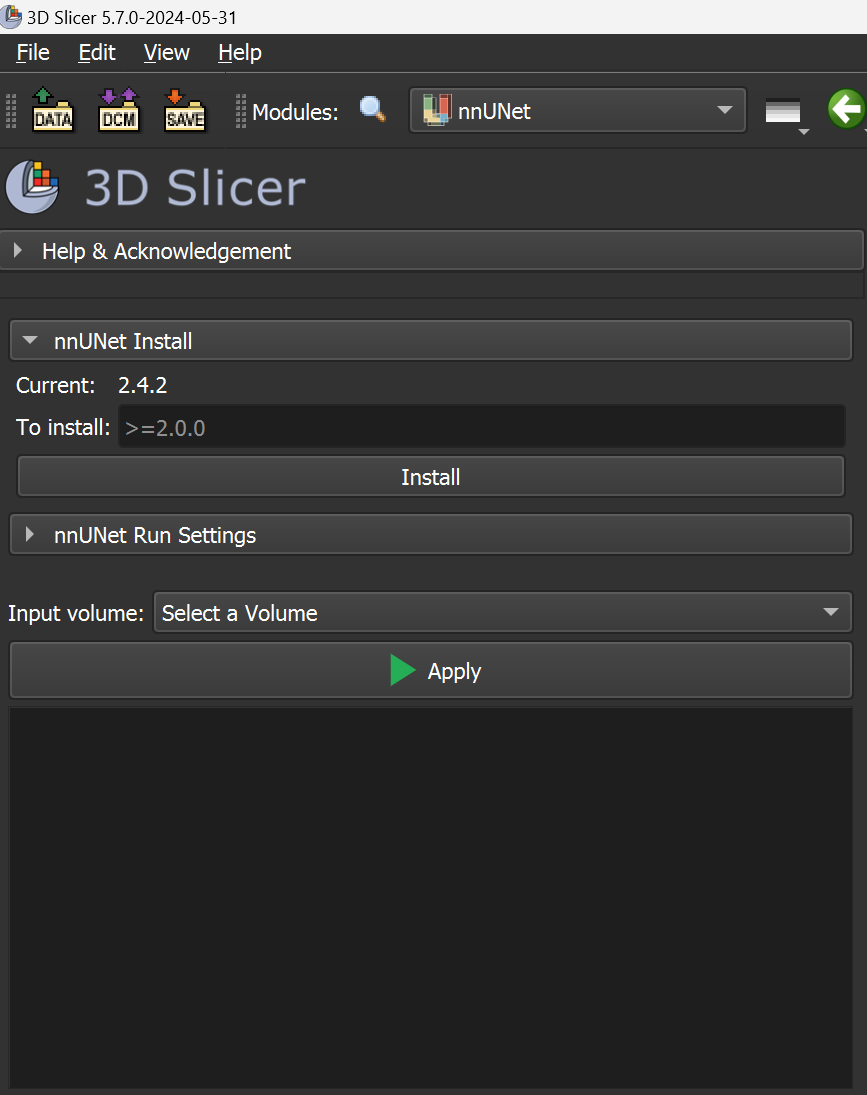
Then go to the nnUNet install section and click on the button “Install”:
Configure the extension
After installing all the dependencies, you need to configure the extension to locate the nnUNet files so that 3D Slicer can run the inference using the official nnUNet inference code. As you may know, the official inference process from nnUNet requires a specific folder structure that must be respected; otherwise, the code will not work.
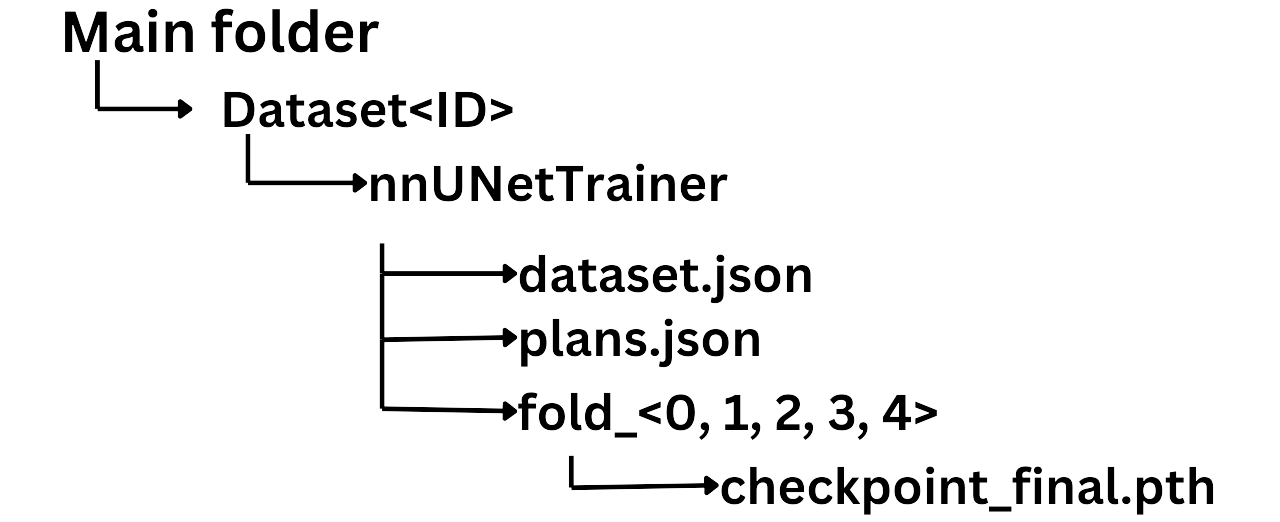
Once you have ensured that you have the correct folder structure, you can adjust the parameters to point to the main folder, specify the name of the model weights, and provide the fold index (0, 1, 2, etc.).
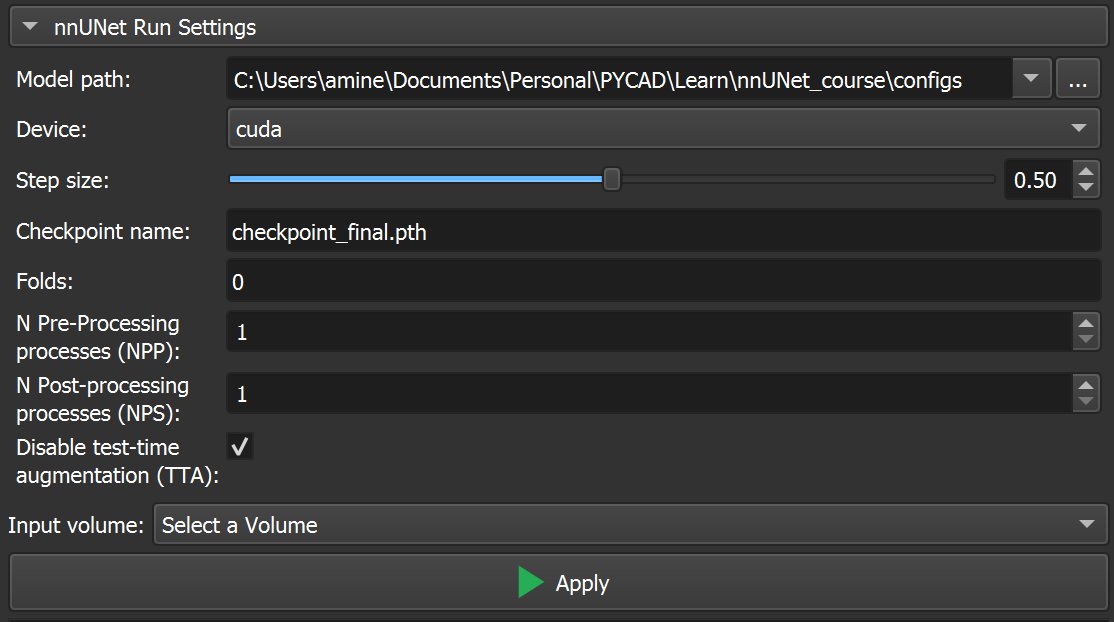
Use the Model
Now that everything is ready to be used, we can upload the scan and run the inference using the nnUNet model. You just need to upload the scan, select it in the “Input volume” option, then click on “Apply.” The inference will start, and you will see the logs just below the Apply button.
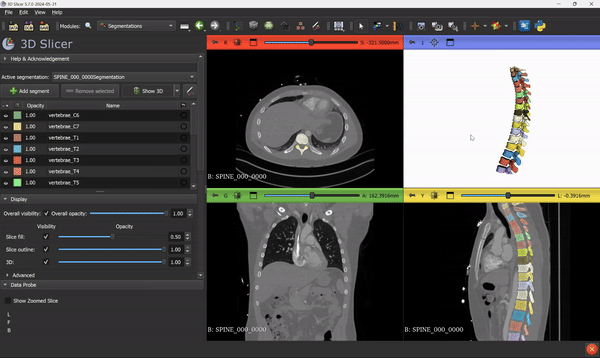
Once the inference is done, you will see the segmentation output overlaid directly on the scan, something like this:
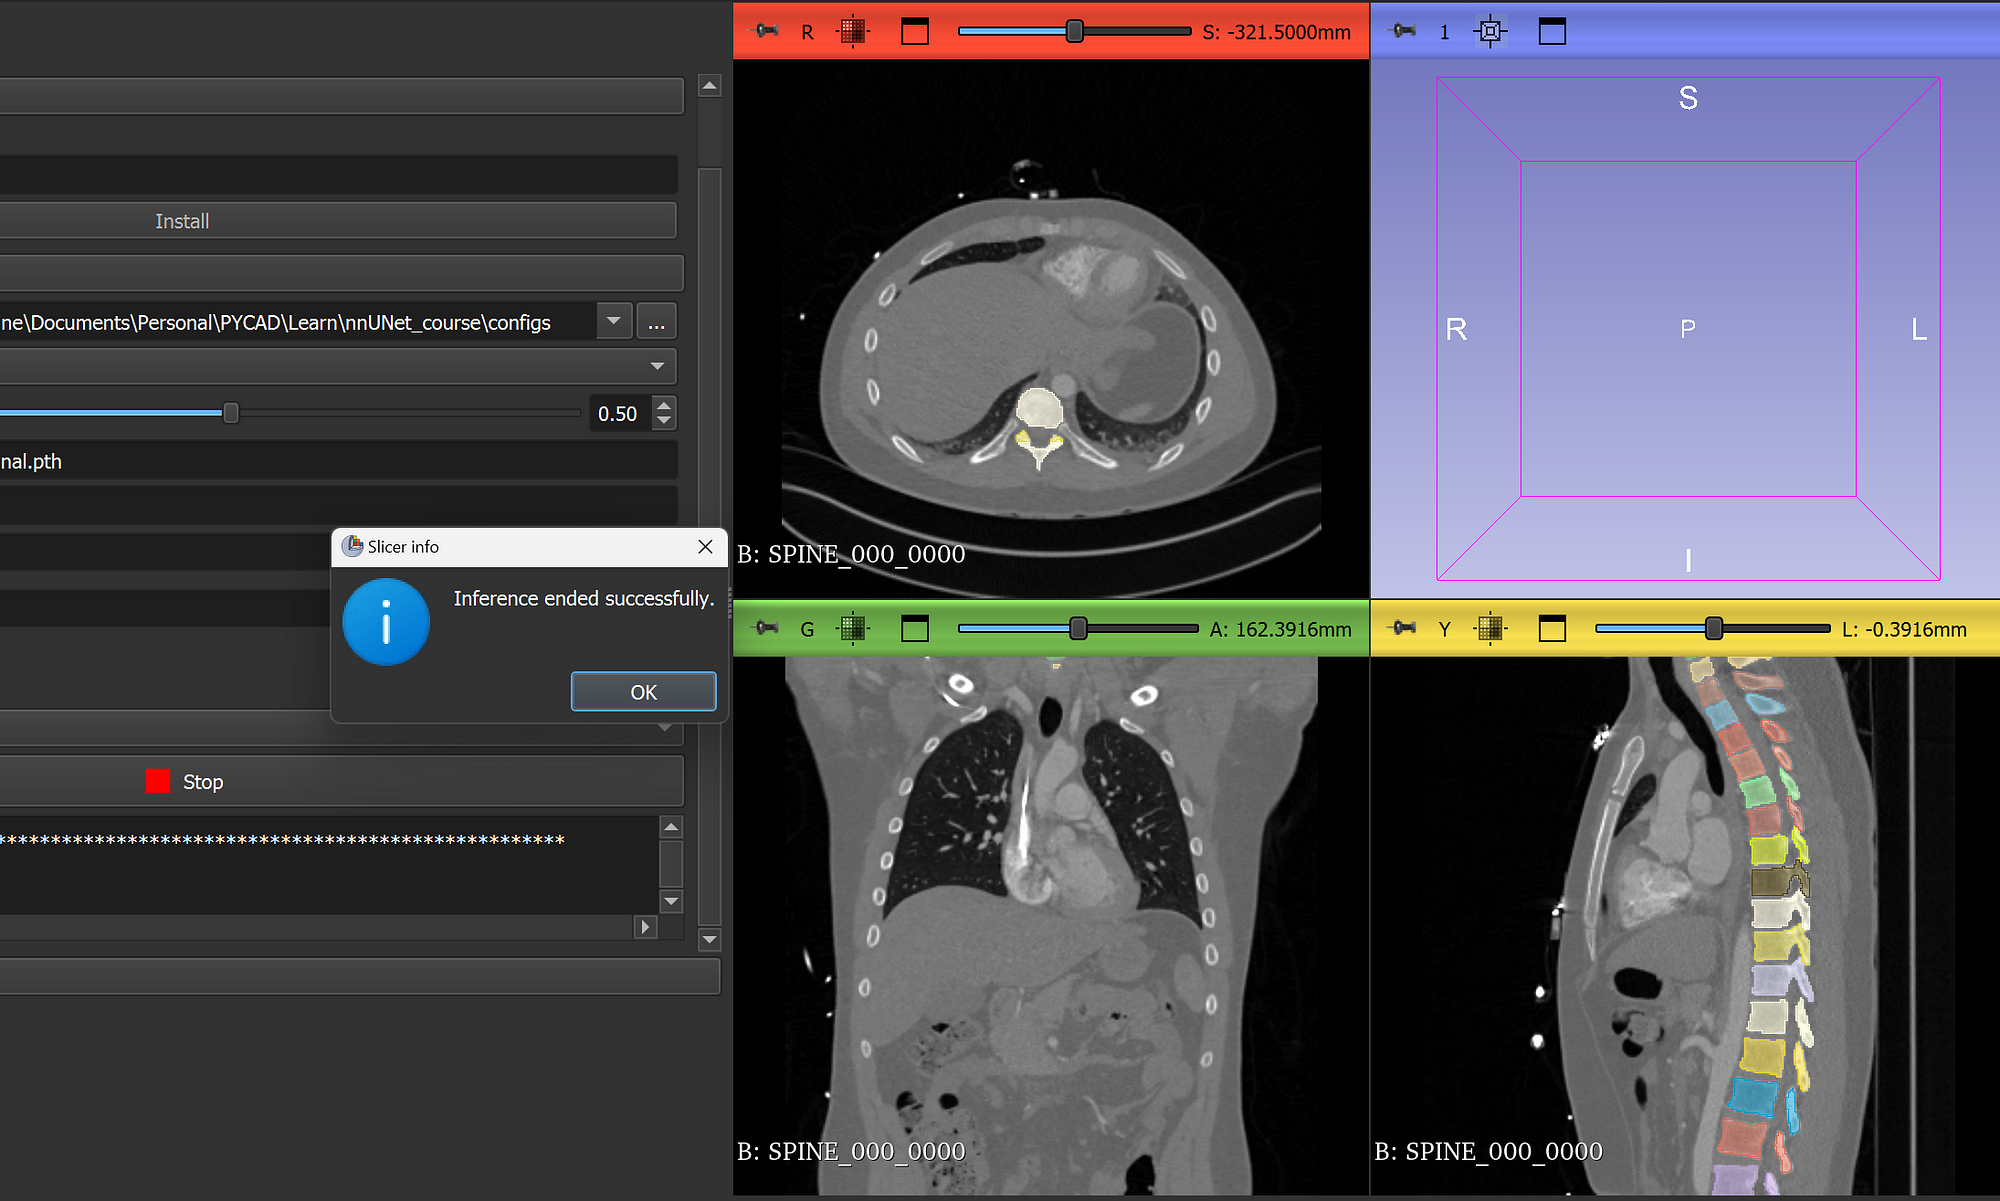
From this step, you can go ahead and use all the 3D Slicer tools and features that you know. Everything can be applied to the segmentation mask.