When it comes to medical imaging, particularly CT (Computed Tomography) scans, the ability to see and understand different parts of the body is crucial for diagnosis and treatment planning. However, not all tissues and organs look the same on a CT scan — some are harder to see and require special adjustments. That’s where the concepts of Window Center (WC) and Window Width (WW) come into play. Think of these as the brightness and contrast settings on your TV or computer screen but for medical images.
What are the Window Center and Window Width?
Window Center (WC) is like the brightness setting. It determines the midpoint of the range of intensities (or Hounsfield Units — HUs) displayed in the image. Adjusting the WC can make the image appear lighter or darker.
Window Width (WW), on the other hand, is similar to the contrast setting. It defines how wide the range of intensities will be. A narrow WW makes the image look more contrasted, while a wider WW shows more gradations between black and white, making it easier to differentiate between tissues.
Applying WC and WW in Practice
Thanks to the pycad-medic library, applying these settings to CT scans is straightforward. For instance, to focus on specific parts of the body, such as the liver, lungs, tumors, or bones, we can adjust the WC and WW accordingly. Here’s how we do it in Python:
  from pycad.preprocessing import DicomCTWindowing

  dicom_dir = "path/to/dicom/series"  # Directory with DICOM files.
  output_dir = "path/to/output"
  window_center = 40
  window_width = 400
  converter = DicomCTWindowing(window_center, window_width, visualize=True)
  converter.convert(dicom_dir, output_dir)
Let’s dive into some examples:
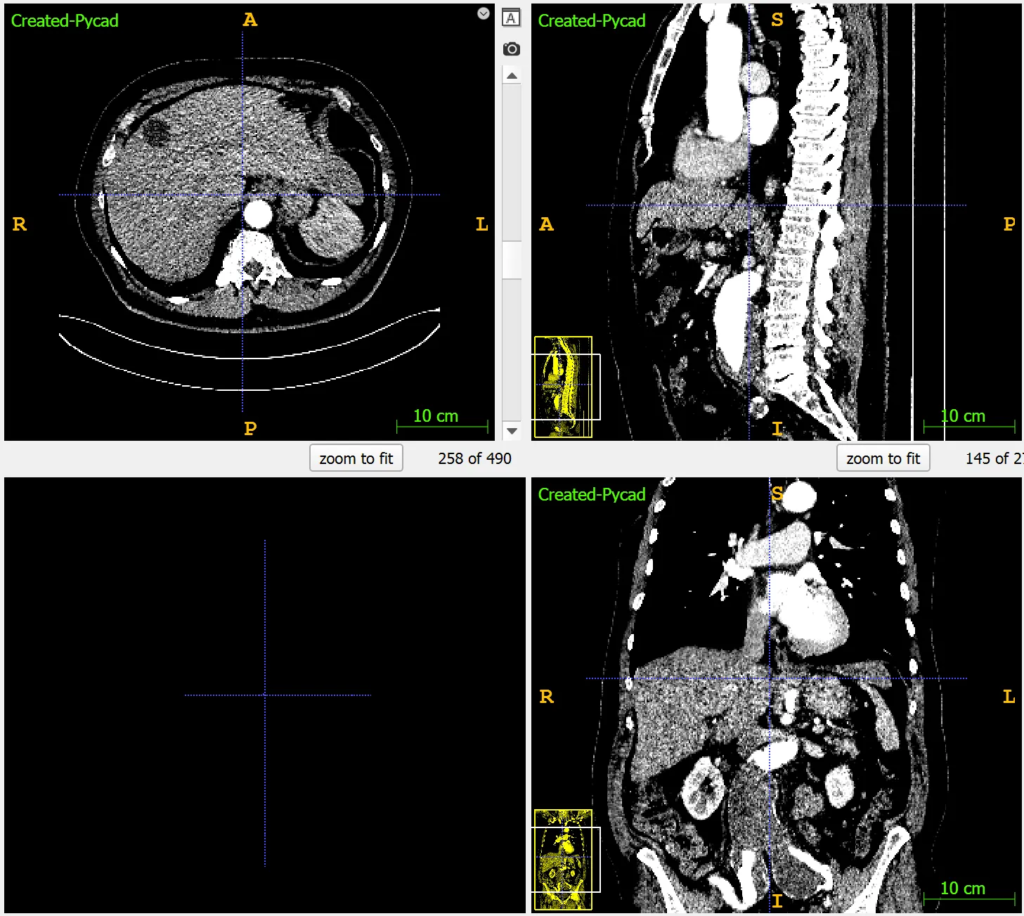
The Liver
To visualize the liver with clarity, we adjust our settings to a WC of around +60 HU and a WW of 150 HU. This allows us to see the liver’s texture and spot any abnormalities. [See the image below]

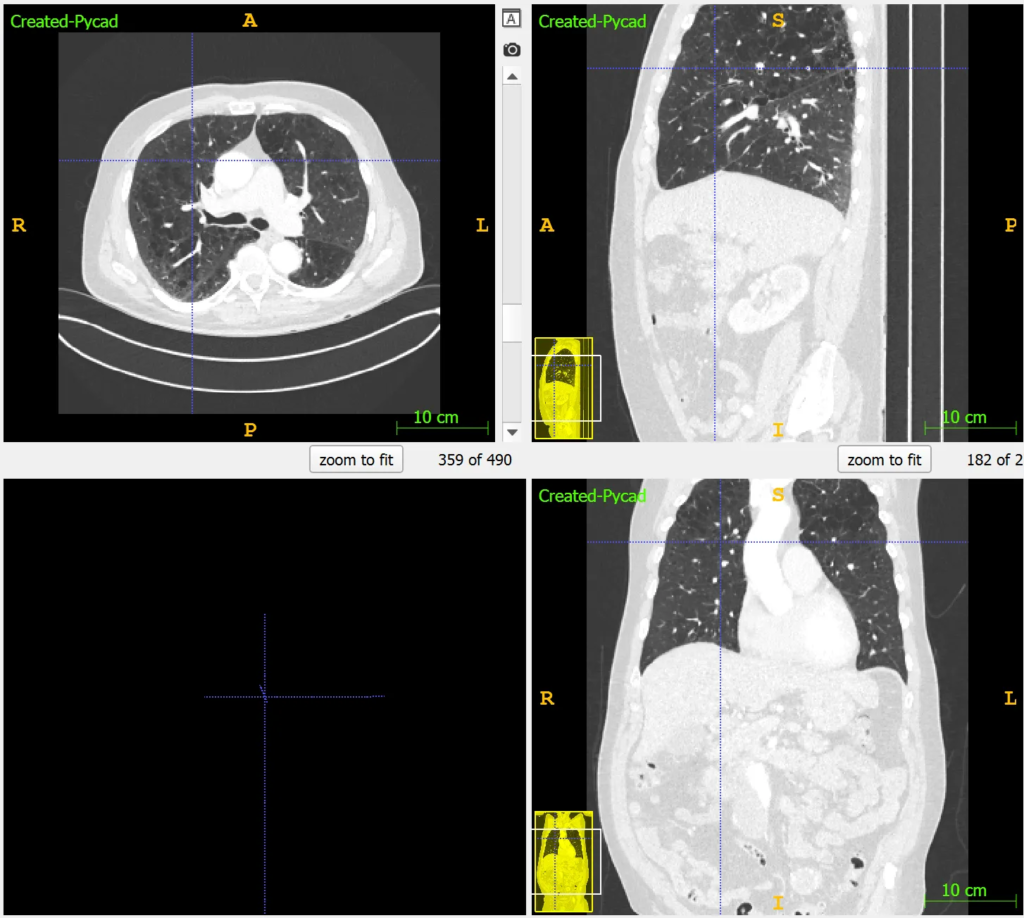
The Lungs
Lungs require a much different setting due to their air content. A WC of -600 to -700 HU and a WW of 1500 to 2000 HU will make the lung tissues stand out, helping identify issues like nodules or infections. [See the image below]

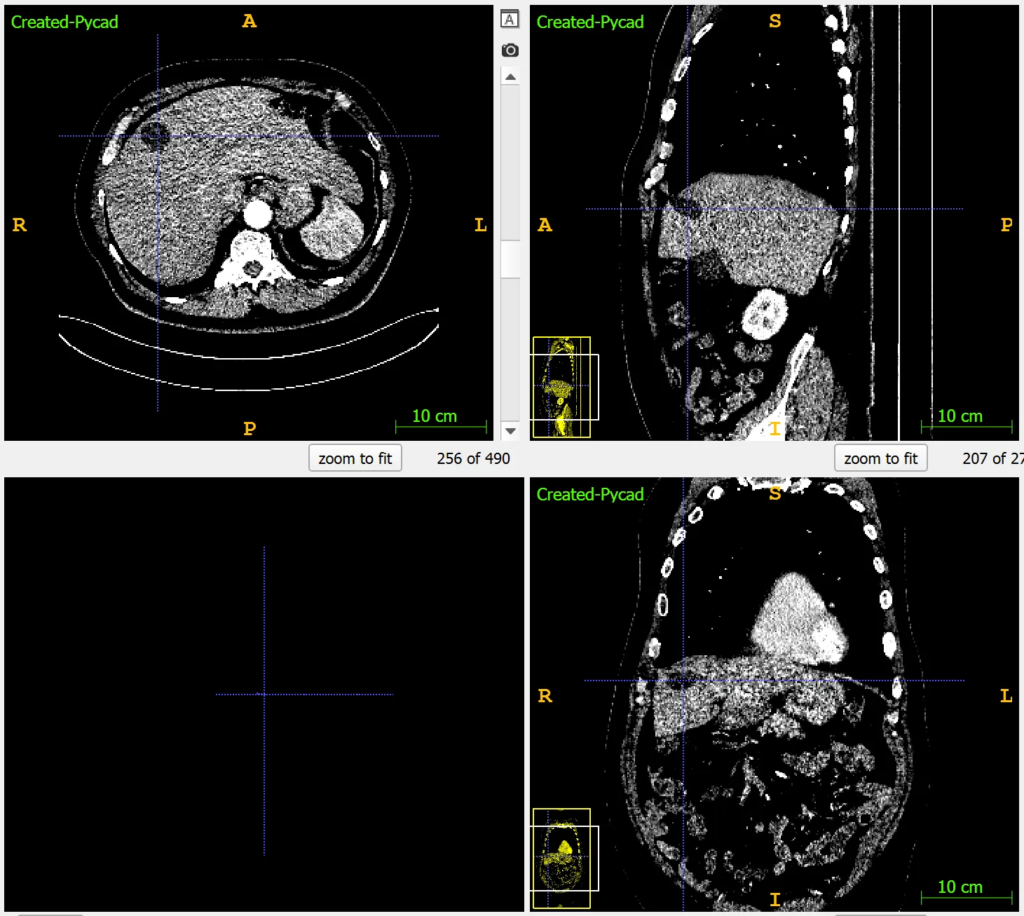
Tumors
Detecting tumors involves looking for contrasts in tissue density. Depending on the tumor’s location, WC and WW settings might vary, but generally, a slightly higher WC and a moderate WW help in enhancing tumor visibility against surrounding tissues. [See the image below]

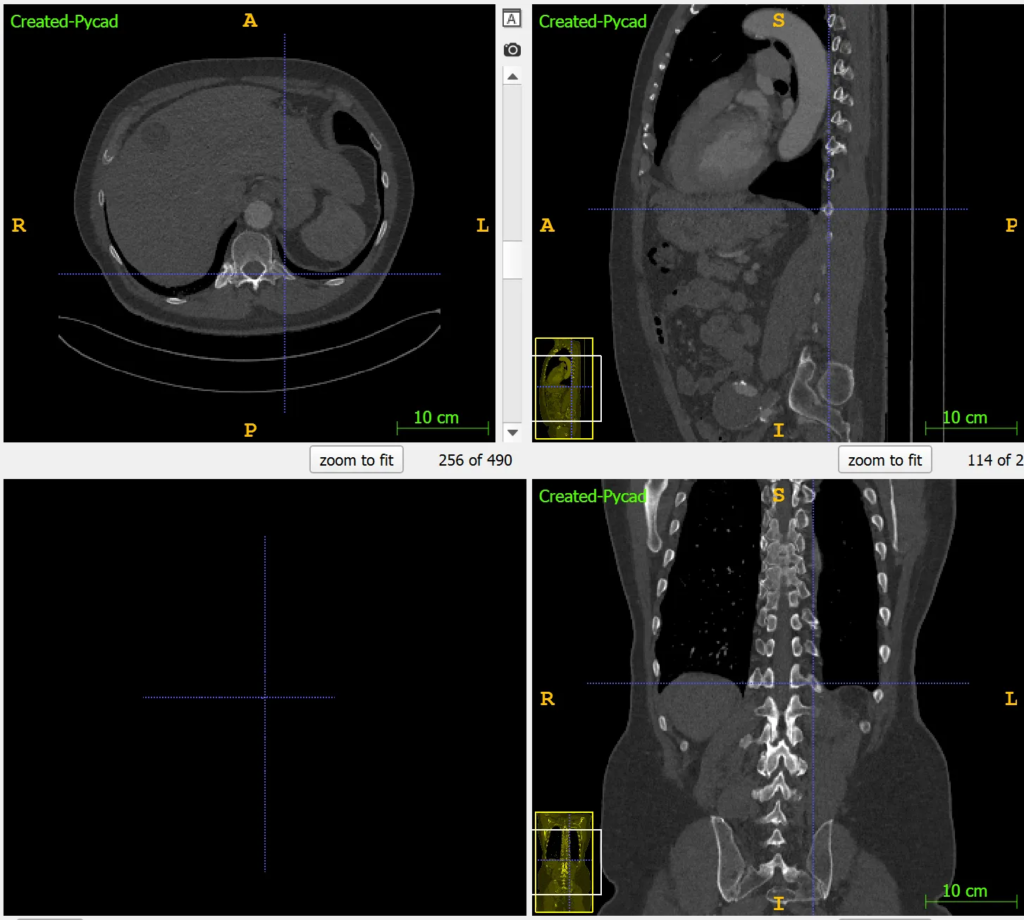
Bones
For bones, a high WC of +400 to +700 HU and a WW of 1500 to 2000 HU ensure that the bone structures are distinct and any fractures or lesions are visible. [See the image below]

Conclusion
Understanding and applying the right WC and WW settings can significantly improve the visibility of different structures in CT scans, aiding in accurate diagnoses. With tools like the pycad-medic library, manipulating these settings becomes a breeze, making it possible for practitioners and researchers to focus on what matters most—the health and well-being of patients.
Remember, these adjustments aren’t just technical; they’re a gateway to better, more informed medical care. By leveraging technology and understanding the basics of medical imaging, we can all contribute to advancing healthcare, one image at a time.


