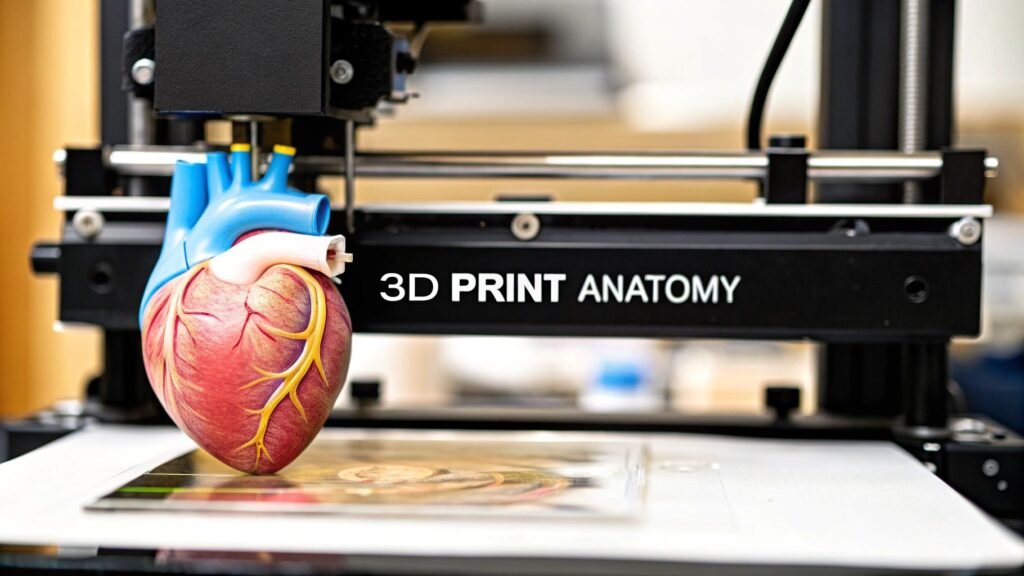
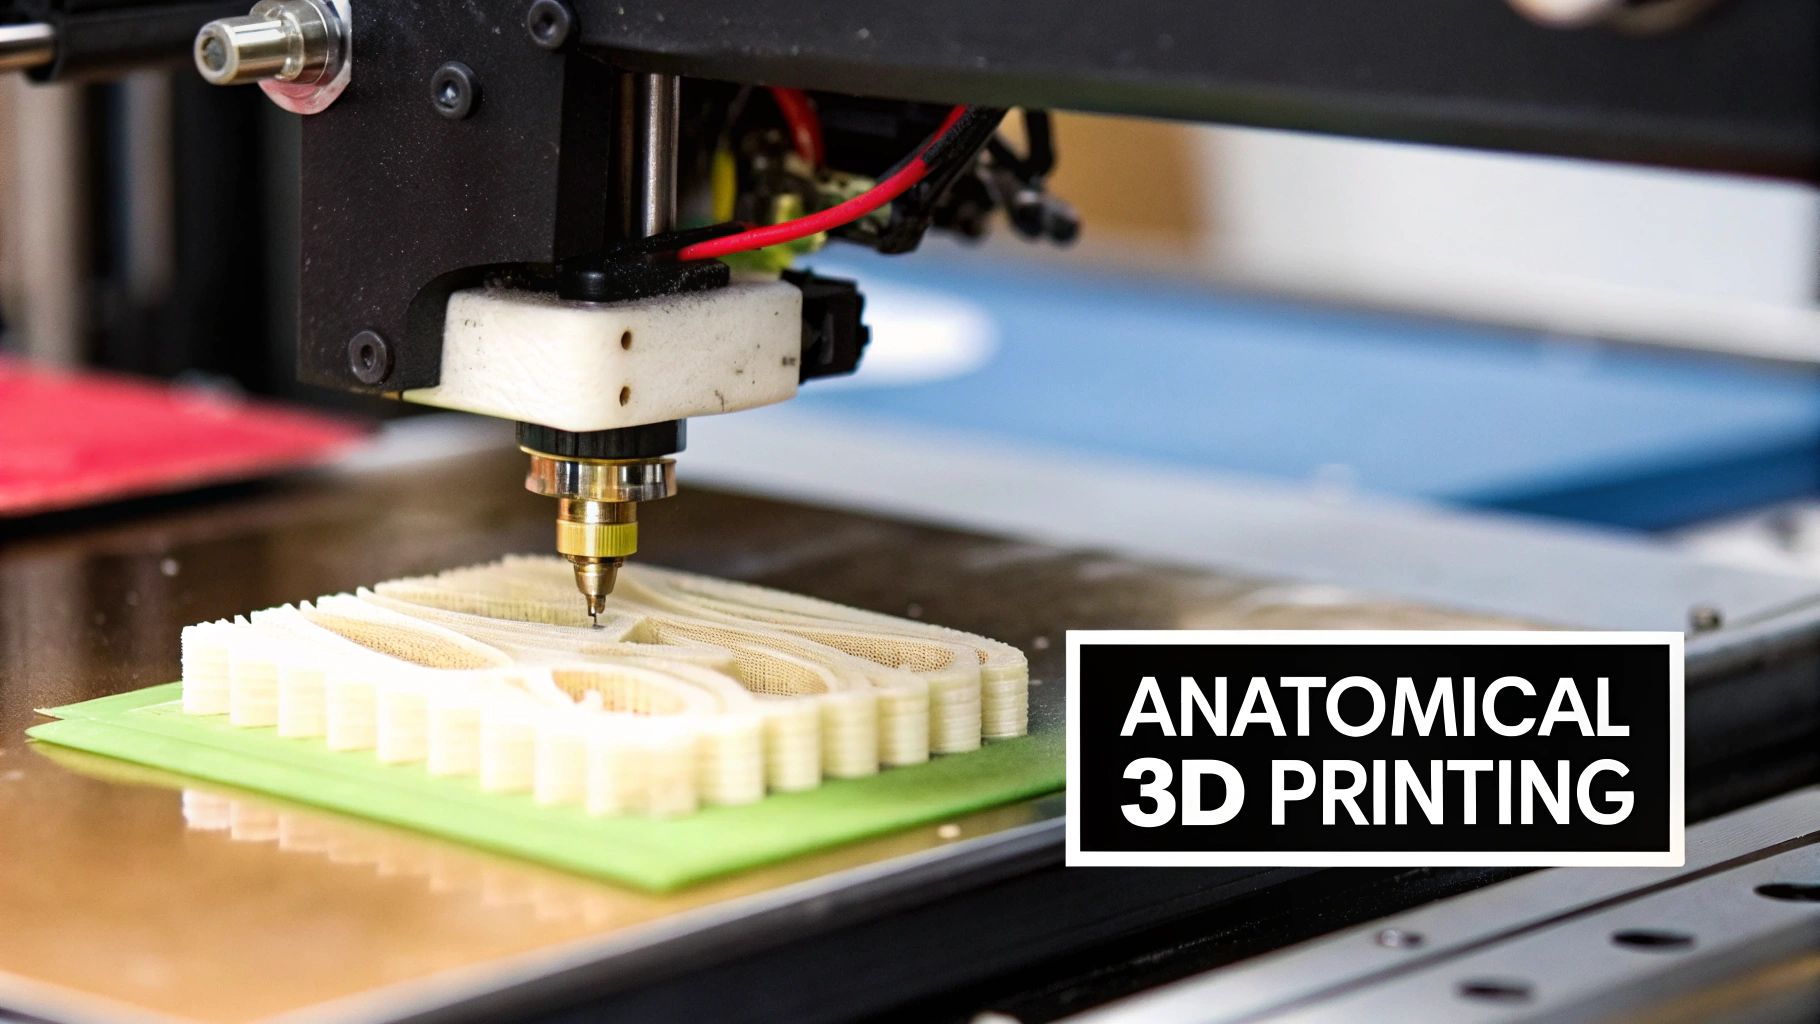
Imagine a surgeon holding a perfect replica of a patient's heart, rehearsing a complex procedure days before stepping into the operating room. This isn't science fiction; it's the reality of 3D printing anatomical models. We're turning digital medical scans into physical, patient-specific tools that are fundamentally changing how we approach surgery, education, and patient care.
The New Frontier of Patient-Specific Medicine
There's a world of difference between looking at a flat, 2D image on a screen and holding a precise model of a patient's unique anatomy. For surgeons, this offers a profound advantage. It's a chance to physically interact with the model, get a real feel for complex spatial relationships, anticipate challenges, and even practice tricky maneuvers.
This hands-on approach is more than just preparation; it's a full-on practical rehearsal. It can significantly improve surgical outcomes by allowing for pre-fitting implants, mapping out incision paths, and developing contingency plans with a level of clarity that was simply out of reach before.
Enhancing Medical Training and Education
These models are also bridging the gap between textbook diagrams and real-life anatomy for medical students and residents. Instead of just studying generic illustrations, trainees can now examine specific pathologies and anatomical variations they'll actually encounter in the clinic. It makes for a much richer, more intuitive learning experience.
The benefits for medical education are pretty clear:
- Realistic Simulation: Students can practice procedures on lifelike models without any risk to actual patients.
- Understanding Complex Cases: Visualizing rare or intricate anatomical structures becomes far more straightforward.
- Improved Retention: Tactile learning really helps anatomical knowledge stick, much more so than just passive observation.
Transforming Patient Communication
Trying to explain a complex medical condition or surgical plan to a patient can be tough. A 3D printed anatomical model is an incredible communication aid because it makes abstract concepts concrete and easy to grasp. When patients can see and touch a model of their own anatomy, they get a much clearer picture of their condition and the proposed treatment.
This technology empowers patients to take a more active role in their own healthcare decisions. It demystifies complex medical information, leading to better conversations between doctor and patient and often easing pre-surgical anxiety.
The impact is clear from the rapid adoption across the healthcare industry. The global market for 3D printed surgical models is growing fast, driven by its proven value. Projections show the market jumping from USD 607.5 million in 2025 to USD 2,589.0 million by 2035—a powerful sign of its increasing importance. You can dig into the full market analysis of 3D printed surgical models to see the trends for yourself. This journey, from a simple digital scan to a physical, life-saving tool, is a huge step forward in personalized medicine.
Turning Medical Scans into a Digital Blueprint
It all starts with data. Before you can even think about firing up a 3D printer, you need the right raw material—and in this case, that means high-quality medical scans. We're typically talking about Computed Tomography (CT) or Magnetic Resonance Imaging (MRI) scans, which are saved in a format called DICOM. Think of a DICOM file as a digital stack of 2D pictures, or slices, that capture a patient's internal anatomy.
The quality of these initial scans is everything. You absolutely need high-resolution images with thin slices to get the detail required for a truly accurate model. If you start with a blurry, low-resolution scan, you'll end up with an imprecise print. It's like trying to build a detailed sculpture out of big, chunky blocks—you just can't capture the fine details.
From Image Slices to a 3D Object
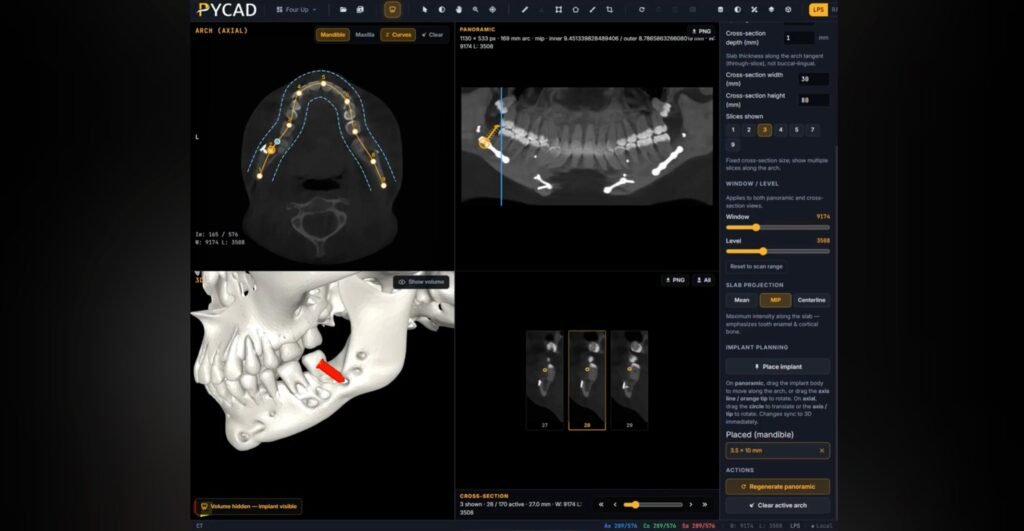
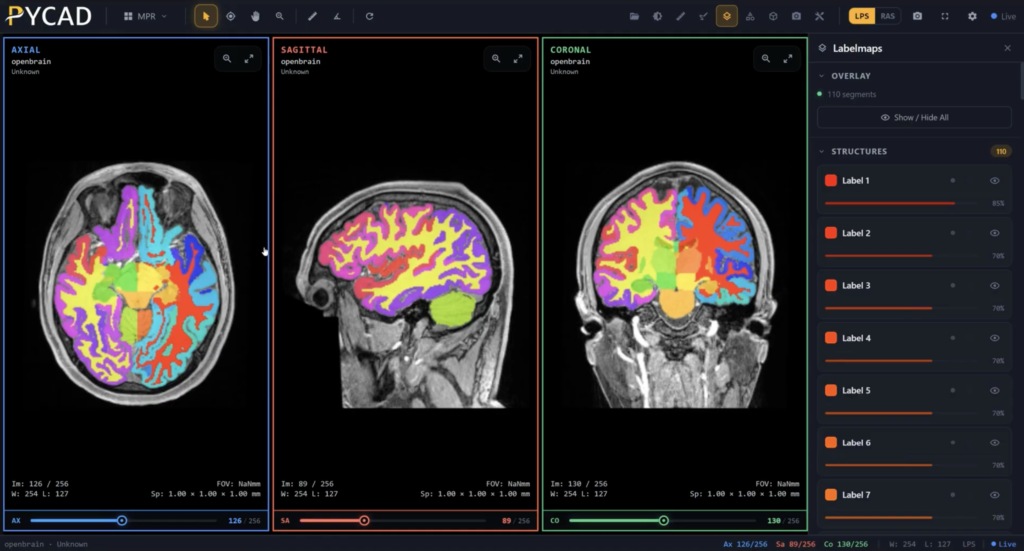
The first real hurdle is to take that stack of 2D images and transform it into a single 3D object. This process is called segmentation, and it’s where you digitally trace and isolate the exact anatomy you want to print. If a surgeon needs a model of a patient's aorta, segmentation is the step where you meticulously separate the aorta from all the surrounding tissues and bones on every single slice of the scan.
Not too long ago, this was a brutal, manual job. A skilled technician would spend hours painstakingly outlining the anatomy slice by slice. It was incredibly time-consuming and, frankly, prone to human error. Thankfully, things have changed.
The rise of AI-powered segmentation tools has completely transformed this workflow. These smart algorithms can automatically or semi-automatically identify and isolate anatomical structures, turning a multi-hour task into something that takes just a few minutes. The consistency and accuracy often blow manual efforts out of the water.
This jump in technology is a major reason why the healthcare 3D printing market is exploding. The whole field, which covers not just anatomical models but also implants and prosthetics, was valued at USD 1.66 billion in 2024 and is on track to hit USD 8.71 billion by 2034. That kind of growth is directly tied to AI making the process faster and more reliable.
The entire workflow, from the initial scan to the finished print, follows a logical path.
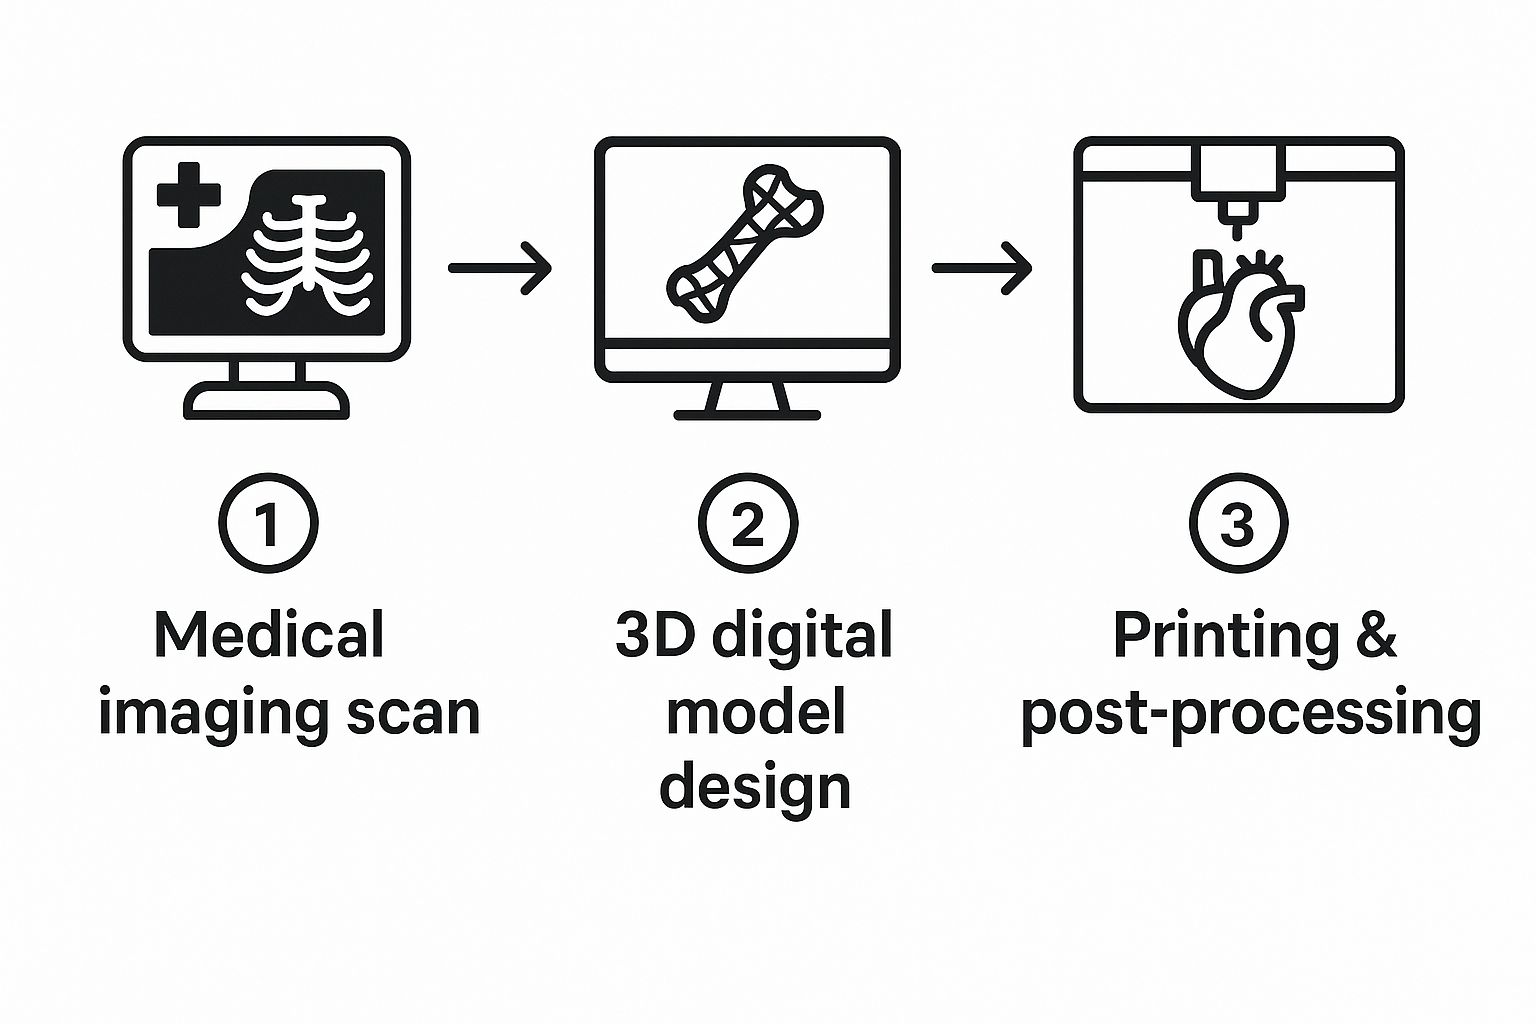
You can see how everything flows from the medical imaging suite to the design software and finally to the printer, with each step building on the one before it.
Creating a Watertight and Printable Mesh
Once you’ve successfully segmented the anatomy, the software generates a 3D mesh. This is essentially the digital skin of your object, built from thousands—or even millions—of tiny triangles. The standard file format for this is STL (stereolithography), which is the universal language that most 3D printers understand.
But here’s a pro tip: the first mesh you get is almost never ready to print. It’s usually riddled with errors that will cause the print to fail. You'll run into common problems like:
- Holes or gaps where triangles are missing, making the model not "watertight."
- Intersecting triangles where surfaces cross over each other in a way that confuses the printer.
- Non-manifold edges, which are geometric impossibilities that a printer can't interpret.
This is where mesh repair comes in. Using specialized software, you have to go in and fix these problems, patching holes and smoothing out rough surfaces to create a single, solid, enclosed object. Skipping this step is one of the most common mistakes I see people make, and it almost always leads to a failed print and a lot of wasted time and material. If you want to get deeper into the nitty-gritty of this stage, there's a great guide on how to create 3D models that covers these fundamentals.
Refining the Digital Blueprint for Printing
After the mesh is repaired, you're on the home stretch. This is where you make final tweaks to get the model ready for the printer. For a very large object, like an adult spine, you might need to digitally slice it into smaller, more manageable pieces that can be printed and then assembled. Other common steps include hollowing the model to save on expensive materials or adding small connectors and joints.
The specific refinements you make really depend on the model's purpose. For example, if you're creating a model of a complex web of blood vessels for a neurosurgeon, you need to preserve every tiny, delicate branch. The focus is on smoothing surfaces without losing any of that critical detail. On the other hand, a solid bone model for an orthopedic surgeon might be slightly simplified to maximize its strength and durability for surgical planning.
The end goal of this entire process is to produce a clean, error-free STL file. This file is your digital blueprint, containing all the geometric data the 3D printer needs to start building the physical model, layer by painstaking layer.
Choosing the Right Printer and Materials
You’ve got a flawless digital model, but now comes the real magic: bringing it into the physical world. This is where your choice of 3D printing technology and materials becomes the most important decision you'll make. The question isn't about which technology is "best" overall, but which is the right tool for the specific job you have in front of you.
The three main players you'll be working with are Fused Deposition Modeling (FDM), Stereolithography (SLA), and Selective Laser Sintering (SLS). Each has a unique set of strengths that makes it a better fit for certain clinical or educational needs.
A Quick Look at the Core 3D Printing Technologies
Before we get into the nitty-gritty, it's helpful to see how these technologies stack up against each other for creating anatomical models. Each one shines in different areas, from producing large, sturdy bone models to capturing the finest vascular details.
3D Printing Technology Comparison for Anatomical Models
| Technology | Best For | Resolution/Detail | Material Options | Relative Cost |
|---|---|---|---|---|
| FDM | Large, durable models like bones (pelvis, spine, femur) for surgical planning and education. | Lower | Wide (PLA, PETG, TPU, ABS) | Low |
| SLA | High-detail models with intricate features like vascular networks or complex cardiac structures. | Very High | Resins (standard, clear, flexible, biocompatible) | Medium |
| SLS | Complex models with internal channels or interlocking parts, like bronchial tubes, that don't need support structures. | High | Powders (mostly nylon) | High |
As you can see, the right choice really comes down to what you're trying to achieve with the final print. Now let's dig into what this means in practice.
FDM, SLA, and SLS in the Real World
FDM is what most people picture when they think of 3D printing. It's a true workhorse, building models layer by layer by extruding a thermoplastic filament. It’s incredibly cost-effective and perfect for creating large, durable models like a patient's spine or pelvis. These prints are tough enough to be handled over and over in a classroom or used to plan out an orthopedic procedure.
On the other end of the spectrum is SLA, which uses a precise laser to cure liquid resin into solid plastic. This method gives you stunningly high resolution, making it the go-to for models that demand intricate detail. If you need to replicate delicate vascular networks or the complex internal chambers of a heart, SLA can capture those features with incredible, sub-millimeter precision.
Then there's SLS. This technology uses a powerful laser to fuse powdered material—usually nylon—together one layer at a time. The real game-changer with SLS is that it doesn't need support structures; the unused powder supports the model as it prints. This makes it fantastic for producing complex, interlocking parts or models with tricky internal channels, like bronchial tubes.
Brian Albers, a 3D Printing Engineer at St. Louis Children’s Hospital, explains why having the right tech on hand is so critical for unpredictable clinical demands. "We lean very heavily on the Formlabs [SLA] printers. It's great on the cost savings side of it, but it's also a quick and efficient process."
Material Selection Makes All the Difference
The printer is only half the equation; the material you choose is just as important. Your material selection dictates the model's physical properties—its rigidity, flexibility, color, and even how it feels in your hands. The right material can elevate a model from a simple plastic shape to a functional anatomical replica that truly informs patient care.
For basic, low-cost educational models, you can't go wrong with PLA (Polylactic Acid) on an FDM printer. It's affordable, easy to work with, and comes in tons of colors, which is perfect for color-coding different anatomical structures.
When you need to simulate soft tissue, a flexible filament like TPU (Thermoplastic Polyurethane) is a fantastic choice. It lets you create models of organs or muscles with a realistic, pliable feel that's invaluable for surgical simulation.
For applications where you need the absolute highest accuracy and a glass-smooth surface finish, the resins used in SLA printing are second to none. These materials range from standard resins for visual models to specialized biocompatible ones that can be sterilized. This allows the models to be brought directly into the operating room as a physical guide during surgery. For a deeper dive, this professional 3D printing materials guide is a great resource for matching materials to specific applications.
Matching the Technology to the Clinical Need
Let’s walk through a couple of real-world scenarios to see how this all comes together.
-
Case One: An orthopedic surgeon needs a life-size model of a patient's fractured femur to plan a complex reconstructive surgery. They need something robust and dimensionally accurate that they can physically handle. In this situation, an FDM printer using a strong material like PETG or ABS is the perfect tool. It's fast, affordable, and produces a durable part that checks all the surgeon's boxes.
-
Case Two: A cardiac surgeon wants a model of a newborn’s heart with a congenital defect to explain the corrective procedure to the anxious parents. The model has to show tiny, intricate blood vessels and valve structures clearly. For this, SLA is the only choice. Using a clear or multi-color resin, you can produce a highly detailed, visually stunning model that makes complex anatomy easy for anyone to understand.
These examples show how the intended use of 3d printing anatomical models directly drives your technology and material choices. There’s no one-size-fits-all solution here. Success comes from perfectly aligning your tools with the clinical or educational goal.
Slicing Your Model for a Perfect Print
You've got a clean, pristine STL file. Now comes the real magic: translating that digital blueprint into a language your 3D printer can actually understand. This critical step happens in your slicer software, which essentially "slices" your 3D model into hundreds or thousands of individual layers.
From there, it generates the G-code—the specific, line-by-line instructions that will guide your printer's every move. This is where you get to play puppet master, fine-tuning the settings that dictate the final quality, strength, and overall finish of your anatomical model.
Getting good at slicing isn't about memorizing every single setting in the software. It’s about understanding how a few key parameters work together. When you're 3D printing anatomical models, accuracy and detail are everything, and dialing in these settings is often the difference between a clinical-grade tool and a frustrating failed print.
Layer Height and Infill: The Core Decisions
One of the first things you'll decide is the layer height, which controls the vertical resolution of your print. Think of it like pixels in an image. A smaller layer height, say 0.1 mm, produces a much smoother and more detailed surface. This is perfect for capturing the delicate textures of a cardiac model or the intricate pathways of cranial nerves. The only downside? It takes significantly longer to print.
For larger, less complex models like a femur or a segment of the spine, a bigger layer height of 0.2 mm or 0.25 mm is usually more than enough. You get a much faster print without sacrificing the dimensional accuracy you need for something like surgical planning.
Next up is infill density. This is the internal structure printed inside your model. The density you choose affects the model's weight, overall strength, and how much material you end up using. For most anatomical models, you really don't need to go crazy with a high infill.
A density between 10-20% is a great sweet spot. It provides plenty of internal support to ensure the top layers print cleanly while keeping the model lightweight and conserving your filament. Now, if you're printing a model that will be handled a lot or used to practice with surgical tools, you might want to bump that up to 25-30% for extra durability.
The real goal here is finding that perfect balance. You need enough infill to make the model robust for its job—whether that's for a patient consultation or pre-surgical practice—without wasting time and material on what would essentially be a solid, heavy brick.
The Art of Support Structures
Let's be honest: organic shapes are a pain to 3D print. They're full of overhangs and complex curves that just can't be printed in mid-air. This is where support structures become your best friend. These are just temporary scaffolds printed alongside your model to hold up any tricky sections, which you'll remove later on.
Modern slicers offer a few different types of supports, but for anatomical models, "tree" or "organic" supports are almost always the way to go. Unlike the old-school grid supports, they branch out intelligently to touch the model only where absolutely necessary. This gives you two huge advantages:
- They use a lot less material.
- They leave fewer marks on your model's surface, which means less sanding and finishing for you.
How you orient your model on the print bed is just as crucial as the supports themselves. For instance, if you're printing a spinal column, try tilting it at a 45-degree angle instead of printing it straight up. This can drastically reduce the amount of support needed for the transverse processes and give you a much cleaner final part.
In a fast-moving field like orthopedics, where patient-specific guides are in high demand, these little efficiencies add up. The market for these devices is set to explode from roughly USD 2.75 billion in 2025 to USD 6.87 billion by 2034, all driven by the need for faster, more precise surgical tools. You can dive deeper into this trend in this market overview of orthopedic 3D printing devices.
Real-World Slicer Settings in Action
Let’s bring this all together with a practical example. Imagine you need to print a kidney model that has a tumor inside, and you want to use it for patient education. To make the kidney body itself translucent, you'd pick a clear material like PETG or a clear SLA resin.
In the slicer, you would set the infill to 0% and the wall count (sometimes called perimeters) to just one or two. This creates a completely hollow shell that lets light pass right through, making the solid, brightly colored tumor you've printed inside stand out perfectly.
This is what makes slicing so incredibly powerful. By thoughtfully adjusting just a handful of settings, you can turn a standard digital file into a purpose-built anatomical tool that's both beautiful and highly effective.
Turning Plastic into Pathology: A Guide to Post-Processing

The moment a print finishes is always a great feeling, but that raw part straight off the build plate is nowhere near ready for the operating room or a consultation. This is where the real artistry begins. Post-processing is what transforms a piece of plastic into a high-fidelity anatomical replica that feels as authentic as it looks.
These finishing steps are what make a model truly functional. They elevate a simple print into a powerful tool for surgeons, medical students, and patients alike. The very first—and often most tedious—task is getting rid of the support structures.
The Delicate Art of Support Removal and Surface Finishing
Patience is your best friend here. If you’re working with a model that has intricate blood vessels or delicate nerve pathways, rushing the support removal can easily snap off the very details you spent hours trying to capture.
The right technique really depends on your printing technology. For FDM prints, you’ll mostly be snapping off supports, but this can leave behind ugly little nubs. I always keep a good set of flush cutters, needle-nose pliers, and a deburring tool handy to clean these up without gouging the model’s surface.
SLA models are a different beast. Their support touchpoints are much finer, demanding a more delicate touch. A little trick I’ve picked up is to remove the supports after the initial isopropyl alcohol (IPA) wash but before the final UV cure. The resin is a bit softer and less brittle at this stage, so the supports tend to pop off cleanly.
With the supports gone, it’s all about creating that flawless surface. This isn’t just for looks; a smooth, professional finish is essential for models that will be handled constantly in a clinical setting.
- Sanding with a Purpose: Start with a fine-grit sandpaper, maybe around 220 grit, and work your way up to 400 or even higher to erase any support marks or layer lines. For those tight, hard-to-reach spots, a set of needle files or a Dremel with a sanding attachment is a lifesaver.
- A Smoother Finish: If you're using a material like ABS, you can achieve an almost injection-molded look with vapor smoothing. It's a more advanced technique that uses a solvent vapor to slightly melt the outer layer, completely eliminating layer lines.
- The Final Cure: For any resin print, a thorough UV cure is absolutely non-negotiable. This final step is what maximizes the resin's strength and stability. Always follow the manufacturer’s recommended curing times to avoid ending up with a model that’s brittle or, worse, sticky.
From Model to Medical Marvel: Adding Realism
A perfectly smooth, monochrome model is a great start, but color and texture are what truly bring it to life. This is your chance to add immense clinical value, turning a generic shape into a specific, intuitive diagnostic tool.
Think about it: painting a tumor in a bright, contrasting color on a kidney model immediately tells the whole story. It's incredibly powerful for patient education, helping them see exactly what their surgeon is talking about. An airbrush is fantastic for laying down a smooth, even coat, while fine-tipped brushes are your go-to for detailing smaller structures.
The real goal of post-processing is to create a model that not only looks realistic but feels right in your hands. This tactile feedback is invaluable for surgical planning, offering insights that a 2D screen simply can't provide.
Want to simulate the appearance of wet biological tissue? A clear gloss coat works wonders. It gives the model a realistic sheen that’s far more impactful in an educational or simulation setting.
If you’ve printed a larger model in multiple pieces, like a section of the spine, careful assembly is the final touch. I use a strong adhesive like a cyanoacrylate (super glue) or a two-part epoxy to get a permanent bond. A little bit of filler can hide the seams before a final coat of paint, creating a single, cohesive piece. These are the details that define high-quality 3d printing anatomical models.
Got Questions About 3D Printing Anatomical Models?
Once you start turning medical scans into physical models, you'll quickly run into the same questions that everyone else does. Getting a handle on these common hurdles is what separates a basic print from a truly clinical-grade tool. Let's dig into some of the most frequent ones I hear.
Getting these answers straight will save you countless hours of trial and error, whether you're just firing up your printer for the first time or looking to sharpen your existing workflow.
What’s the Best Software for Turning DICOMs into STLs?
This is probably the single biggest decision you'll make. There's no one-size-fits-all answer here; the "best" software really depends on your budget, your technical skill, and most importantly, what you plan to do with the final model. Are you making something for a classroom, or is this for a surgeon to hold before an operation?
If you're working in a research lab or just don't have a big budget, the open-source community has your back.
- 3D Slicer: This is a powerhouse in the research world. It can do almost anything you can imagine for segmentation and visualization, but be warned, it has a pretty steep learning curve.
- InVesalius: Another fantastic free option that I’ve found to be a bit more intuitive to pick up. It still packs plenty of power for creating solid segmentations.
When you move into the clinical world, where things like regulatory compliance and validation are non-negotiable, you’ll be looking at commercial-grade software.
- Materialise Mimics and Simpleware ScanIP are the gold standards. These platforms are built for the hospital environment, often featuring advanced AI tools and FDA-cleared workflows that can stand up to serious scrutiny.
Just How Accurate Are These 3D Printed Models?
They can be incredibly accurate—we’re talking sub-millimeter precision. But that level of accuracy doesn't happen by accident. The final fidelity of the model you’re holding in your hand is the sum of every single step in your process, starting right back at the imaging scanner.
It all begins with the source data. A high-resolution CT or MRI with thin slices is your foundation; without that detail, you can't build a precise reconstruction. After that, the 3D printer's own mechanical capabilities come into play. High-end technologies like SLA or PolyJet are my go-to for really complex jobs, like delicate vascular networks or cardiac models, because they excel at reproducing those tiny, critical details.
A crucial step for any model used in surgical planning is validation. You have to be sure it's dimensionally accurate. We do this by digitally overlaying the final 3D model back onto the original scan data in software. This allows us to measure everything and confirm there are no significant deviations before it ever gets near a surgeon.
Are There Regulations for Models Used in Surgical Planning?
Yes, and this is a big one you can't afford to get wrong. The second a 3D printed model is used to diagnose a condition, plan a treatment, or guide a surgical instrument, it often becomes classified as a medical device.
This brings it under the watch of regulatory bodies like the FDA in the US. Suddenly, you're dealing with a whole new set of rules:
- Using Certified Software: Clinical work frequently demands FDA-cleared software for all your segmentation and modeling.
- Implementing a Quality Management System (QMS): You need to have documented, repeatable processes for everything you do to ensure safety and consistency.
- Process Validation: You must be able to prove that your entire workflow—from the initial scan to the final print—consistently produces accurate and reliable models.
On the other hand, if you're just creating models for general education or to help explain a condition to a patient, you typically won't face these tough regulatory hurdles. The key is to always know the intended use of your model and check your local regulations to stay compliant.
At PYCAD, we focus on the AI backbone of this process—transforming complex medical images into clean, segment-ready data for your anatomical models. Find out how our AI solutions can significantly speed up your workflow.