Integrating MRI, AI Segmentation Overlays, and 3D Visualization
For many clinical and research teams, a generic DICOM viewer simply isn’t enough. Advanced neuroimaging workflows require more than just basic image viewing, they demand a cohesive environment where MRI scans, AI segmentations, 3D visualization, and surgical planning tools are combined into one custom interface.
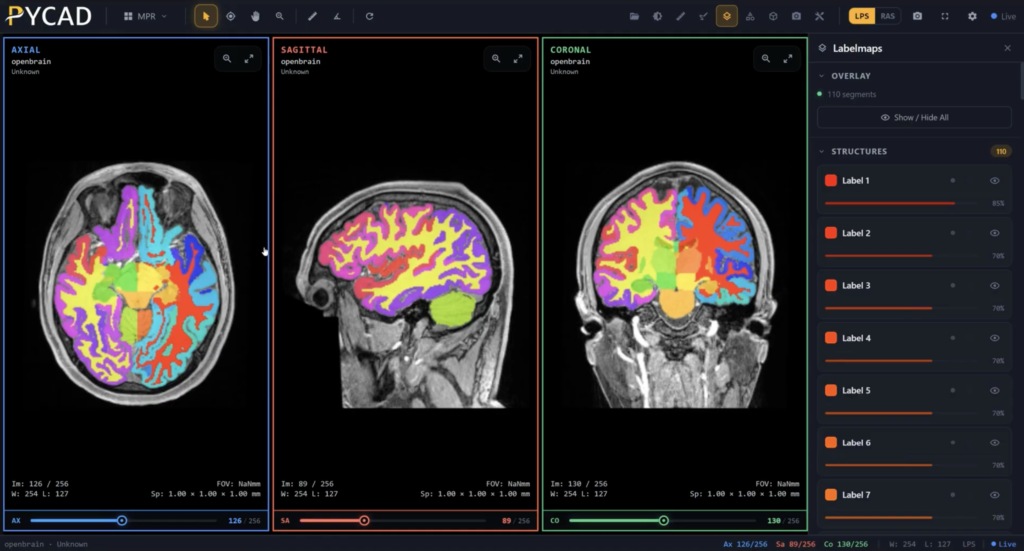
In this post, we will walk through a specialized neuroimaging workflow that takes a standard Multiplanar Reconstruction (MPR) viewer—featuring standard axial, coronal, and sagittal views—and elevates it by integrating artificial intelligence and dynamic 3D rendering.
1. Overlaying AI Segmentations
A standard baseline for any advanced viewer is the ability to visualize the outputs of AI models directly on the scan. If you have an AI endpoint that segments the brain into various structures, you need a seamless way to load and interact with that output file.
Using a dedicated “Label Maps” module, you can load NIfTI-based or DICOM-SEG-based segmentations into the viewer. These segments are seamlessly overlaid on top of the volume across all three orthogonal views. Users have fine-grained control to:
- Scroll through segmented structures slice by slice.
- Adjust the opacity to compare the overlay with the underlying MRI.
- Hide specific structures entirely.
Note on Formats: When using NIfTI files, labels often default to numerical names (e.g., Label 1, 2, 3). However, using DICOM-SEG allows the viewer to extract and display the real anatomical names, such as identifying a specific region as a tumor.
2. 3D Volume Rendering and Structure Generation
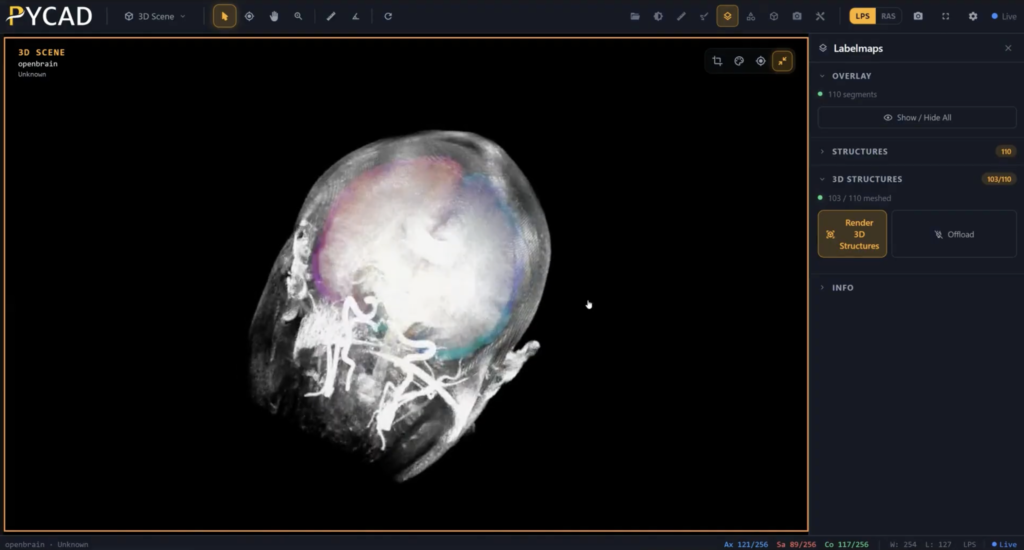
While 2D analysis is crucial, rendering the volume and structures in 3D is vital for presurgical planning and advanced analysis.
Within the custom viewer, you can easily render the current volume using presets like CTA vessels or Maximum Intensity Projection (MIP), and fine-tune the visual values to optimize clarity. Furthermore, the viewer can extract the 2D MPR segments and generate corresponding 3D structures overlaid directly inside the volume. Once generated, you can completely hide the base MRI volume to focus exclusively on the 3D rendered segments, retaining full control over opacity to highlight specific structures.
3. Advanced Navigation: Synchronized MPR and 3D Scenes
To facilitate more precise planning, the viewer allows clinicians to look at all views simultaneously, featuring the MPR views alongside the 3D scene.
A powerful crosshair tool enables users to focus on a specific region, which automatically updates the corresponding regions across all orthogonal views. Even more impressively, the orthogonal planes (axial, coronal, and sagittal) are overlaid directly inside the 3D scene. As you move your cursor, these planes move with you, replicating your MPR navigation directly inside the 3D environment. This means you can stay entirely within the 3D scene without having to constantly switch back and forth.
4. Custom Measurements Updated in Real-Time
Measurements are a fundamental feature of any DICOM viewer. A robust custom viewer will include distance, angle, area, and volume modules, but true value comes from customization.
For instance, a highly requested custom feature is the ability to draw a distance measurement in a 2D MPR view and see it updated live within the 3D scene. You can perform this across all three MPR views, demonstrating the high level of interconnected customization possible when building specialized tools.
5. Asynchronous Clinical Collaboration
Clear communication between clinicians is essential. To support this, a specialized annotations module allows users to point out specific areas of interest using arrows, freehand drawing, shapes, or text.
These annotations are slice-specific—if you scroll away from the annotated slice, the note disappears, and reappears only when you scroll back. The session state can then be saved to the backend, allowing a completely different doctor from another organization to retrieve the case and immediately see the previous doctor’s notes.
Looking to Build Your Own Custom Viewer?
Integrating AI segmentation with a custom DICOM viewer requires careful planning to ensure the components work together flawlessly. If you are looking to build a DICOM viewer for the neuro space, we have created a free checklist and guide to help you avoid common integration mistakes. You can access the guide from here.
By moving beyond generic viewers and building highly customized workflows, teams can dramatically improve analysis speed, enhance surgical planning, and foster better collaboration across the medical field.