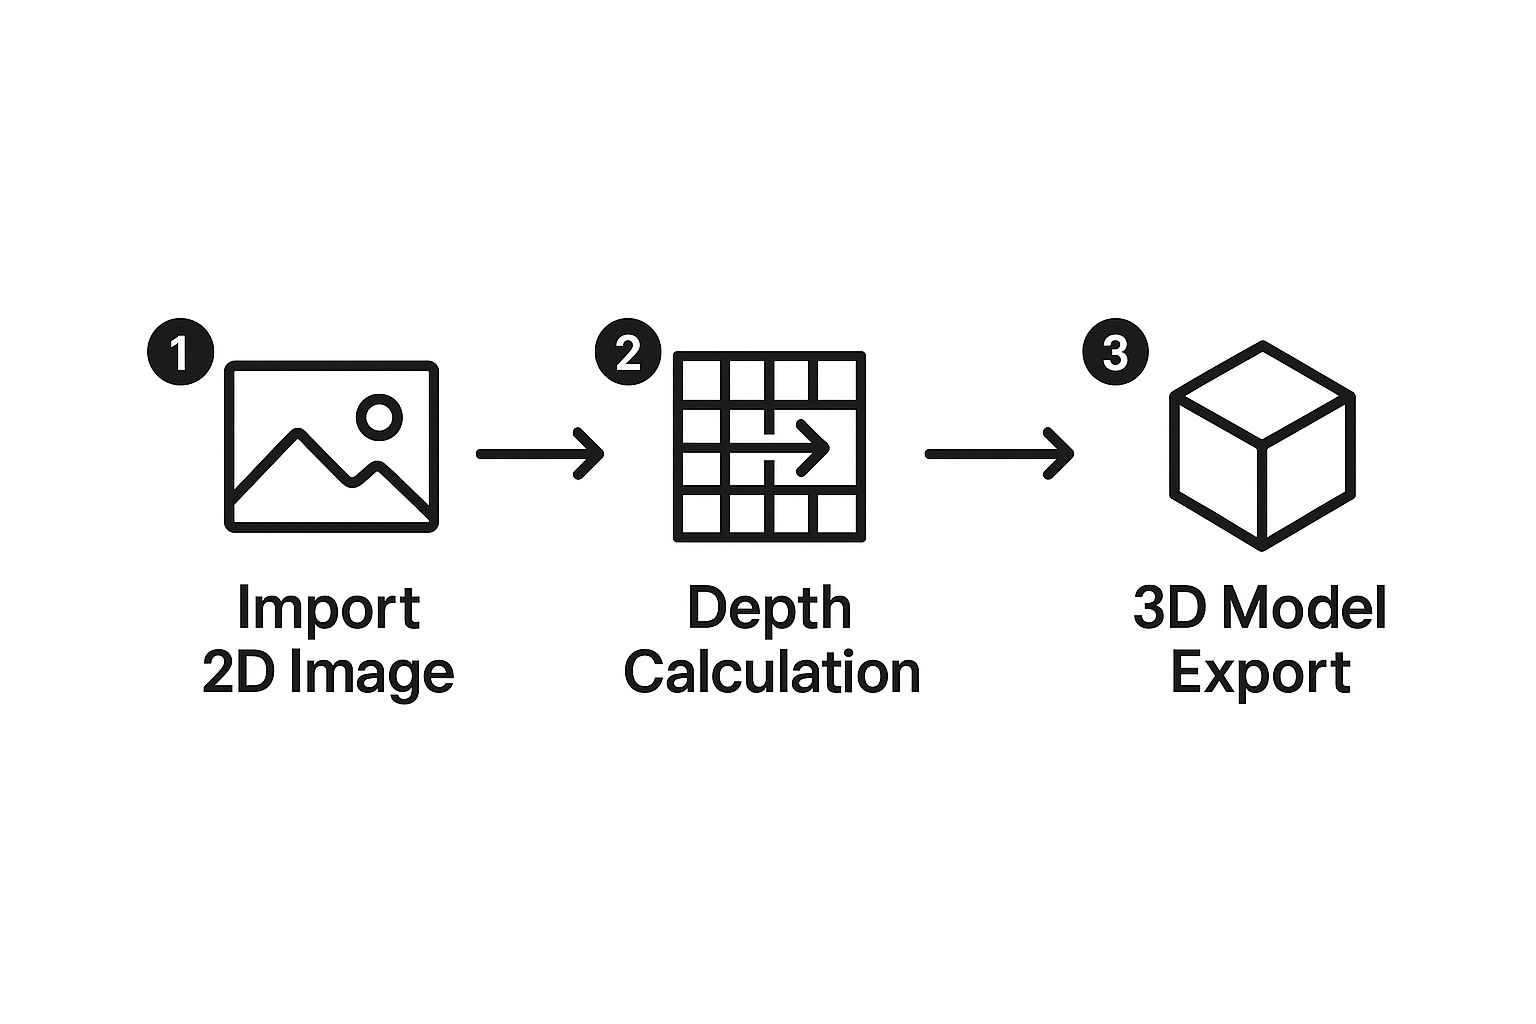
At its core, creating a 3D model from 2D images is about teaching software to see depth where there isn't any. AI-powered tools are exceptionally good at this. They take a series of flat medical scans, like individual CT or MRI slices, and intelligently stack and interpret them to build an interactive, multi-dimensional anatomical structure. It's a process where algorithms meticulously analyze pixel data across each image to construct a single, coherent 3D shape.
From Flat Scans to Dynamic 3D Models
Let's move past the theory and get our hands dirty. This guide is all about the practical reality of turning standard 2D medical images into dynamic 3D models using AI. You’ll see exactly how a stack of flat, grayscale CT scans can become a fully interactive organ model that you can rotate, slice, and inspect from any angle. This isn't just a novelty; for surgeons planning intricate operations or for patients trying to grasp their own condition, this technology is quickly becoming indispensable.
The ambition to build 3D worlds from 2D pictures has been around for decades. You can find early research on 3D reconstruction from the 1980s and 1990s, but progress was slow, largely held back by the hardware of the time. Those early systems laid a lot of important groundwork, even if they couldn't quite deliver on the promise of real-time 3D scene building.
A New Era of Accessibility
So, what's different now? The sheer power and accessibility of modern tools. What used to be a niche, resource-intensive process is now within reach for more clinicians and researchers than ever before, thanks to sophisticated, AI-driven software. This represents a fundamental shift in how we approach medical visualization.
We're not just making prettier pictures. We're unlocking profound clinical insights that were once buried in those stacks of flat, grayscale images. The impact is tangible and growing every day.
- Smarter Surgical Planning: Imagine a surgeon rehearsing a tricky procedure on a perfect digital twin—or even a 3D-printed replica—of a patient's unique anatomy.
- Clearer Patient Communication: Handing a patient a 3D model of their own anatomy is a powerful way to help them understand their condition and treatment plan. It fosters trust and engagement.
- More Confident Diagnostics: Radiologists can rotate a 3D rendering of a tumor, seeing exactly how it relates to nearby blood vessels and tissues. It adds a layer of confidence that 2D slices can't match.
- Richer Medical Education: For students, interacting with anatomical models built from real patient data is a far more memorable and effective learning experience than what textbooks alone can offer.
When we transition from a stack of flat images to a single, interactive 3D object, we gain a much more intuitive and complete understanding of complex biology. This is the key to pushing both diagnostics and treatments forward.
Think of this guide as your hands-on manual. We're about to walk through the entire workflow together, from prepping your raw 2D scans to exporting a polished, clinically accurate 3D model ready for whatever you need it for.
Preparing Your Scans for 3D Conversion
Any great 3D model starts with high-quality source data. Before an AI even touches your files, the 2D scans need to be properly prepped for the conversion. I always think of it like cooking a complex meal—you have to get your ingredients in order first to guarantee a good outcome. This is where we'll get hands-on with handling and refining raw medical images, especially DICOM files.

The journey of creating 3D from 2D images really starts with understanding what you're working with. Medical scans from a CT or MRI aren't just single pictures. They're a series of individual images, often called a "stack," where each image represents a thin slice of the anatomy. It's the combination of all these slices that forms the complete volumetric dataset an AI can actually interpret.
The Importance of a Complete DICOM Series
For an accurate 3D reconstruction, a complete and consistent DICOM series is absolutely non-negotiable. A DICOM (Digital Imaging and Communications in Medicine) file isn't just an image; it also holds critical metadata, like slice thickness and patient orientation. Your AI software relies on this data to correctly place each slice in 3D space.
Having a full "stack" of images is essential. If you're missing even a handful of slices, you'll have gaps in your data, which leads to a distorted or incomplete model. It's like trying to build a loaf of bread with several slices missing from the middle—the final shape would just be wrong. That’s exactly what happens to your 3D model if the source data is flawed.
Spotting and Fixing Common Data Issues
Before you even think about loading your files into the software, you need to play detective. I’ve seen several common problems pop up time and again that can completely compromise a model's quality. Learning to spot and fix them is a critical pre-processing step.
- Inconsistent Slice Thickness: If the spacing between slices changes throughout the scan, the AI will have a tough time creating a proportionally accurate model. You might end up with a 3D object that looks stretched or squished in certain spots.
- Imaging Artifacts: These are distortions in the image itself. Think streaks caused by metal implants or motion blur from a patient moving. An AI can easily mistake these artifacts for actual anatomy, throwing off the entire segmentation.
- Gantry Tilt: Sometimes, the scanner itself is tilted during the scan. This has to be corrected in the metadata so the software can properly align every slice before it starts building the model.
Key Takeaway: I can't stress this enough: "garbage in, garbage out." The time you spend cleaning and verifying your 2D scans will directly pay off in the accuracy and clinical value of the final 3D model.
To get started on cleaning up your data, you’ll want to have a clear checklist. Ensuring your DICOM files are properly organized and free of common issues is the best way to set your AI up for success.
DICOM Data Prep Checklist for Optimal 3D Models
Follow this checklist to ensure your 2D medical scans are properly prepared for a successful 3D conversion.
| Check | Objective | Why It Matters for Your Model |
|---|---|---|
| Completeness | Ensure you have the entire sequence of slices. | Missing slices create holes or gaps in the final 3D model, making it anatomically incorrect. |
| Consistency | Verify that slice thickness and spacing are uniform. | Inconsistencies lead to stretching or compression, distorting the model's proportions. |
| Artifacts | Scan for motion blur, metal streaks, or other noise. | Artifacts can be misinterpreted as anatomical structures, leading to inaccurate segmentation. |
| Orientation | Check for and correct any gantry tilt in the metadata. | Proper alignment is essential for the software to stack the slices correctly in 3D space. |
| Anonymization | Remove all patient-identifying information (PII). | Protects patient privacy and ensures compliance with regulations like HIPAA. |
This checklist covers the foundational issues you need to address. Many of these problems can be fixed using powerful, open-source tools.
My go-to recommendation for this is almost always 3D Slicer. It’s a fantastic piece of software that lets you inspect your DICOM series, check for consistency, and even make basic corrections before you start the AI-driven segmentation. Crucially, it also includes features to anonymize patient data by stripping personal identifiers from the metadata—an essential step for privacy and compliance. Taking care of these prep steps first gives your AI the cleanest possible data to work with, which is exactly what you need for a successful conversion.
Using AI to Isolate and Build Your Model
With your pristine DICOM series ready, it’s time for the most exciting part of the process—where the actual transformation from 2D to 3D happens. This is where AI stops being a buzzword and becomes a practical, powerful tool for isolating the precise anatomy you want to model.
We’ll focus on the workflow within a tool like 3D Slicer, but the core principles hold true for most medical segmentation software. The goal is to intelligently tell the software which pixels in your image stack belong to the structure of interest (like a kidney) and which ones are just surrounding tissue.
Loading and Initial AI Segmentation
First things first, you need to load your prepared DICOM series into the software. The program will display the stacked images in three orthogonal views—axial, sagittal, and coronal—along with a preliminary 3D render.
The screenshot below shows the interface for 3D Slicer, a powerful, open-source platform for medical image analysis and 3D visualization. You can see how it lays out the 2D slices alongside the 3D rendering space, which is essential for understanding anatomical relationships.
Now, instead of painstakingly tracing an organ slice by slice, you can turn to the AI segmentation tools. These algorithms are pre-trained on vast datasets of medical scans. This training allows them to recognize the distinct textures, shapes, and density values that define specific anatomical structures. You simply select the AI model for your target anatomy—for instance, a "kidney" model for an abdominal CT—and let it run.
The AI analyzes the entire image stack and generates a "segment," which is essentially a 3D mask that highlights your target organ. This process is remarkably faster and often more accurate than older methods like manual thresholding, which would frequently include unwanted adjacent tissues with similar grayscale values.
The real power of AI here is its contextual understanding. It doesn't just see pixels; it recognizes anatomical patterns. This is what allows it to distinguish between a kidney and a nearby muscle, even if their densities are very similar.
Refining the AI's Initial Work
While incredibly powerful, the initial AI segmentation is rarely perfect. Think of it as a highly skilled assistant providing a 95% complete first draft. Your job is to perform the final quality control, refining the small areas where the AI may have made errors.
Software like 3D Slicer provides intuitive tools for this refinement:
- Digital Paintbrush: You can "paint" onto the 2D slices to add parts of the organ the AI missed.
- Eraser Tool: Conversely, you can "erase" areas where the AI incorrectly included surrounding tissue.
- Smoothing Filters: These can be applied to clean up any rough or jagged edges on the surface of the 3D model.
This iterative process of AI-assisted segmentation followed by manual refinement ensures the final model is both quickly generated and clinically precise.
One of the most significant recent advances in this field involves neural networks that can infer three-dimensional structure from a single image—a task once deemed nearly impossible. While we're working with an image stack, the underlying deep learning principles are similar; the AI learns to interpret subtle cues like shading and texture to build a plausible 3D shape.
The ability of AI to interpret and generate complex outputs extends beyond static models. This same foundational technology is being applied to other media, evident in the growth of AI video generator technology that can create moving visuals from text prompts.
Once you are satisfied with the segmentation, the final step is to instruct the software to build the 3D surface model, turning your refined mask into a tangible digital object.
How to Refine and Export a Usable 3D Asset
Getting that first 3D model from your AI is a huge step, but the raw output is rarely the finished product. It's more like a rough diamond. The real magic happens in post-processing, where a bit of human skill turns that draft into a polished, clinically reliable asset. This refinement is absolutely crucial when creating 3D models from 2D images.
One of the first things you'll almost always see are "stair-step" artifacts. This jagged effect is a totally normal byproduct of stacking flat 2D slices to create a 3D form. Luckily, the software you're using almost certainly has tools built just for this.
Your best first move is usually applying a smoothing filter. This function intelligently averages the bumpy geometry, giving you a much more organic and realistic surface. My advice? Start with a low-intensity setting. You can gradually dial it up until the steps vanish, but be careful not to overdo it and lose important anatomical details.
Fine-Tuning with Manual Corrections
Even the smartest AI can make small mistakes during segmentation. You might find tiny holes in your model or see little bits of nearby tissue that got picked up by mistake. For clinical accuracy, these need to be fixed, and that means moving from automated filters to hands-on editing.
Think of it like being a digital sculptor. You’ll be using tools that work a lot like a painter's brush or an eraser, letting you add or remove material directly on the 3D model.
- Painting Tools: If the AI missed a small section of an artery, you can grab a "paint" or "add" tool to fill that gap. This ensures the model is complete.
- Erasing Tools: On the flip side, if a piece of a neighboring bone fragment is stuck to your model, the "erase" tool lets you carefully carve it away.
This detailed, manual cleanup is what makes the final asset a true and accurate representation of the patient's anatomy—a non-negotiable for medical work.
A model destined for surgical planning or patient education has to be perfect. Taking the time to manually check and fix every surface ensures the asset isn’t just good-looking, but clinically trustworthy.
Choosing the Right Export Format
Once you’re happy with the model, it's time to export. The file format you pick comes down to one simple question: What are you going to do with it? The two formats you'll run into most often are STL and OBJ. They look similar but are built for different jobs.
| Format | Best For | Key Characteristics |
|---|---|---|
| STL (Stereolithography) | 3D Printing | Represents only the surface geometry (a mesh of triangles). It’s a simple, universal format that's perfect for sending to a 3D printer. It contains no color or texture data. |
| OBJ (Object File) | Visualizations & VR | Can store geometry, color, texture, and other information. This makes it far more versatile and the go-to choice for realistic renderings, presentations, or interactive VR/AR simulations. |
So, if you're making a physical surgical guide to be held in a surgeon's hand, STL is the clear winner. But if you're building an interactive simulation for medical students, OBJ is the way to go because it keeps all that rich visual information.
As a final tip, pay attention to file size during export. Most programs let you reduce the polygon count. This can shrink the file size dramatically, making it much easier to work with, often without any noticeable loss in quality.
Putting Your 3D Models to Work in Medicine
Creating a polished 3D model is one thing, but its real power is unlocked when you put it to work in clinical and research settings. This is the moment your technical work transforms into a tool that can genuinely improve patient outcomes and push medical discovery forward. The possibilities here are incredibly exciting and diverse.

Just picture it: a cardiac surgeon rehearsing a tricky valve replacement on a 3D-printed heart that’s an exact replica of their patient's. This physical model, built directly from the patient's own scans, provides a hands-on feel for their specific anatomy. It helps the surgeon anticipate challenges and fine-tune their technique, boosting precision and confidence long before the first incision is ever made.
Better Diagnostics and Smarter Education
Think about a radiologist who is no longer stuck scrolling through dozens of flat, grayscale images. Now, they can grab a high-fidelity 3D rendering of a tumor, spin it around, and examine it from any angle to measure its exact volume and see how close it is to critical blood vessels. That kind of spatial awareness is something 2D images just can't deliver.
These models are also game-changers for medical education. A student can explore a virtual reality (VR) anatomy model that isn't some generic template, but is constructed from real patient data. That kind of interactive, realistic experience sticks with you.
A few key applications stand out:
- Surgical Rehearsal: Surgeons can map out complex operations on digital or 3D-printed models, spotting potential issues and perfecting their strategy.
- Patient Communication: It's one thing to describe a condition, but showing a patient a 3D model of their own body makes the diagnosis and treatment plan crystal clear.
- Diagnostic Clarity: Radiologists get a much clearer picture of how tissues, tumors, and vasculature relate to one another in three-dimensional space.
Validation and Getting Your Model Out There
Before you can use any model for clinical decisions, you have to validate it. This is a critical step. It means you must meticulously compare your 3D creation back to the original 2D source scans to confirm it's a true and accurate representation. Accuracy is everything.
Fundamentally, creating these models is about extracting depth information from flat images. The process relies on a principle called triangulation, where the software analyzes matching points across images from different viewpoints to calculate a 3D position.
Once your 3D medical models are refined and validated, the next step is figuring out how to deploy them so people can actually interact with them. You want them to be accessible. Technologies that allow for remote, real-time visualization of these complex files are a huge advantage. Resources like Pixel Streaming Explained cover how this works, enabling collaboration and training no matter where your team is located. These practical benefits are the real payoff for turning flat scans into dynamic, three-dimensional assets.
Clearing Up Common Questions About Creating 3D Medical Models
When you first dive into converting 2D scans into 3D models, a few questions tend to pop up again and again. Getting these sorted out from the start can save you a ton of headaches and let you focus on what really matters: creating a precise and valuable model.
Is My Image Quality Good Enough?
This is probably the most common question I hear. While today's AI is incredibly powerful, it’s not magic. It can't reconstruct details that were never captured in the first place.
If your source scans are low-resolution or full of artifacts, those imperfections will absolutely show up in your final 3D model. My best advice? Always, always start with the highest-quality DICOM series you can get your hands on. It’s the foundation for everything that follows.
Which Software Should I Use?
The sheer number of software options can feel overwhelming. So, where do you start?
For most medical applications, especially if you're just getting into this field, you can’t go wrong with a powerful, open-source platform like 3D Slicer. It’s completely free and packed with everything you need, from handling DICOM files to running sophisticated AI segmentation.
How Do I Handle Data Security and Compliance?
This isn't just a question—it's a critical professional responsibility. When you're working with patient data, things get serious. Adhering to regulations like HIPAA is non-negotiable.
Your first step, before you do anything else, must be to anonymize all patient data during the prep phase. When it comes to storage and sharing, your environment has to be just as secure. It's crucial to find and use a HIPAA compliant cloud storage solution to keep that information safe throughout your entire workflow.
The accuracy of your final model is directly tied to the precision of your initial segmentation. If the AI-generated mask is only 90% correct, your final 3D model will also be 90% correct. Always take the time to manually refine the segmentation for clinical-grade results.
Do I Really Need a Powerful Computer?
While you don't need to build a supercomputer, creating 3D from 2D images is a graphically demanding job. You'll have a much smoother experience, especially with large datasets, if your machine has:
- A dedicated graphics card (GPU)
- At least 16GB of RAM
This kind of setup prevents frustrating lag and crashes, letting you work much more efficiently.
At PYCAD, we specialize in turning complex medical imaging data into precise, functional AI solutions. If you're looking to integrate advanced 3D modeling and AI into your medical device or research, explore our services at https://pycad.co.