Abstract
Deep learning is an important machine learning technique that helps computers identify objects in images. Medical images are used in diagnosis and treatment of diseases, injuries, and congenital abnormalities.
Deep learning can be used to detect diseases like cancer by finding tumor cells through medical images. Deep learning also has the potential to improve the quality of medical care by segmenting organs during surgery or scanning patients for signs of cancer or other ailments.
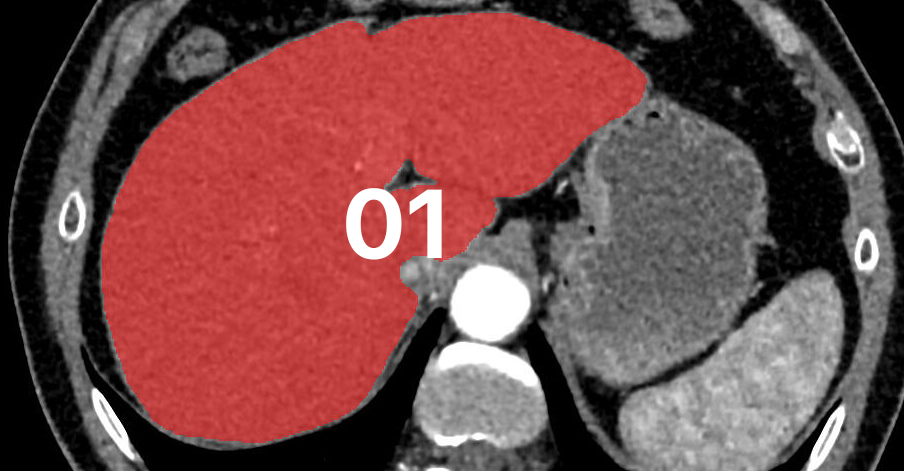
So the goal of this blog series is to use Monai and PyTorch with the Python programming language to create a deep learning model to segment a liver from a public CT scan dataset. After completing this series, you will be able to create the same model that segments the liver, as well as use the same principle to segment other organs or tumors from CT scans or MRIs.
Image Segmentation
Deep learning in computer vision can be used for a variety of tasks, the most common of which is image classification, which was one of the first deep learning applications.
The image classification technique simply determines whether or not an image contains the object that we are looking for (in our case, the liver).
Then there was object detection, which is another extremely useful technique in computer vision. This technique entails drawing a box around the object we’re looking for in the image (which we call a bounding box).
Image segmentation, on the other hand, is a technique that combines image classification and object detection. This technique not only detects an object in an image, but it also segments the object’s correct pixels.
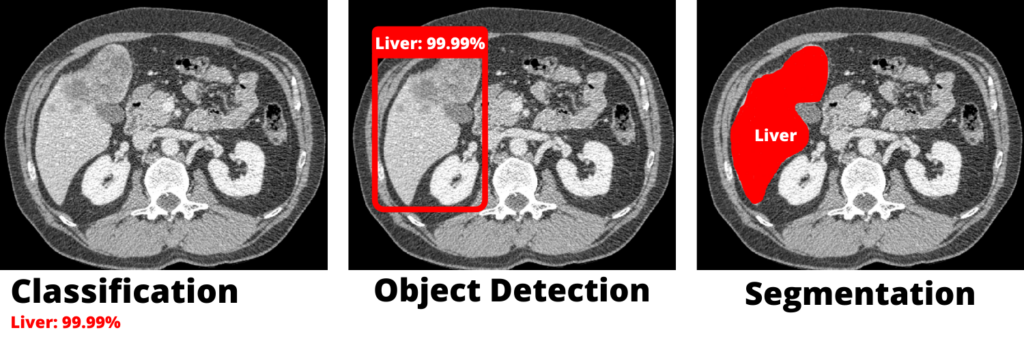
Image Segmentation Types
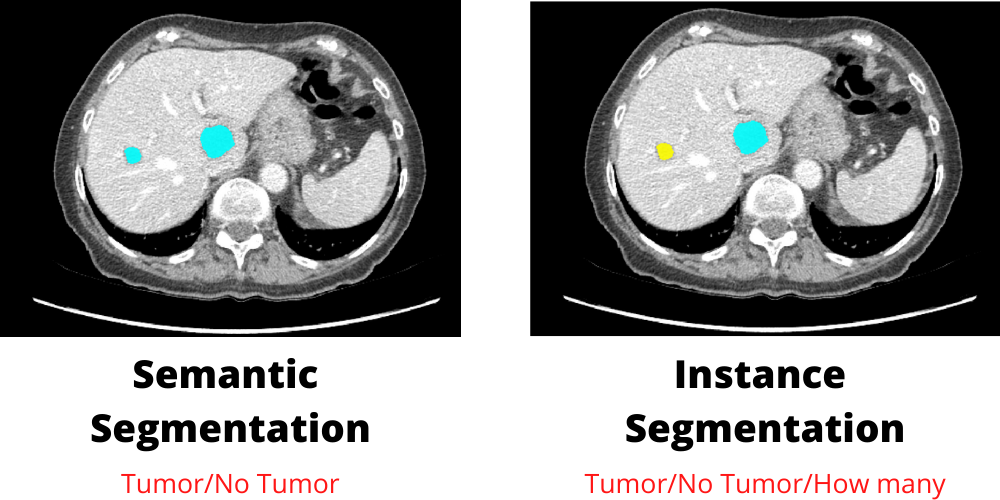
There are two types of image segmentation. The first is referred to as semantic segmentation, and the second is referred to as instance segmentation. The distinction between these two types is that semantic segmentation only produces pixel probabilities about whether a pixel belongs to one of two classes. The goal of instance segmentation, on the other hand, is to index objects even if they belong to the same class.
In our case, semantic segmentation will be used because we need to know whether the slice contains a liver or not.
U-Net Architecture
The U-Net deep learning architecture is used for semantic image segmentation. It was initially developed for medical imaging segmentation, but due to its high accuracy and results, it quickly gained popularity and started being used for other image segmentation tasks. The U-Net architecture is split into two parts. The encoder: the first part contains down convolutions (normal convolutions), followed by max-pooling layers; this part is very similar to an image classification architecture, and the feature array is obtained at the end of the first part. The model then moves on to the decoder, which contains up convolutions rather than normal ones. In this part, the model begins by using the features extracted previously to create the output mask, which has the same width and height as the input image.
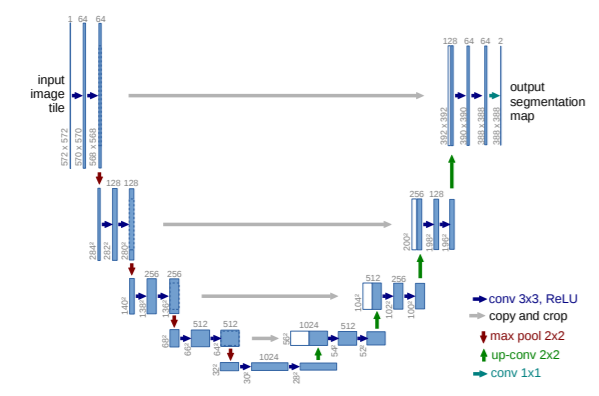
The U-Net output is a pixel-wise mask with the same dimensions as the input image and the same number of channels as the number of classes in your task. Each channel has the pixel probabilities of a specific class.
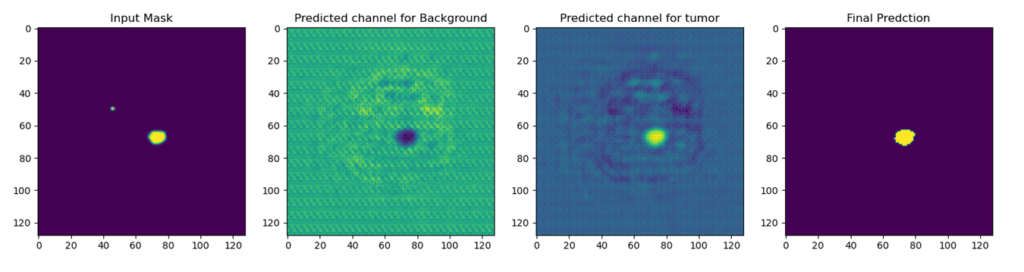
When doing tumor segmentation, this is an example of output channels. You get two channels: one with background pixel probabilities (where there is no tumor) and one with foreground pixel probabilities (where there is a tumor).
Software installation
To make this project done we need to install some software that I will talk about in this section.
- Programming language: Python
- Text editor: VS code
- 3D visualization: 3d Slicer
- Tool for segmentation: ITK snap
- Anaconda Navigator (so that we can create virtual environments and Jupiter notebooks)
PS: You can use the 3D slicer for both(visualization and labeling), but I prefer ITK snap for the segmentation (labeling) part, and we will need the 3D slicer for another task that I will discuss in the next blog.
Outline
Now after that, we talked a little bit about the theory let’s talk about the steps that we will do during this series.
- Part 1: Introduction to the project (this blog).
- Part 2: Prepare and preprocess the data.
- Part 3: The common problems/errors.
- Part 4: The training.
- Part 5: The testing.
- Part 6: Cloning the GitHub repo and using it directly.