Introduction
Most of us struggle to install Onnxruntime, OpenCV, or other C++ libraries. As a result, I’m writing this brief blog post to demonstrate a technique for installing a large number of C++ libraries with a few mouse clicks using Visual Studio (VS).
Requirements
The only requirement is that you install Microsoft Visual Studio if you don’t already have it.
Installing VS
It’s simple and free! Simply go to the official website and download the version you require. On this date, the VS 2022 is the most recent version, but older versions also work. Don’t worry, I’m using VS 2019 and it does the job. You can get it here.
When you download the VS installer, open it and check the box for C++ to install the C++ builder, then click the install button (it may take few time because it downloads and installs at the same time).
Installing Onnxruntime & OpenCV
Setting a New Project
When you have finished installing Visual Studio, simply open it and create a new console app project. create a new project → console app → next → fill the boxes.
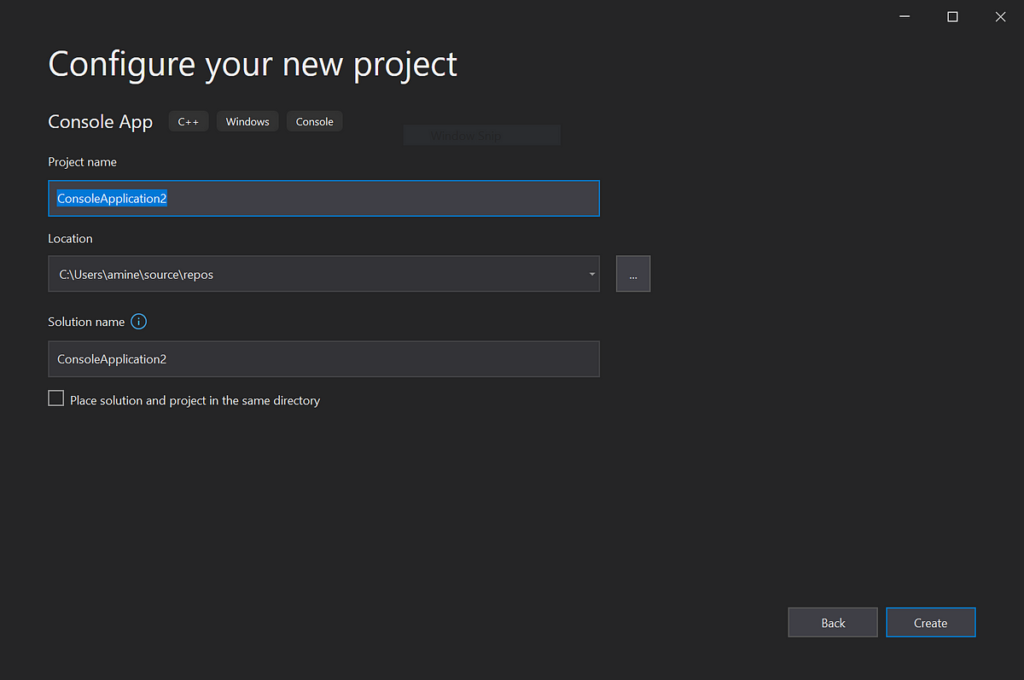
When you create a new project, you can begin configuring it (it does not affect the installation of Onnxruntime, but it is good to set your project before doing anything).
The only things I ever change are the number of bits in your system and the debug/release mode.

The new project is always started in debug mode and x86, which is for a 32-bit system.
So, if your system is x64-bit, change it there, and I recommend using release mode because the code will run faster than in debug mode.

Great! the project is set, now let’s start installing the libraries.
Installing Onnxruntime CPU
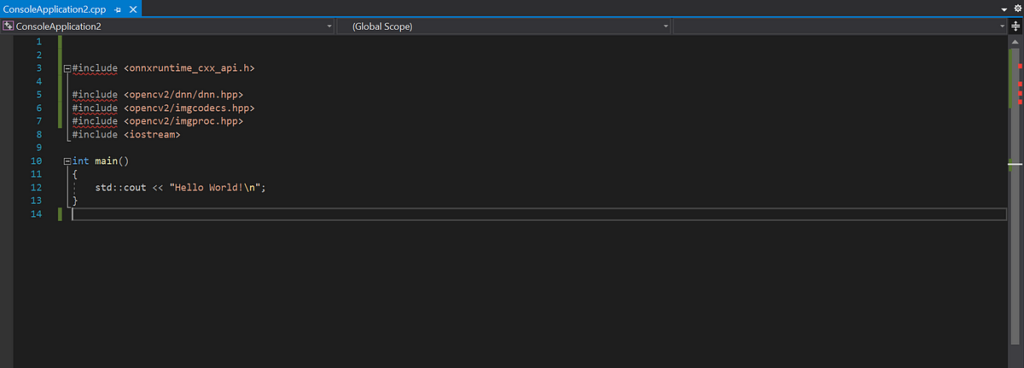
You can see that when we import Onnxruntime or OpenCV, we get errors, indicating that they are not installed.
Steps:
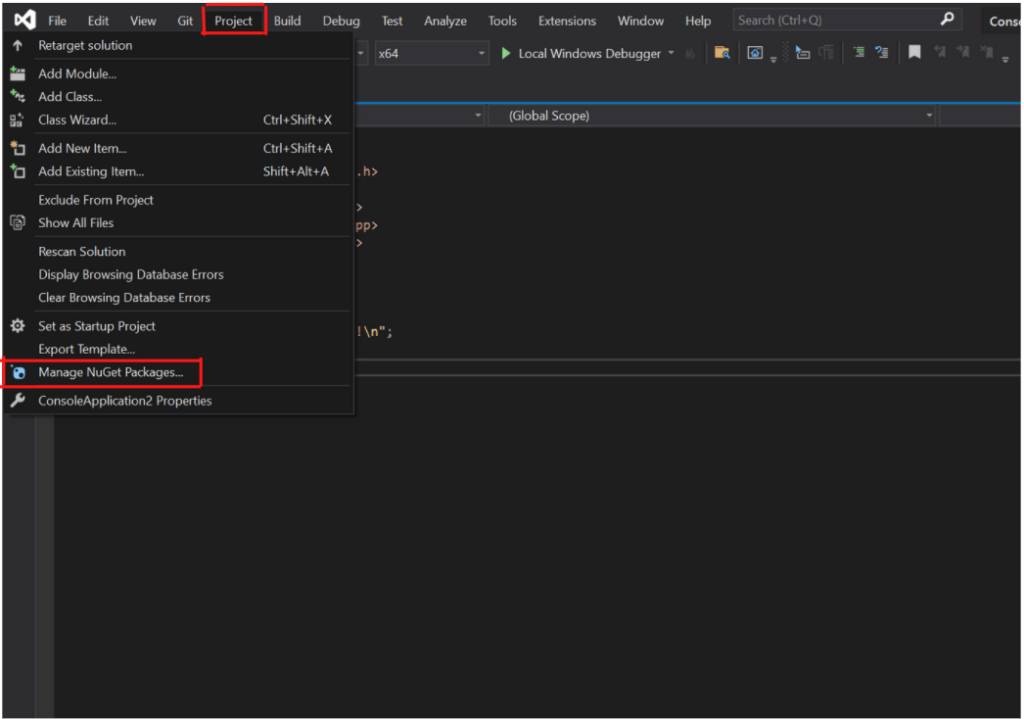
Go to: Project → Manage NuGet Packages
Then type onnxruntime.
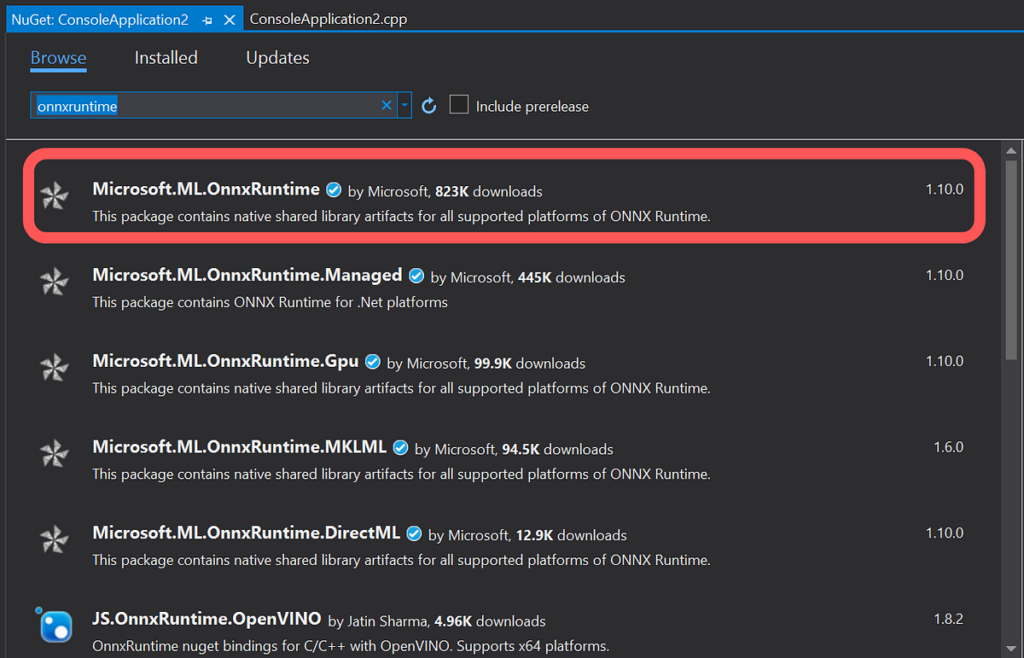
Install the first one to get onnxruntime on your project and enjoy!
Installing Onnxruntime GPU
In other cases, you may need to use a GPU in your project; however, keep in mind that the onnxruntime that we installed does not support the cuda framework (GPU). However, there is always a solution to every problem.
If you want to use GPU in your project, you must install onnxruntime.gpu, which can be found in the same window.
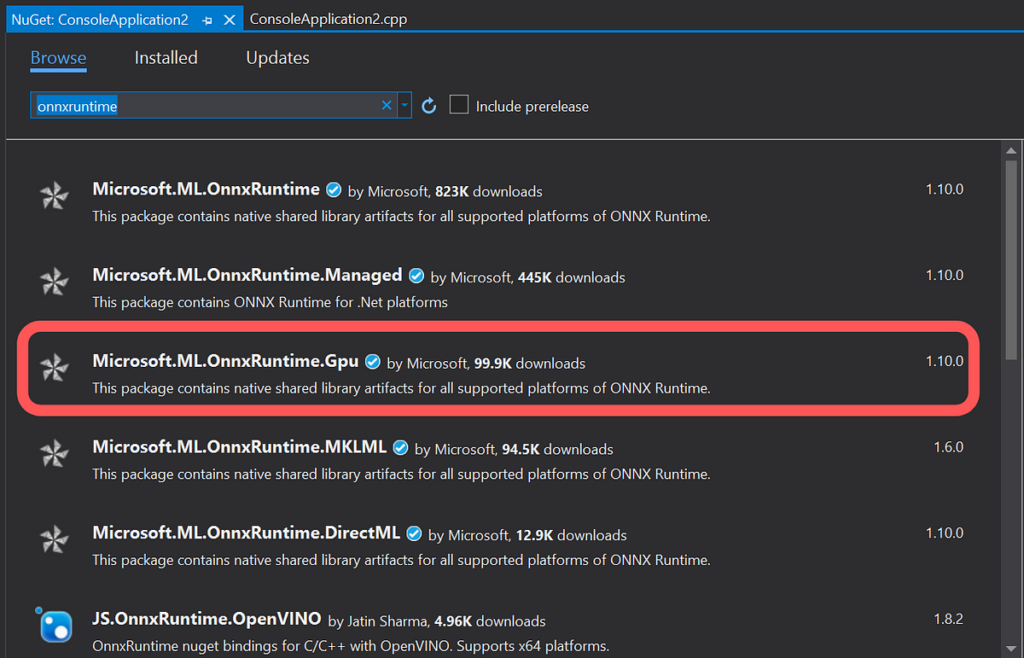
You’ll notice that we no longer get the error when importing onnxruntime, indicating that we installed it successfully.

Installing OpenCV
We can do the same thing to install openCV for your project; simply search for opencv and click the install button. However, if you install openCV with the default version, it will be very old; therefore, you can specify the version to get the most recent one.
For example you type opencv4
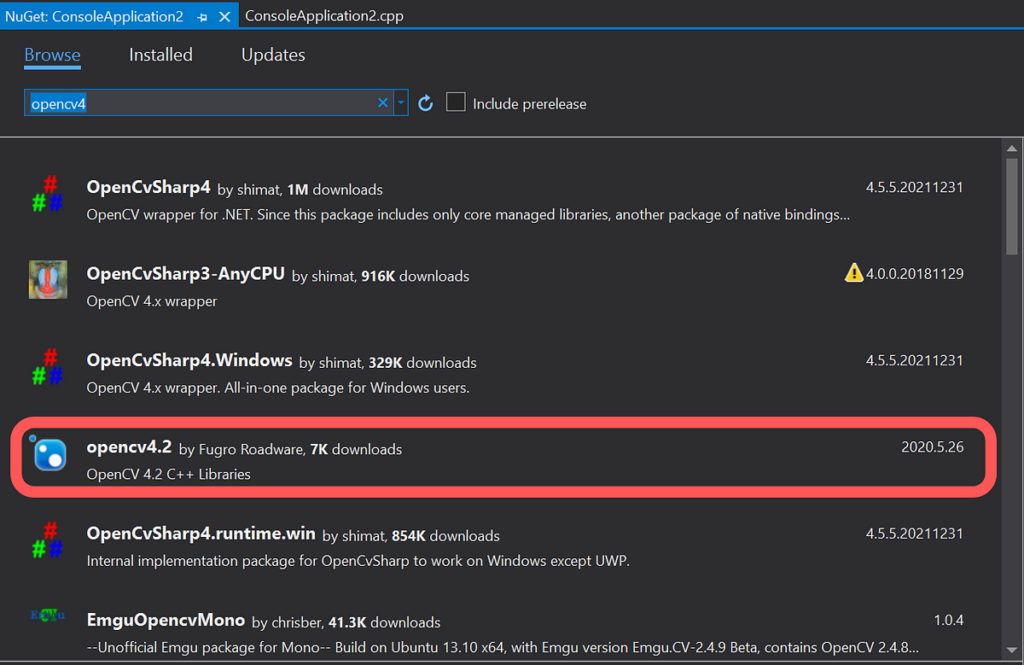
Then install it and enjoy!

Conclusion
So you can see how simple it is to install these packages using Microsoft Visual Studio and NuGet, and you can do the same for other Python packages like Tensorflow…
