Using a 3D Slicer online platform pulls powerful medical imaging tools out of a dedicated workstation and puts them right into your web browser. This shift is a game-changer, breaking down the old barriers to access and making real collaboration possible. It means researchers and clinicians can finally analyze complex datasets and run intensive AI models without being tethered to specialized local hardware.
Why 3D Slicer Moved to the Cloud
The journey of 3D Slicer from a powerful-but-localized desktop tool to a collaborative, web-based environment wasn't just a technical upgrade. It was a necessary evolution driven by the real-world headaches in medical imaging. For years, the desktop version has been an absolute workhorse, but its potential was often capped by the machine it was running on.
This traditional setup created bottlenecks that many of us in the field know all too well. Sharing massive DICOM or NIfTI datasets often meant physically mailing hard drives or struggling with clunky, slow file-sharing services. Collaboration between institutions was more of a chore than a seamless process.
On top of that, running advanced algorithms—especially the GPU-hungry AI segmentation models—demanded serious computing power. This reality forced smaller labs or clinics into a tough spot: either invest in expensive, dedicated workstations or simply go without these powerful tools. The software was brilliant, but access to its full potential was far from universal.
The Technological Leap to the Browser
The move to a 3D Slicer online platform became a reality thanks to huge strides in cloud computing and browser-based rendering. Instead of your local machine doing all the heavy lifting, the processing is offloaded to powerful cloud servers equipped with high-end GPUs. Your browser essentially becomes a secure window into that remote session.
This model directly tackles the core problems of the desktop-only era:
- Accessibility: You can fire up a full-featured Slicer instance from a standard laptop, a tablet, or even a Chromebook. All the intense computations happen on the server.
- Collaboration: Sharing a project is now as simple as sending a link. Colleagues can view, comment on, or even co-edit segmentations in real-time, no matter where they are.
- Computational Power: On-demand access to cloud GPUs means you can run complex AI models in minutes—tasks that might have taken hours, or been completely impossible, on a standard computer.
This evolution is part of a much bigger trend in how specialized software is delivered. To get a broader perspective on the benefits of moving established tools to modern cloud environments, it's worth exploring these legacy system modernization strategies.
The whole idea is to democratize access. By shifting the computational burden to the cloud, a 3D Slicer online setup ensures the best tools for medical image analysis are available to anyone with an internet connection, not just those with the most powerful hardware.
From Local Project to Global Platform
3D Slicer has a long and impressive history as an open-source platform. It all started back in 1998 as a master's thesis project between Brigham and Women's Hospital and the MIT Artificial Intelligence Laboratory.
Its development hit major milestones with the Slicer 3 release in 2007 and the Slicer 4 release in 2011, which moved the interface to the Qt framework for a huge performance boost. By 2022, the desktop version alone had been downloaded over a million times, a testament to its global impact. You can explore the detailed history of Slicer's development and see how its community-driven growth shaped the tool we use today.
Firing Up Your First Cloud Slicer Session
Alright, let's get down to business. Moving from theory to actually using a new tool is where the real learning begins. Getting a 3D Slicer online session running is more straightforward than you might think, but the very first step—choosing the right platform—is critical. This isn't like downloading a single desktop app; the online world gives you a few different flavors, and each one is built for a specific purpose.
The best platform for you really boils down to what you're trying to accomplish. Are you a researcher collaborating on annotations with a team across the globe? Or are you part of a clinical group that needs a rock-solid, secure environment? Your answer will point you down a different path with its own setup and costs.
Choosing Your Online Slicer Platform
Broadly speaking, you have two main routes for getting Slicer in a browser: commercial cloud services or community-backed, open-source deployments.
For instance, a platform like NVIDIA Clara offers a powerful, enterprise-level solution. This is the kind of setup you'll often find in clinical settings where security, validation, and professional support are non-negotiable. These systems are built for heavy workloads and designed to plug right into existing hospital IT.
On the flip side, you've got options like a MONAI Label server, which is hugely popular in the research community. It’s an open-source tool, meaning labs or institutions can host their own Slicer instances. This gives you incredible freedom to customize AI models and tweak workflows, making it a perfect fit for experimental projects where you need to be nimble.
This visual breaks down how the online approach streamlines the old, clunky workflow.
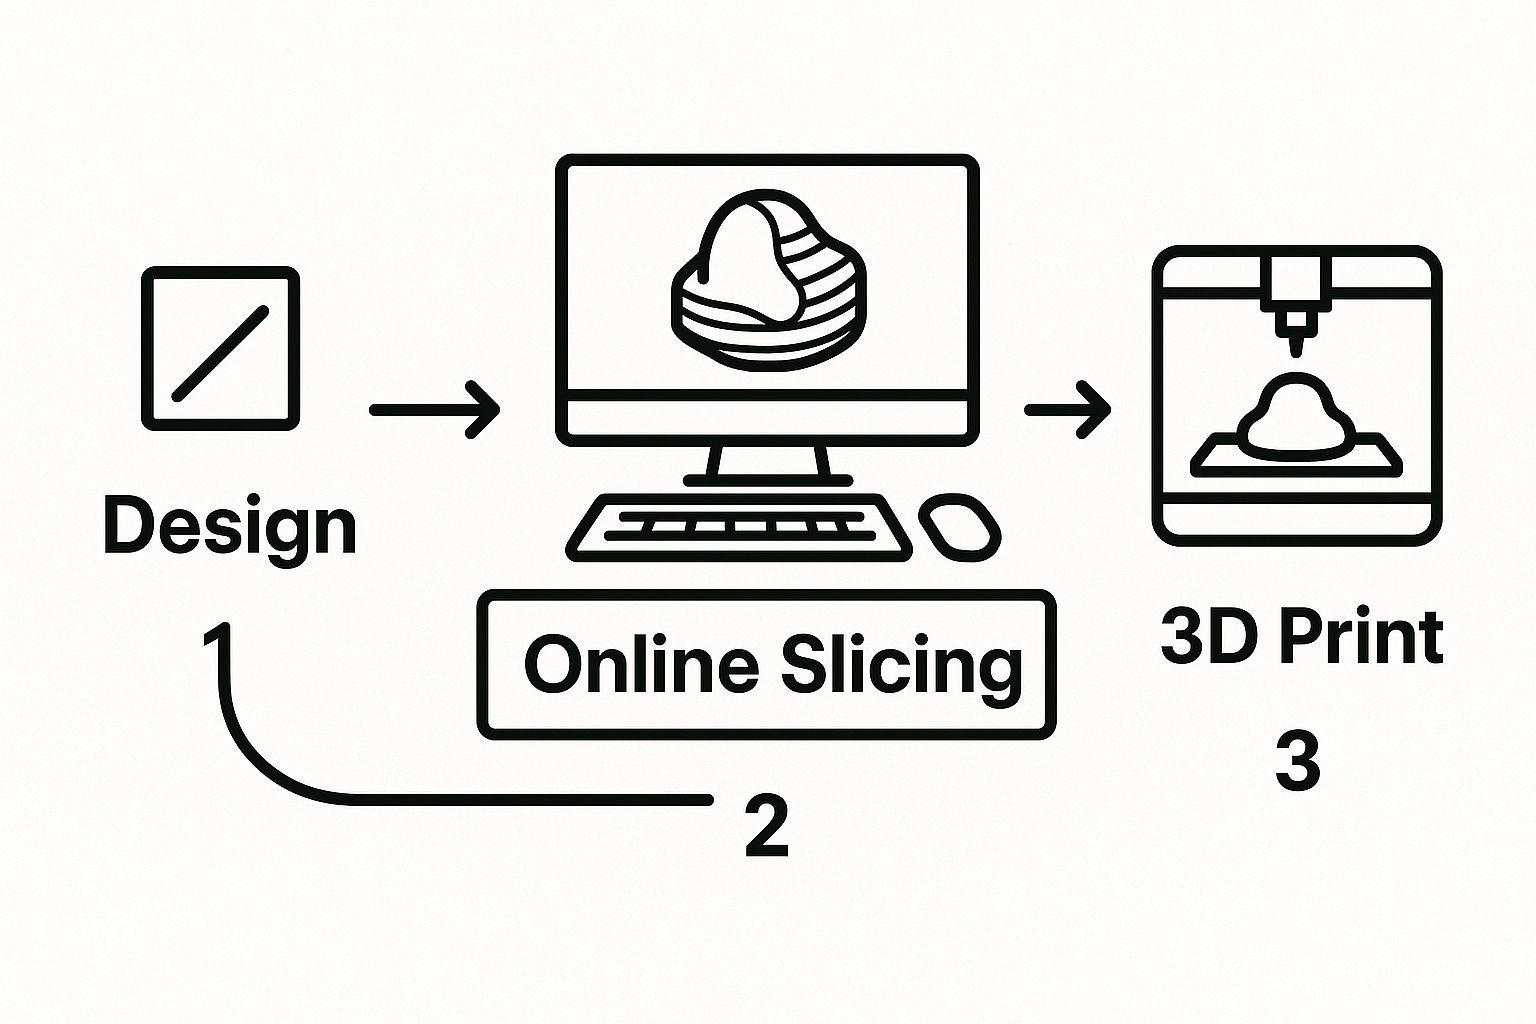
As you can see, essential tasks like loading data, analyzing it, and sharing results can all happen in one place, right in your browser. No more software installs or wrestling with massive file transfers.
Navigating the Initial Setup
Once you've picked your platform, you'll need to handle the initial setup. For most commercial services, this means creating an account and picking a subscription plan. If you're going the research route, you might just be connecting to a server that your university or a collaborator already hosts.
Either way, you'll probably have to make some choices about your cloud configuration. This is where you decide how much horsepower your session gets.
- CPU vs. GPU Instances: For basic visualization, manual segmentation, or just managing data, a standard CPU instance will do the job just fine. It's the cheaper option and is perfectly adequate for less demanding tasks.
- GPU-Enabled Instances: Now, if you plan on running AI segmentation models or doing sophisticated 3D rendering, a GPU-enabled server is non-negotiable. The extra processing power from a GPU is what allows deep learning models to run in minutes instead of hours.
Think of it this way: a CPU is like a dependable sedan for daily commutes (basic tasks), while a GPU is the high-performance race car you need for the track (AI-heavy work).
A quick tip from experience: I always recommend starting with a smaller, more affordable instance when you're just exploring. You can almost always scale up your server resources later if you find things are running too slow. This saves you from burning through your budget while you're still getting the hang of things.
Managing Data and Storage Securely
The last piece of the setup puzzle is your data. How do you get your medical images into the cloud session safely? Most platforms give you two main options.
First, there's the direct browser upload. It works just like attaching a file to an email—simple and great for a few files or a small dataset. But if you're dealing with a large study containing hundreds of DICOM series, this method will quickly become a bottleneck.
The smarter, more scalable solution is to connect your cloud Slicer to a dedicated cloud storage service, like Amazon S3 or Azure Blob Storage. You upload your data to this secure "bucket" first, and then your Slicer instance accesses it from there. This approach is significantly faster for large datasets and gives you a much cleaner way to organize project files. It also keeps your precious data separate from the temporary computing instance, which is a big plus for data safety.
With that sorted, your online session is live and ready for action.
Getting Your Data into the Cloud and Visualizing It
Alright, with your cloud session up and running, it's time to get to the heart of the matter: loading your data and actually seeing it. If you've used the desktop version of 3D Slicer, the online platform will feel surprisingly familiar, but how you handle your files is a whole different ballgame. We're not just dragging files from a local hard drive anymore; we're thinking about efficient cloud-based data pipelines.
The most straightforward way to get started is by loading your scans directly through the browser. This works just like attaching a file to an email—simple and effective. Whether you have a folder of DICOMs from a CT scan or a single NIfTI file from an MRI, this direct upload method is perfect for a quick look at a single case or a small dataset. It’s fast, intuitive, and gets you working in seconds.
But let's be realistic. That approach hits a wall pretty quickly. If you're tackling a large research project with dozens or even hundreds of scans, uploading them one-by-one is a recipe for frustration. It's slow, and a single network hiccup can derail the whole process. It's just not built for heavy-duty work.

A Better Way: Connecting Directly to Cloud Storage
For any serious project, the smarter move is to link your online Slicer session directly to a cloud storage provider. I’m talking about services like Amazon S3, Google Cloud Storage, or Azure Blob Storage. Think of these as your secure, high-speed digital warehouses for medical images.
The workflow is simple: first, you upload your entire dataset to a dedicated "bucket" on one of these platforms. Then, you just point your Slicer session to that bucket. This is the professional way to do it, and for good reason:
- Blazing Speed: Data transfer between two cloud services is exponentially faster than anything you can get from a typical office or home internet connection.
- Clean Organization: It neatly separates your raw data from the temporary session where you're doing the analysis. This is a best practice that keeps things tidy.
- Top-Notch Security: These platforms are designed with enterprise-grade security, which is essential when you're handling sensitive patient data.
Navigating the Slicer Interface in Your Browser
Once your data is loaded, the interface will be a welcome sight for any Slicer veteran. The classic four-pane layout—Axial, Sagittal, Coronal, and the 3D view—is front and center. You can scroll through slices, pan, and zoom just as you would on a local machine. The amazing part is that all the heavy lifting for rendering is being done on a powerful remote server, not your laptop.
One of the first things you'll do is start windowing, which is just adjusting the brightness (window level) and contrast (window width) to highlight different tissues. This is absolutely critical. For a chest CT, for instance, you'll switch to a "lung window" to see the delicate pulmonary structures, then flip to a "bone window" to properly assess the ribs and spine. The controls are right where you expect them, making this kind of on-the-fly visual tweaking a breeze.
The real magic of 3D Slicer has always been its open, community-driven nature. It grew from a niche academic tool into a global standard because it was built to adapt. That philosophy is what makes its transition to the cloud so successful.
This platform has been around since the late 1990s, evolving from a research project into a powerful, free, and extensible application. Key milestones, like the addition of Python scripting support back in 2007, unlocked huge potential for customization and automation. The software’s long history of cross-platform support on the desktop really paved the way for its current flexibility in a browser. You can dig into the platform's rich history to see just how far it's come.
Working with multiple datasets is also seamless. You can easily load a CT, an MRI, and a pre-existing segmentation mask all at the same time. The Data module serves as your command center, allowing you to toggle the visibility of each dataset in the different viewports. This is invaluable for tasks like image fusion, where you might overlay a PET scan onto a CT to correlate metabolic hotspots with specific anatomical structures. The online environment handles these complex multi-modal workflows without breaking a sweat, giving you all the power of a dedicated workstation, minus the hardware.
Tapping into Cloud-Based AI for Automatic Segmentation
This is where running 3D Slicer online really shines, turning a useful tool into a game-changing one. If you've ever spent hours manually outlining a tumor or organ slice-by-slice, you know it's the biggest bottleneck in medical imaging. It's tedious, demanding, and the results can vary from person to person.
Cloud-based AI flips that script entirely. By linking your browser-based Slicer session to a powerful AI server, you can slash segmentation jobs that once took all afternoon down to just a few minutes. It's not just about saving time, either. It’s about getting consistent, precise results that are hard to achieve by hand, especially when you're working with large stacks of images.
Getting Started with MONAI Label for Smart Annotation
One of the best ways to bring AI into your workflow is with the MONAI Label module. MONAI (Medical Open Network for AI) is a fantastic open-source framework, and its Label tool is built specifically for AI-assisted annotation. It turns the slow, one-way street of manual tracing into a genuine collaboration between you and an AI model.
The first thing you need to do is establish a connection. Inside your online Slicer environment, find the MONAI Label module and plug in the address of your cloud server. This could be a server run by your institution or a commercial service. Once you’re connected, Slicer can now access all the pre-trained AI models ready and waiting on that server.
For anyone looking to really nail down their process, understanding strategies for streamlined ML workflows in advanced AI development can offer some great insights into building these powerful analysis pipelines from the ground up.
This is the classic 3D Slicer interface, which the online platform is built upon.
You’ll see the familiar layout—axial, sagittal, and coronal views next to the 3D rendering window. The online version keeps this user-friendly design, so you'll feel right at home.
Your First AI-Powered Segmentation Run
Okay, with the connection live, it’s time to put the AI to work.
Let’s say you have an abdominal CT scan and need to isolate the liver. Instead of starting the painstaking process of drawing its border on every single image, you can now just:
- Pick Your Model: Look through the list of available models on the server. For this job, you'd pick one trained for abdominal organs, something like
segmentation_liver_and_tumor. - Run the Inference: Just one click tells the AI to analyze the entire CT volume. All the heavy computational work happens on the powerful cloud server, not your own computer.
- Check the Result: In a few moments, a complete 3D segmentation of the liver appears, perfectly overlaid on your scan.
This first pass from the AI is often 80-90% accurate, giving you a massive head start. This is the real magic of a 3d slicer online setup—you're tapping into huge computational power whenever you need it.
The breakthrough isn't just getting an instant result. It's how you can then work with the AI to refine it. The model does the heavy lifting, and you, the human expert, provide the final, nuanced corrections. This partnership gets you a final product that is both incredibly fast and highly accurate.
Fine-Tuning the Results with Interactive AI Tools
That first AI segmentation probably won't be perfect. You might spot a few small spots where the model slightly over- or under-estimated the organ's boundary. This is where interactive tools like DeepEdit come into play.
DeepEdit lets you guide the AI with a few simple clicks.
If you see the model missed a little piece of the liver, you just place a few positive "foreground" points inside that area. If it accidentally included a bit of the spleen, you add a couple of negative "background" points to exclude it.
Once you’ve provided that feedback, you run the model again. It doesn’t start over; it uses your corrections to instantly update its understanding and adjust the segmentation lines in real time. This back-and-forth between human and AI is incredibly efficient. A task that could have taken an hour of careful drawing can now be perfected with a few strategic clicks, all within your web browser.
Creating and Sharing Your 3D Models
Getting a high-quality segmentation, whether you did it by hand or with an AI assist, feels like a major win. But really, it’s just the starting point. The next move is turning that segmented data into a polished 3D model you can actually analyze, share, or even 3D print. This is where a 3d slicer online platform truly shines, connecting digital analysis with real-world use.
Even the best AI models can leave behind little imperfections. Maybe it grabbed a tiny piece of a neighboring organ or didn't quite catch a subtle curve. This is where your expertise comes in. You’ll use the Segment Editor module to add that final, human touch.
Think of this module as your digital sculpting toolkit. It’s packed with intuitive tools like Paint and Erase that let you make precise, pixel-level changes on any 2D slice. If an AI-generated tumor boundary looks a bit too generous, you can just grab the Erase brush and trim it back. It feels a lot like using Photoshop or any other image editor.

Refining and Merging Segmentations
The Segment Editor isn’t just for minor clean-up; it handles complex operations, too. For instance, say you've segmented a kidney and a tumor right next to it as two different structures. For planning a surgery, you’d probably want to see them as a single, combined object.
This is a perfect job for the Logical Operators tool. It lets you apply Boolean logic to your segments:
- Add: This will merge two separate segments—like our kidney and tumor example—into one solid model.
- Subtract: You can use one segment to cut a piece out of another. This is incredibly useful for hollowing out models or isolating a very specific region.
- Intersect: This creates a brand new segment that only contains the areas where two other segments overlap.
These tools hand you an incredible amount of control, letting you manipulate the data so your final 3D model shows the precise anatomical relationships you need to see.
The real game-changer with an online platform isn't just making the model, but how it opens up your workflow. You're not stuck working in a silo anymore. A colleague on the other side of the country can jump into your session, suggest a tweak in the Segment Editor, and you’ll see their changes happen live.
Visualizing and Exporting Your Work
Once your segmentation is just right, it’s time for the fun part: bringing it to life in 3D. The visualization controls in your 3d slicer online session are what make your model truly insightful. You can assign different colors to each segment or adjust their opacity.
For example, you could make the bones semi-transparent to reveal the vascular network running through them, or color-code different functional zones in the brain. This is more than just making it look good; it's a powerful way to communicate complex spatial information at a glance.
When your 3D scene is set, the last step is sharing it. Here again, the online platform has a huge advantage. You can save your entire session—all the data, segmentations, and view settings—and share it with a collaborator using a single, secure link. They can open it in their browser and see exactly what you see, no software installation or massive file downloads required.
For physical applications, you’ll need to export your model. The go-to format for this is STL (stereolithography), which is the universal language of 3D printers. The link between 3D Slicer and 3D printing is especially powerful in personalized medicine, where surgeons print patient-specific models to plan complex procedures. This combination of advanced visualization and rapid prototyping is completely changing healthcare, as you can read more about on the 3D Slicer Wikipedia page.
Exporting an STL file directly from your browser session is a breeze, getting your model ready for the printer or for use in other engineering software.
Common Questions About Using 3D Slicer Online
Moving from a familiar desktop app to a browser-based workflow always stirs up a few questions. When you start using 3D Slicer online, you’re thinking about your data in a new way—how it's stored, what it costs, and how it performs. Let’s walk through some of the most common things people ask, so you can make the switch with confidence.
What About Data Security and Patient Privacy?
This is usually the first question on everyone's mind, especially if you're working with clinical data. And it's a critical one. You're handling sensitive patient information, and keeping it secure is non-negotiable.
Here's the good news: platforms designed for medical imaging are built from the ground up with security at their core. They typically run on secure cloud infrastructure that meets strict compliance standards like HIPAA. Your data is encrypted every step of the way—both when it's traveling between your computer and the server (in transit) and when it's stored in the cloud (at rest). Frankly, this setup is often more secure than a standard computer sitting in an office.
Is It Expensive to Use a Cloud-Based Slicer?
Cost is always the next big question. Desktop Slicer is free, so the "online" part makes you think of subscription fees, right? It's a bit more nuanced than that, and often, it's surprisingly cost-effective.
Instead of shelling out thousands for a high-end GPU workstation, you’re essentially renting powerful hardware by the minute or hour. Most platforms operate on a usage-based model.
- Pay-as-you-go: You only get billed for the time your session is active. If you just need to run a couple of complex AI segmentations a week, this can be far cheaper than owning and maintaining the necessary hardware 24/7.
- Tiered Plans: You might see options based on the machine's power (e.g., CPU vs. different GPU levels) and how much storage you need.
This flexibility means a small research lab can tap into the same high-performance computing that a large hospital uses, leveling the playing field. For many, this on-demand access is much more economical than the endless cycle of buying, maintaining, and upgrading local machines.
How Does Performance Compare to a Desktop Workstation?
It's easy to be skeptical. Can a tool running in a web browser really keep up with a powerful desktop app? The answer is not only yes, but it often blows it away.
The magic is that the heavy lifting—rendering a huge 3D volume or running a complex AI algorithm—isn't happening on your laptop. It's all being processed on a powerful cloud server packed with enterprise-grade GPUs, the kind that are way more powerful than what most of us have at our desks. Your web browser just acts as a thin client, a window into that remote supercomputer.
The real advantage is that you're no longer limited by your local hardware. As long as you have a decent internet connection, you can get workstation-level performance on a basic laptop or even a tablet.
This means a task that would bring your desktop to its knees, like segmenting a high-resolution CT scan, can be done in a fraction of the time. Everything feels snappy and responsive because the visual data is streamed efficiently right to your screen. You get a smooth, powerful experience without the hardware headaches.
At PYCAD, we specialize in bringing the power of AI to your medical imaging workflows. Our expertise in data handling, model training, and seamless deployment can help you integrate these advanced tools into your practice. Discover how we can enhance your diagnostic capabilities at https://pycad.co.