Medical Image Classification with Tensorflow

Introduction
In this essay, I’ll discuss image classification in the context of medical imaging. Although it is true that image classification is the simplest deep learning problem, when it comes to medical imaging, things get more complicated. The kind of images, the quality of the imagery, the amount of the images, and even the transforms that we can use on the images all change.
This article’s main focus isn’t on data processing or creating image classification models like Inception, Xception, VGG16, etc. However, it is about how you may improve your accuracy by changing just one parameter. Naturally, instructions and code for training a classification model will be given.
Classification Section (the code)
I’ll discuss how to train the classification model and describe the underlying code in this section. Please skip this part if you are not interested in learning how to carry out this process.
Datasets
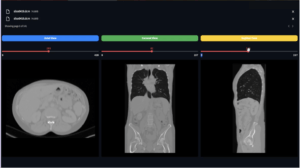
The dataset used for this task was Kvasir, it is available in Kaggle, if you want to learn more about it then you can check the link below.

If you’re interested in learning more about the dataset used for this challenge, Kvasir, which is available on Kaggle, follow the link below.
Processing the Data
In order to prepare the data for training, I decided to divide it into two groups: 80% for training and 20% for validation. As for the size of the images, that will depend on the model you use. For instance, the suggested image size for VGG16 is 224×224, whereas the recommended image size for Xception is 299×299…
The function image_dataset_from_directory from keras.preprocessing is what I used for this section.
def return_ds(input_dir):
    train_ds = tf.keras.preprocessing.image_dataset_from_directory(
        input_dir,
        validation_split=0.2,
        subset="training",
        seed=42,
        image_size=(cfg.input_dim, cfg.input_dim),
        batch_size=16,
    label_mode='categorical',
    )

    val_ds = tf.keras.preprocessing.image_dataset_from_directory(
        input_dir,
        validation_split=0.2,
        subset="validation",
        seed=42,
        image_size=(cfg.input_dim, cfg.input_dim),
        batch_size=8,
    label_mode='categorical',
    )
    return train_ds, val_ds
Model Selection
I develop a function for the model selection that, given just the model’s name in a string, will import the chosen pre-trained model from Keras. This name of the model can be provided in the config file.
# The config file
# Data paths
classes_path = 'utils/annotation.txt'
train_dataset_path = './dataset/train'
test_dataset_path = './dataset/test'

# Training configs
input_dim = 224   # 299, 224
epochs = 20
lr=0.01
head = 'xception' # xception, vgg16, inceptionv3, densenet121
For the model importation, you can use this function:
def return_model(input_dim, nb_classes, freeze=False, head=None):
    if head == 'xception' or head == 'Xception':
        base_model = Xception(include_top=False, weights='imagenet', input_shape=(input_dim, input_dim, 3))

    if head == 'vgg16' or head == 'VGG16':
        base_model = VGG16(include_top=False, weights='imagenet', input_shape=(input_dim, input_dim, 3))

    if head == 'inceptionv3' or 'Inceptionv3' or 'InceptionV3':
        base_model = InceptionV3(include_top=False, weights='imagenet', input_shape=(input_dim, input_dim, 3))

    if head == 'densenet121':
        base_model = DenseNet121(include_top=False, weights='imagenet', input_shape=(input_dim, input_dim, 3))

    if not head:
        print('Please choose the pretrained model')

    print('Chosen model is:', head)

    if freeze:
        for layer in base_model.layers:
            layer.trainable = False

    x = base_model.output
    x = GlobalAveragePooling2D()(x)
    # x = Dense(1024, activation='sigmoid')(x)

    predictions = Dense(nb_classes, activation='softmax')(x)
    model = Model(inputs=base_model.inputs, outputs=predictions)

    return model
The function contains 4 model importations, xception, vgg16, inceptionv3, and densenet121. But you can add more if you prefer!
Hyper Parameters
I discovered that the ideal learning rate for this task and dataset is 0.01; however, other challenges may require a different learning rate. And for the optimizer, I went with SGD, which outperformed extremely well compared to Adam.
The lines of code are here:
model.compile(loss='categorical_crossentropy',
      optimizer=gradient_descent_v2.SGD(learning_rate=cfg.lr),
      metrics=['accuracy'])

save_weights = ModelCheckpoint(filepath='models/my_model.h5',
      monitor='val_accuracy', verbose=1, save_best_only=True,
      save_weights_only=False, mode='max')
The Parameter that Gives Best Results!
In order for you to understand which component affects your outcomes, I might need to take you back a few stages. We stated that the function return_model ( )will return a pre-trained model of our choice. However, there are more factors that I haven’t previously covered, such as whether to freeze imported weights for the pre-trained model. As you can see, the parameter weights= 'imagenet’is always included when we import models from Keras, indicating that we want to import weights that were developed using the enormous Google dataset known as imagenet. The majority of the time, these weights are frozen, which means that we take the pre-trained model, remove the last layers, and then replace them with a few fully connected layers that use a softmax activation to forecast the classes. Only the additional layers will be trained during the training period; the others will remain frozen.
So here’s the experiment I came across, which is not freezing the weights and doing the training on the weights without exception!
In comparison to the method of freezing the weights, this produced quite good results!
Evaluating the Models
To evaluate our models, I have created the test.py script that can be used to do the inference of one image or for a whole directory.
Predict One Image
def predict_one_image(img_path, model_path):
    classes = return_classes(cfg.classes_path)
    model = load_model(model_path)
    img = image.load_img(img_path, target_size=(cfg.input_dim, cfg.input_dim))
    img_array = image.img_to_array(img)
    img_batch = np.expand_dims(img_array, axis=0)
    prediction = model.predict(img_batch)
    predicted_class_idx = np.argmax(prediction)
    probability = np.max(prediction)
    predicted_class = classes[predicted_class_idx]

    return predicted_class, probability
By giving only the path to the image and the path to the model, the function will return the predicted_class and probability.
Predict a Directory
def evaluate_model(model_path):
    test_ds = return_test_ds(cfg.test_dataset_path)
    model = load_model(model_path)
    score = model.evaluate(test_ds, verbose=0)

    return score[0], score[1]  # loss, accuracy
Only the path to the model is required by this method because the evaluation directory’s path will be acquired immediately from the config file. Additionally, it provides the overall directory’s loss and accuracy.
Results
I’ll show you the findings in this part after comparing models that were trained with and without weight freezing.


Conclusion
As a result of the model being able to extract new features that it didn’t extract on the imagenetdataset, you can see that it performs quite well when the weights of the pre-trained model are not frozen. On a large number of datasets, I tested this strategy (even on none medical imaging datasets). However, if your models aren’t working well for medical imaging, I’d like to point out that this isn’t a general rule and that you should consider the experiment.
Best of luck!
GitHub repo (the whole code)
🆕 NEW
Learn how to effectively manage and process DICOM files in Python with our comprehensive course, designed to equip you with the skills and knowledge you need to succeed.