Abstract
Let’s talk about how to start the training after we’ve prepared the data and installed the packages. You can use the train function that I will provide directly for this part, but first I would like to explain the code to you so that if you encounter any errors or get a low accuracy, you will know how to fix it.
The U-Net Model
The first thing you must import after processing the data is the U-Net model from monai (or you can use your defined model if you want).
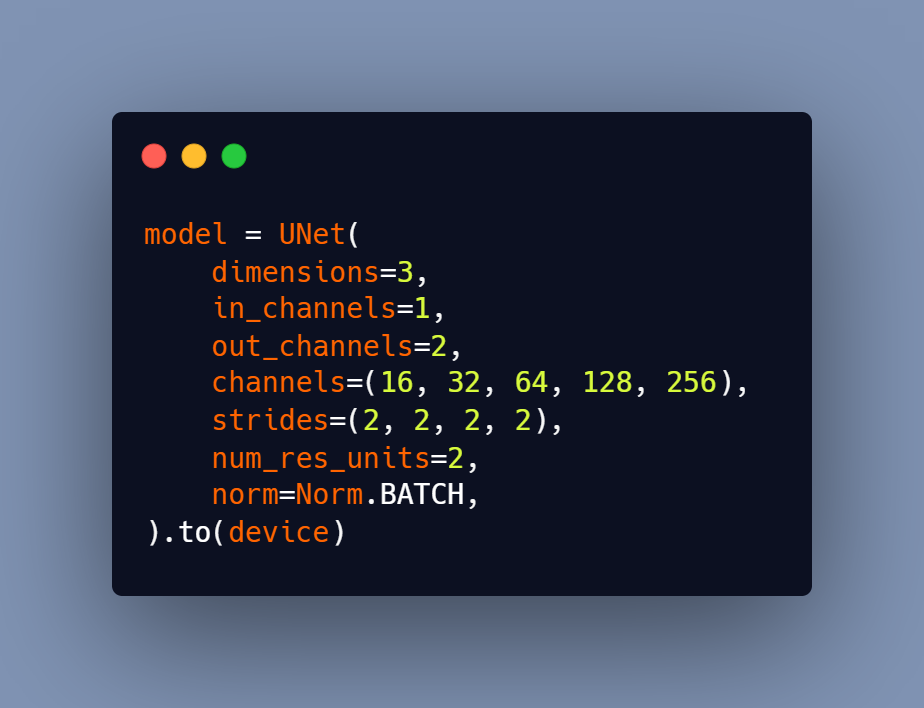
The important parameter to consider is ‘dimensions.’ This parameter controls the dimensions of the convolution blocs, and here we can choose to use a 3D U-Net (by putting the dimensions = 3) or a 2D U-Net (by putting the dimensions = 3). Don’t worry, the default value is 3.
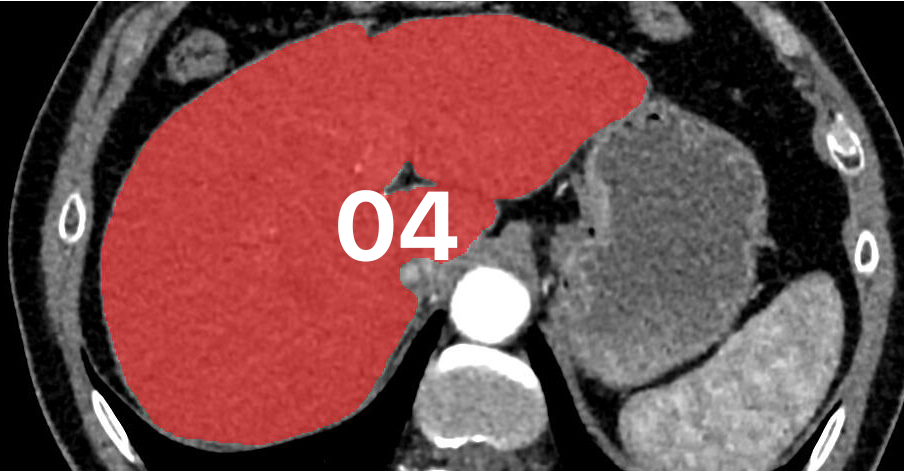
Then there’s the ‘in_channel’, which refers to the input channel, which is only one because you’re using slices with only one channel and contains two different values (0 for the background and 1 for the foreground). However, for the ‘out_channel’ (output channel), you must enter 2 so that each channel contains predictions for a single class. This means that channel 0 represents predictions to the class background (no liver) and channel 1 represents predictions to the class foreground (liver).
The ‘channels’ parameter, on the other hand, controls the number of filters/kernels for each convolutional bloc.
The other parameters aren’t particularly relevant to the task.
Loss Function
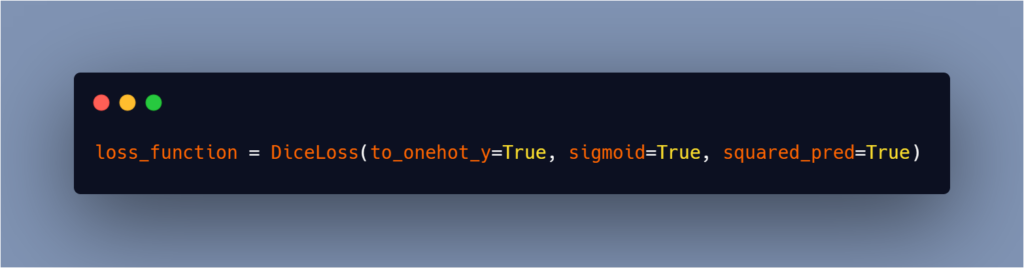
I used the dice loss, which I explained in this blog, for the loss function.
To import it from monai you can use this line of code:
You can see my full YouTube course here for more information on all of this.
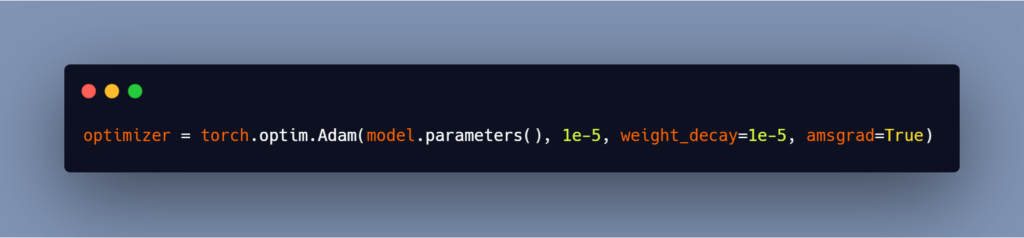
Optimizer
And then you can import the Adam optimizer from monai using this line.
Train the Model
Now that everything is in place, all that remains is to run the training script, which will invoke the train function from the utilities file.
Here is the train function, for more explanation you can always see the YouTube course.
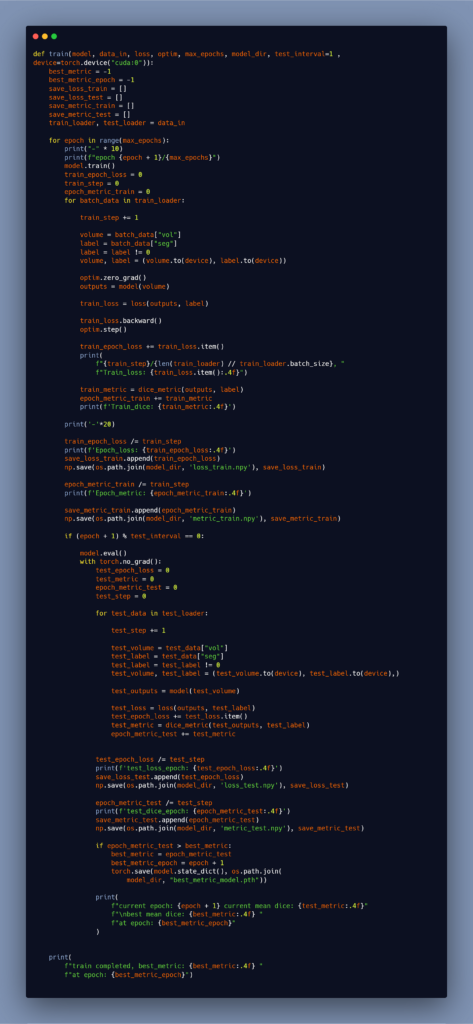
Please be patient as the training may take some time (even more than 24 hours) depending on how many patients you have.
Test the Model
It’s finally time to see the fruits of your labor. There is a test notebook that contains all of the steps required to run the metrics and the model.
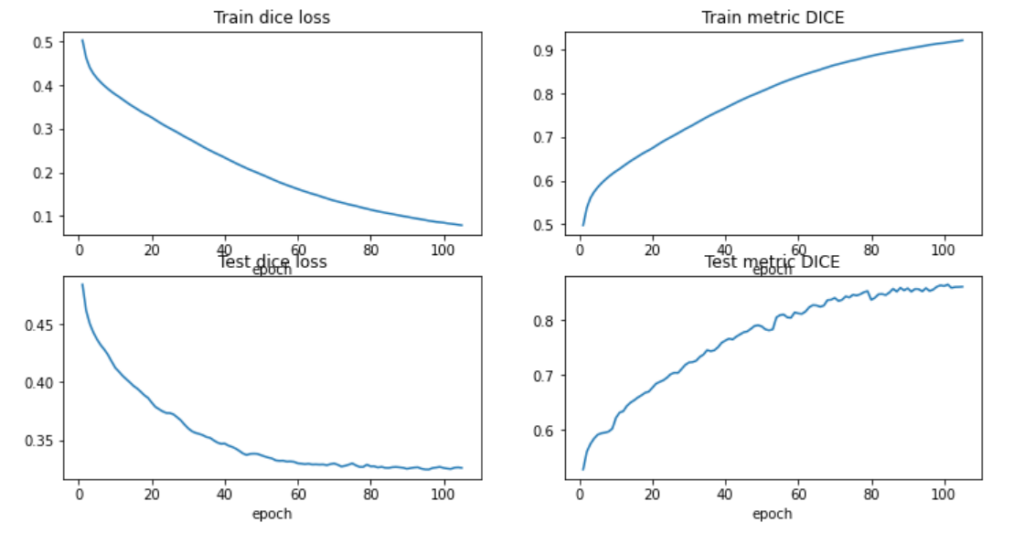
These are the metrics for the training and the testing data:
To test the model, first load the U-Net model as you did for training, then there is a function that allows you to load the weights to the created model, and finally you can start passing the test patients to see if the model is segmenting well or not.
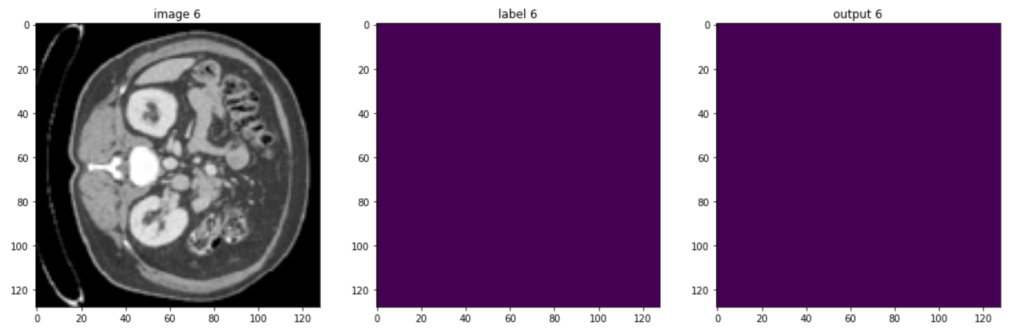
These are some slices from a patient:
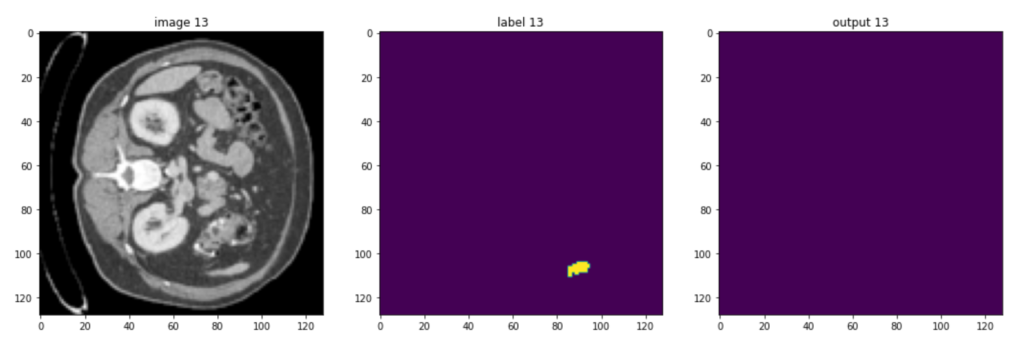
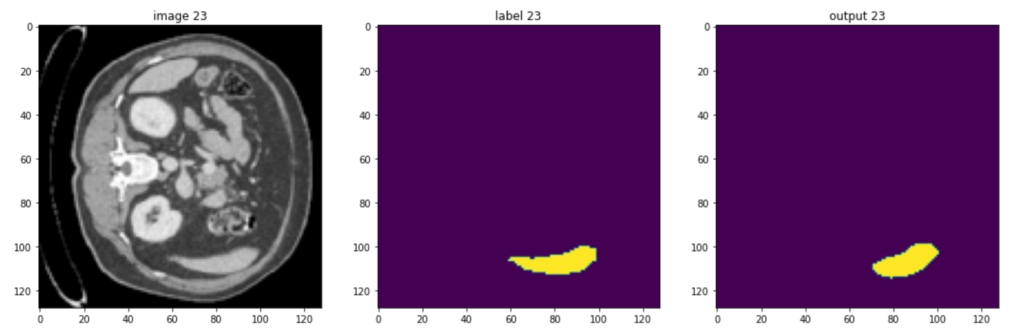
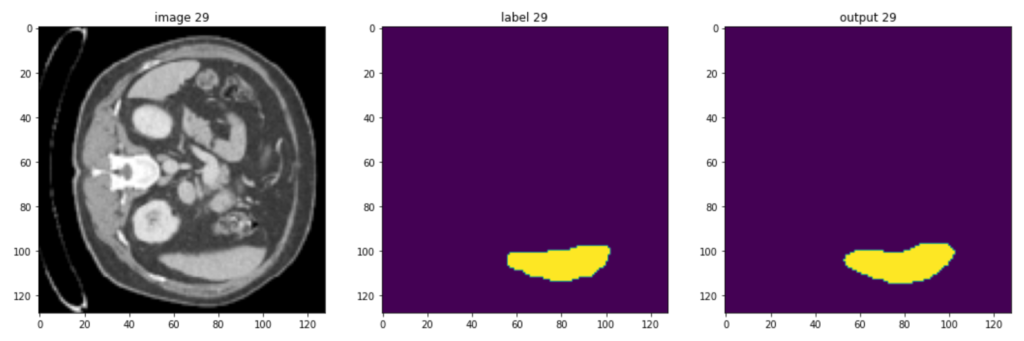
Of course, the model could be improved, but you should be aware that in healthcare imaging, there is no such thing as a perfect task because the type of images is so difficult, but the goal of this course is to give you a quick understanding of monai and how you can use it to handle 3D volumes.
Clone the GitHub Repository
Now that you understand how the code works, you can simply clone my GitHub repository and begin using it by calling the functions that you require.
To clone the GitHub repo, you can run this line in your terminal:
git clone https://github.com/amine0110/Liver-Segmentation-Using-Monai-and-PyTorch
cd ./Liver-Segmentation-Using-Monai-and-PyTorch
And then start enjoying it!