Demystifying the Science Behind 2D to 3D Conversion
Turning a flat, two-dimensional image into a three-dimensional model involves a fascinating blend of art and technology. This conversion relies on cleverly deceiving the human eye into perceiving depth where none exists. The desire to create this illusion has driven innovation for decades. Early attempts, like anaglyphic 3D glasses, offered a basic form of 3D viewing but often suffered from distorted colors and poor depth perception. Want to delve deeper into the historical aspect? Learn more about the history of 2D to 3D conversion.
From Pixels to Perception: How Depth is Created
Modern 2D to 3D conversion relies heavily on sophisticated algorithms. These algorithms interpret visual cues within a 2D image, like shading and texture variations, to create the illusion of depth. Software can analyze an image and extrapolate information about the relative distances of objects. Depth mapping algorithms, for example, even use the size of objects to infer depth. Artificial Intelligence (AI) and neural networks are increasingly used to learn and interpret these cues with greater accuracy.
The Role of Photogrammetry and AI
Photogrammetry is another key technique for 2D to 3D conversion. This process involves taking multiple photographs of an object from different angles. Software then analyzes these photographs, identifying corresponding points to rebuild a 3D model. Think of it like how our two eyes provide us with depth perception.
Amazingly, even single images can be converted. AI can extrapolate depth from subtle cues, even with limited information. This capability has opened exciting new avenues for turning everyday snapshots into 3D models.
Choosing the Right Conversion Method
The best method for converting 2D images to 3D depends on the project's specific needs. Photogrammetry, for example, is ideal for highly detailed and accurate models, especially when digitizing real-world objects. However, it requires multiple images and careful photographic planning.
On the other hand, AI-powered single-image conversion offers speed and convenience. This makes it suitable for simpler projects or when only one image is available. The key is to carefully evaluate the trade-offs between speed, accuracy, and resources to choose the most effective method.
Choosing the Right Tools to Turn 2D Images into 3D

The world of 2D to 3D conversion offers diverse software solutions, each with its own advantages and disadvantages. Picking the right tool hinges on several factors, including project complexity, budget, and technical skills. Understanding the technologies behind 2D to 3D conversion can benefit from exploring resources like this list of AI Developer Tools. This section will help guide you through the selection process.
Free vs. Paid Software: Weighing Your Options
Blender, a robust open-source software, provides a free, complete suite of tools for 3D modeling, animation, and rendering. This makes it an ideal starting point for beginners. However, it has a steep learning curve.
Paid software like RealityCapture offers specialized features and automated workflows that simplify the conversion process, particularly for photogrammetry. The cost can be significant, but the time saved and improved accuracy might justify the investment for professional projects.
Specialized vs. General-Purpose Tools: Selecting the Right Fit
Meshroom, another free, open-source option, stands out in photogrammetry, often surpassing commercial software in certain aspects. This makes it suitable for projects requiring high-fidelity 3D models from a set of 2D images.
General-purpose 3D software like Blender offers a wider range of tools, helpful for further editing and manipulating the converted 3D models. Many professionals use a combination of tools to achieve optimal results.
To help you choose, we've compiled a comparison of some popular 2D to 3D conversion software:
2D to 3D Conversion Software Comparison
| Software | Price | Ease of Use | Key Features | Best For | Output Formats |
|---|---|---|---|---|---|
| Blender | Free | Steep learning curve | Comprehensive 3D modeling, animation, and rendering tools | Beginners, comprehensive projects | Various |
| RealityCapture | Paid | User-friendly | Automated workflows, photogrammetry specialization | Professional photogrammetry projects | OBJ, FBX, PLY, etc. |
| Meshroom | Free | Moderate learning curve | Open-source, high-fidelity photogrammetry | Photogrammetry, detailed models | OBJ, PLY, etc. |
This table highlights the key differences between these three popular software options. While Blender is a versatile and free choice, its complexity might be challenging for newcomers. RealityCapture provides a streamlined experience for photogrammetry but comes at a cost. Meshroom offers a balance between power and accessibility for photogrammetry projects.
Evaluating Your Needs: Key Considerations
The best 2D to 3D conversion tool depends on your specific needs. Consider these factors:
-
Pricing: Free software like Blender and Meshroom are excellent for budget-conscious projects and beginners. Paid software is better suited to professional work.
-
Hardware Requirements: Some software requires powerful computers with dedicated graphics cards. Others run on standard systems.
-
Learning Curve: User-friendly software is ideal for quick projects. More complex software like Blender requires dedicated learning.
-
Output Quality: Photogrammetry software usually produces higher fidelity models than single-image conversion tools.
Understanding your project's specific needs and resources helps you choose the right software. Often, combining the strengths of different tools throughout the conversion process is the most effective approach. This allows for detailed refinements, surpassing the capabilities of a single software.
From Flat to Dimensional: Your Step-by-Step Conversion Guide
Turning 2D images into 3D models is a structured process that transforms a flat image into a dimensional object. This guide breaks down the essential steps, offering practical advice and troubleshooting tips from experienced 3D artists specializing in this conversion.
The infographic below visually outlines the key stages of this 3D conversion process, from the initial image capture to the final model refinement. It demonstrates the workflow progression, from 2D sketches and plans to a fully realized 3D model on a designer’s workstation.
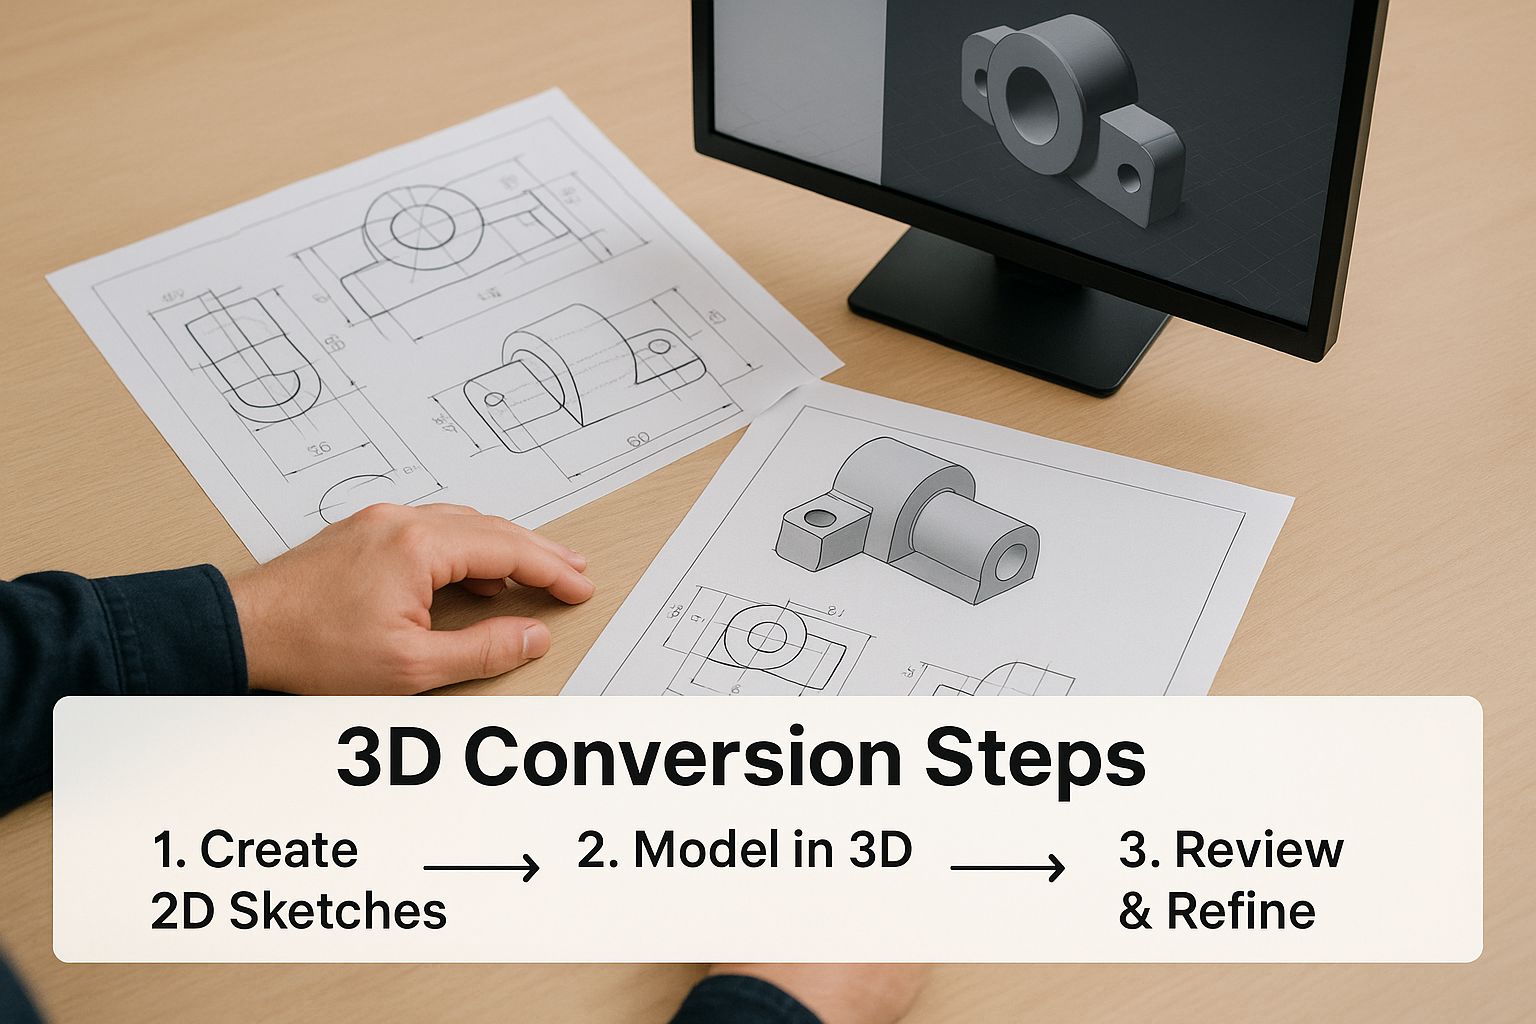
As the infographic shows, each stage builds upon the previous one. This emphasizes the need for careful planning and execution throughout the entire process. From image acquisition to the final adjustments, each step contributes to the overall quality and realism of the finished 3D model.
Image Acquisition: The Foundation of Your 3D Model
The 2D to 3D journey starts with high-quality source images. This is a crucial first step. Consider your lighting: even, diffused light will minimize harsh shadows. Regarding camera settings, a smaller aperture (higher f-stop number) provides a greater depth of field, ensuring more of your subject remains in focus. Capturing multiple images from various angles is essential, particularly when using photogrammetry. This allows the software to accurately reconstruct the 3D form.
Preprocessing: Preparing Your Images for Conversion
After capturing your images, preprocessing is vital. This stage involves cleaning and preparing the images for conversion. This might include removing unwanted elements, adjusting the brightness and contrast, and cropping the image to focus on your main subject. Effective preprocessing significantly impacts the final 3D model's quality, leading to cleaner geometry and more accurate textures.
Conversion: Bringing Your Image to Life in 3D
When choosing your tools, consider platforms that allow you to easily add and manipulate 3D objects. The specific conversion process depends on the software you choose. Programs like RealityCapture or Meshroom utilize photogrammetry, analyzing multiple images to create a 3D mesh. Some AI-powered tools can even extrapolate depth information from a single image. Understanding the software parameters, such as polygon count and texture resolution, is crucial for achieving your desired level of detail.
Refinement: Perfecting Your 3D Model
After the initial conversion, refinement is often needed. This involves smoothing rough edges, filling gaps in the geometry, and adjusting textures for a seamless and realistic look. Common issues like texture stretching or incomplete geometry can be addressed at this stage. Refinement transforms a raw 3D model into a polished, usable asset.
Finishing Touches: Elevating Your 3D Model
The final step is adding finishing touches to enhance your model. This might include incorporating lighting, materials, and rendering effects. These final adjustments can significantly improve the realism and visual appeal, taking your 3D model to a professional level. This stage allows the artistry of 3D modeling to truly shine, transforming a technical conversion into a compelling visual piece. A well-executed finishing process often distinguishes a good model from a truly great one.
Real-World Applications: How Industries Transform 2D into 3D
The process of converting 2D images into 3D models is having a profound impact across various industries. It offers innovative solutions and streamlines existing workflows, creating new opportunities in sectors ranging from architecture and medicine to e-commerce and entertainment. This technology is enhancing efficiency and unlocking creative potential in diverse fields.
Architecture: Breathing Life Into Historical Blueprints
Architectural firms are utilizing 2D to 3D conversion to revitalize historical blueprints and sketches. This allows architects to visualize and interact with historical designs in a dynamic way that surpasses traditional 2D drawings. They can create interactive 3D models of historical buildings from old plans, which is particularly useful for restoration and preservation efforts. This offers a deeper understanding of the original architectural designs, enabling more informed decisions during restoration projects.
Medicine: Personalized Healthcare Through 3D Models
The medical field is benefiting from the ability to transform 2D medical images like CT and MRI scans into 3D anatomical models. These models offer surgeons detailed, patient-specific visualizations for enhanced surgical planning. This precision leads to more accurate procedures and improved patient outcomes. Furthermore, 3D models serve as valuable educational tools, helping patients better understand their own medical conditions.
E-Commerce: Boosting Sales With Interactive 3D Visualizations
E-commerce brands are using 2D to 3D conversion to create interactive product visualizations. These engaging 3D displays allow customers to interact with products online, rotating, zooming, and examining them in detail, much like holding them in their hands. This enhanced interactivity improves the online shopping experience, increasing customer confidence and ultimately driving sales. Studies indicate that 3D product visualization can result in 42% higher conversion rates compared to traditional 2D images.
Entertainment: Streamlining Game Development and Film Production
The entertainment industry, especially film and game development, utilizes 2D to 3D conversion extensively. In film, this process is often used for post-production 3D releases. Creating these 3D conversions can be resource-intensive, often involving hundreds of artists. World War Z's 3D conversion in 2013, for example, required nearly 400 artists. Frankenweenie involved 2,000 artists and staff to create 1,518 3D conversion shots. Learn more about 3D conversion. Game developers similarly leverage this technology to reduce asset creation costs and shorten development timelines, quickly transforming 2D concept art into 3D game assets.
Cultural Preservation: Preserving History Through Digital Transformation
Cultural institutions are adopting 2D to 3D conversion for the preservation of artifacts and historical sites. By creating 3D models from photographs and drawings, they generate digital replicas of fragile objects. This ensures their long-term preservation and accessibility for research, education, and virtual exhibitions, even if the originals are damaged or lost. This opens up cultural heritage to a wider audience.
Breaking Barriers: Advanced Techniques for Photorealistic Results
Taking your 2D to 3D conversion skills further requires a solid grasp of advanced methods. Leading studios employ these techniques to create stunningly realistic 3D models. This involves combining established methods like photogrammetry with newer AI-powered solutions.
Multi-View Reconstruction: Enhancing Geometry Capture
Building on photogrammetry, multi-view reconstruction uses many images from different angles. This dense image set allows for a highly accurate and detailed 3D model. By capturing more viewpoints, the software better interprets the object’s geometry, particularly in complex areas. This results in richer and more realistic 3D representations.
Tackling Challenging Subjects: Transparency and Reflections
Some materials, like transparent or reflective objects, pose unique challenges for 2D to 3D conversion. These materials can confuse traditional algorithms. However, new specialized techniques address these complexities. For instance, some software uses polarization filters to capture multiple images, isolating reflections and reconstructing the underlying surfaces. This is especially helpful for products with glass or metallic surfaces.
Texture Mapping: Preserving Fine Surface Details
Texture mapping applies 2D images onto a 3D model’s surface. Advanced texture mapping methods preserve even the finest surface details. Techniques like normal mapping add surface detail without increasing the polygon count, keeping the model efficient while enhancing realism. Accurate texture mapping makes the final 3D model look more realistic and visually appealing.
The Rise of AI: Revolutionizing 2D to 3D Conversion
AI is reshaping 2D to 3D conversion, providing powerful tools for highly realistic models. Neural networks can learn and interpret complex visual cues from images. They extrapolate depth and surface detail with remarkable accuracy. This makes it possible to create detailed 3D models from even single 2D images.
Workflow Recommendations: Tailoring the Process
The right workflow depends on your equipment and technical expertise. User-friendly software with automated features can simplify the process for beginners. Advanced users might prefer open-source or professional-grade software like Blender for greater control. The table below provides some general guidelines based on the desired quality level.
To help guide your 2D to 3D conversions, the following table outlines the image quality requirements for achieving different levels of 3D output. It covers aspects like resolution, lighting, and the number of images needed, offering valuable insights for project planning.
Image Quality Requirements for Successful 3D Conversion
| Quality Level | Minimum Resolution | Lighting Requirements | Number of Images | Subject Considerations | Post-Processing Needs |
|---|---|---|---|---|---|
| Basic | 1024×768 | Even, diffused lighting | 10-20 | Simple geometry, matte surfaces | Minimal |
| Intermediate | 2048×1536 | Controlled lighting, minimal shadows | 20-50 | Moderate complexity, some reflections | Moderate |
| Advanced | 4096×3072 | Precisely controlled lighting, HDR capture | 50+ | Complex geometry, transparent/reflective surfaces | Extensive |
This table summarizes the key elements for achieving various levels of quality in 3D conversions. From basic models to advanced, photorealistic representations, understanding these requirements is crucial for successful project outcomes.
By following these guidelines and understanding each stage, you can create professional, photorealistic 3D models from 2D images. Every project has unique challenges, but careful planning and execution lead to impressive results. Experiment and explore different techniques to find the best approach for your needs.
Overcoming Common Obstacles When Converting 2D to 3D
Turning 2D images into 3D models can be complex, even for seasoned professionals. This section explores common challenges and offers practical solutions developed by experts in the field. Understanding these potential roadblocks can improve your conversion workflow and yield better results.
Insufficient Detail in Source Images: Enhancing Clarity
One common hurdle is insufficient detail in the original 2D image, often resulting in a blurry or incomplete 3D model. One solution is to employ image enhancement techniques before conversion. This might involve increasing the image resolution in programs like Adobe Photoshop, sharpening details, or adjusting contrast. If possible, sourcing a higher-quality image or using multiple source images can dramatically improve the final 3D model.
Complex Geometries: Simplifying the Conversion Process
Intricate shapes and complex geometries can confuse conversion algorithms, leading to distorted or inaccurate 3D models. Breaking down the image into simpler parts can help. Convert each section individually and then reassemble them in your 3D modeling software, such as Blender. This segmented approach improves accuracy when handling complex shapes.
Problematic Lighting Conditions: Correcting Shadows and Highlights
Uneven lighting in the 2D image can create unwanted shadows and highlights in the 3D model. Adjusting the lighting within your 3D software can mitigate this. Tools like ambient occlusion and shadow mapping can help create a more balanced and realistic look. Preprocessing the 2D image to correct lighting imbalances before conversion can also streamline the process.
Texture Inconsistencies: Creating a Seamless Look
Texture inconsistencies can disrupt the realism of a 3D model. Seams, stretching, or mismatched patterns can detract from the final result. Solutions include using UV mapping techniques in your 3D software to control how textures are applied to the model. Careful attention to texture alignment and scale is crucial for a seamless look.
Geometry Gaps: Filling the Voids
Conversion processes sometimes create models with missing parts or gaps in the geometry. 3D modeling tools allow you to manually fill these gaps. Techniques like bridging, patching, or sculpting can rebuild missing sections, ensuring a complete and accurate 3D model. For more complex gaps, re-converting the 2D image with adjusted settings might yield better results.
Polygon Limits: Optimizing Model Performance
High-polygon models can be resource-intensive, impacting performance in applications like games or virtual reality. Decimation and retopology tools can reduce polygon count without significantly compromising detail. This optimization is key for creating efficient 3D models that perform well in real-time applications. Balancing detail and performance is a critical consideration.
By anticipating and addressing these common challenges, you can effectively convert 2D images into impressive 3D models. Remember to choose the right software for your project, considering its features and limitations. Explore different techniques and solutions to overcome obstacles and create stunning 3D visuals. Ready to experience streamlined and accurate 2D to 3D conversion in your medical projects? Visit PYCAD to discover how AI-powered solutions can enhance your medical imaging workflows.