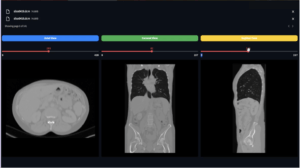
If you want to convert a normal image like JPGs or PNGs into medical images (talking about Dicom files) so you are in the right place.
To do this conversion you need only to install a library called “pydicom” to manipulate the Dicom images then you need a pre-existing Dicom image.
Because we all know that a Dicom image or we can say Dicom file contains more than a normal picture, like pixels … A Dicom image contains the pixels information that we call “pixel array”, the patient’s information, and more stuff. So in our case, we need to convert only the pixels values which are the pixel array. For that, we need to take an existing Dicom image and take its old information or we can say its old allocations to create the new one.
So the first step is to install the pydicom library, pillow, and numpy because we need them as well. To do that we need only to put the following lines in the terminal.
pip install pydicom
pip install numpy
pip install pillow
After doing this, we can start the main program. For that we have 3 steps:
- Open the images, the jpg or png, and the existing Dicom.
- If the jpg or the png image is in the grayscale space.
- If the jpg or the png image is in the RGB space
Opening the images
To open the images, for the jpg or png image we will use pillow and for the Dicom, we will use pydicom. Here are the lines to do that:
ds = pydicom.dcmread(‘path’) # pre-existing dicom file
jpg_image = Image.open(‘path’) # the PNG or JPG file to be replace
If the JPG image is a grayscale image
If you don’t know if the image is in the grayscale or RGB, you can check that by the ‘mode function’ so if it returns ‘L’ means that the image is in the grayscale or RGBA for the RGB image.
So we need to initialize the image or we can say the array using NumPy then we need to give the array the same dimensions of the JPG image so that we will not lose information after that we should specify that the image that we will create is a grayscale image and of course we need to add more parameters to specify the right type of the image. And we should know that this array will replace the array that exists on the first Dicom image.
Here is the program that do this work
if jpg_image.mode == 'L':

       np_image = np.array(jpg_image.getdata(),dtype=np.uint8)
       ds.Rows = jpg_image.height
       ds.Columns = jpg_image.width
       ds.PhotometricInterpretation = "MONOCHROME1"
       ds.SamplesPerPixel = 1
       ds.BitsStored = 8
       ds.BitsAllocated = 8
       ds.HighBit = 7
       ds.PixelRepresentation = 0
       ds.PixelData = np_image.tobytes()
       ds.save_as('result_gray.dcm')
If the JPG image is a RGB
Actually we will do the same steps that we did for the grayscale image, only the array that we will create will have 3 channels instead of 1, the “PhotometricInterpretation” will be RGB instead of the monochrom, and the samples per pixel will be 3 instead of 1.
Here is the code for that:
if jpg_image.mode == 'RGBA':

    np_image = np.array(jpg_image.getdata(), dtype=np.uint8)[:,:3]
    ds.Rows = jpg_image.height
    ds.Columns = jpg_image.width
    ds.PhotometricInterpretation = "RGB"
    ds.SamplesPerPixel = 3
    ds.BitsStored = 8
    ds.BitsAllocated = 8
    ds.HighBit = 7
    ds.PixelRepresentation = 0
    ds.PixelData = np_image.tobytes()
    ds.save_as('result_rgb.dcm')
So that’s was how to convert normal images into Dicom if you want the whole code you can download it from here.
Heppy learning
If you want to know how to convert Dicom images into JPG or PNG so you can visite this link.
Find a sponsor for your web site. Get paid for your great content. shareasale.com.


