
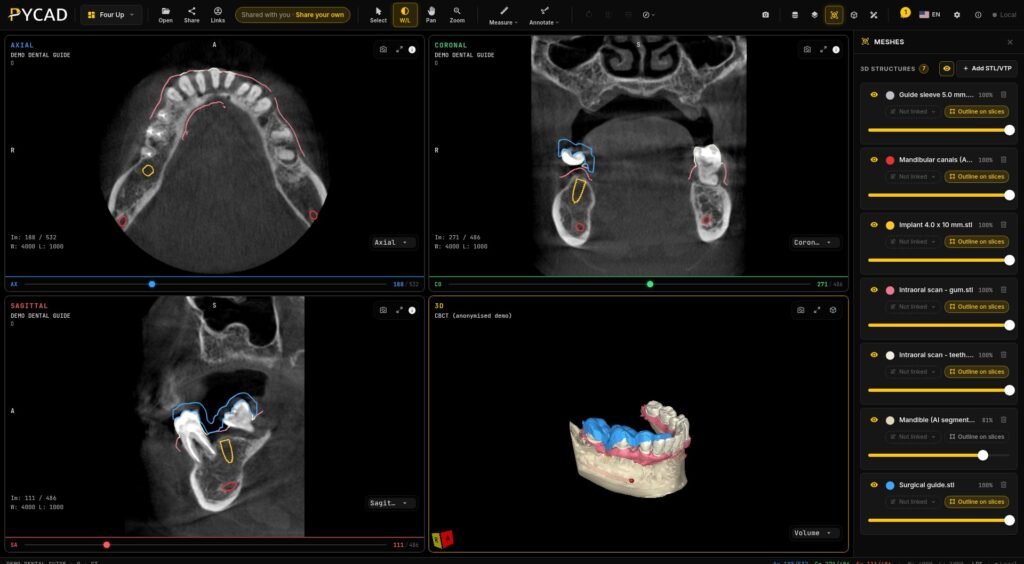
You can send a CBCT scan to a patient, a referring dentist, or a lab as a browser link. The person on the other end clicks it and the scan opens in their browser, in slice views they can scroll through and a 3D view they can rotate. They don’t install anything, they don’t create an account, and nobody has to burn a disc.
That is how sharing works in PYCAD’s web DICOM viewer, which you can try at pycad.co/demos/dicom-viewer. In this post I’ll walk through what the recipient sees, how to create the link, what else you can send along with the scan, and the controls you get over the link.
Why the CD, the USB stick, and the ZIP keep causing trouble
The usual CBCT handoff goes one of three ways. The clinic burns a CD with a bundled viewer, copies the study to a USB stick, or zips the DICOM folder and tries to email it.
Many laptops no longer have a disc drive. The viewer bundled on the CD may not run on the recipient’s operating system. A USB stick can get lost in the post or in a patient’s bag, with a full scan on it. A CBCT export is often too large for an email attachment, so the ZIP ends up on a file-transfer service, and the person who downloads it still needs DICOM software to open it.
Vendor share portals fix part of this, but they usually tie the recipient to that vendor’s software or account.
A link removes the media and the install step. The recipient needs a browser and nothing else.
What the recipient gets when they open the link
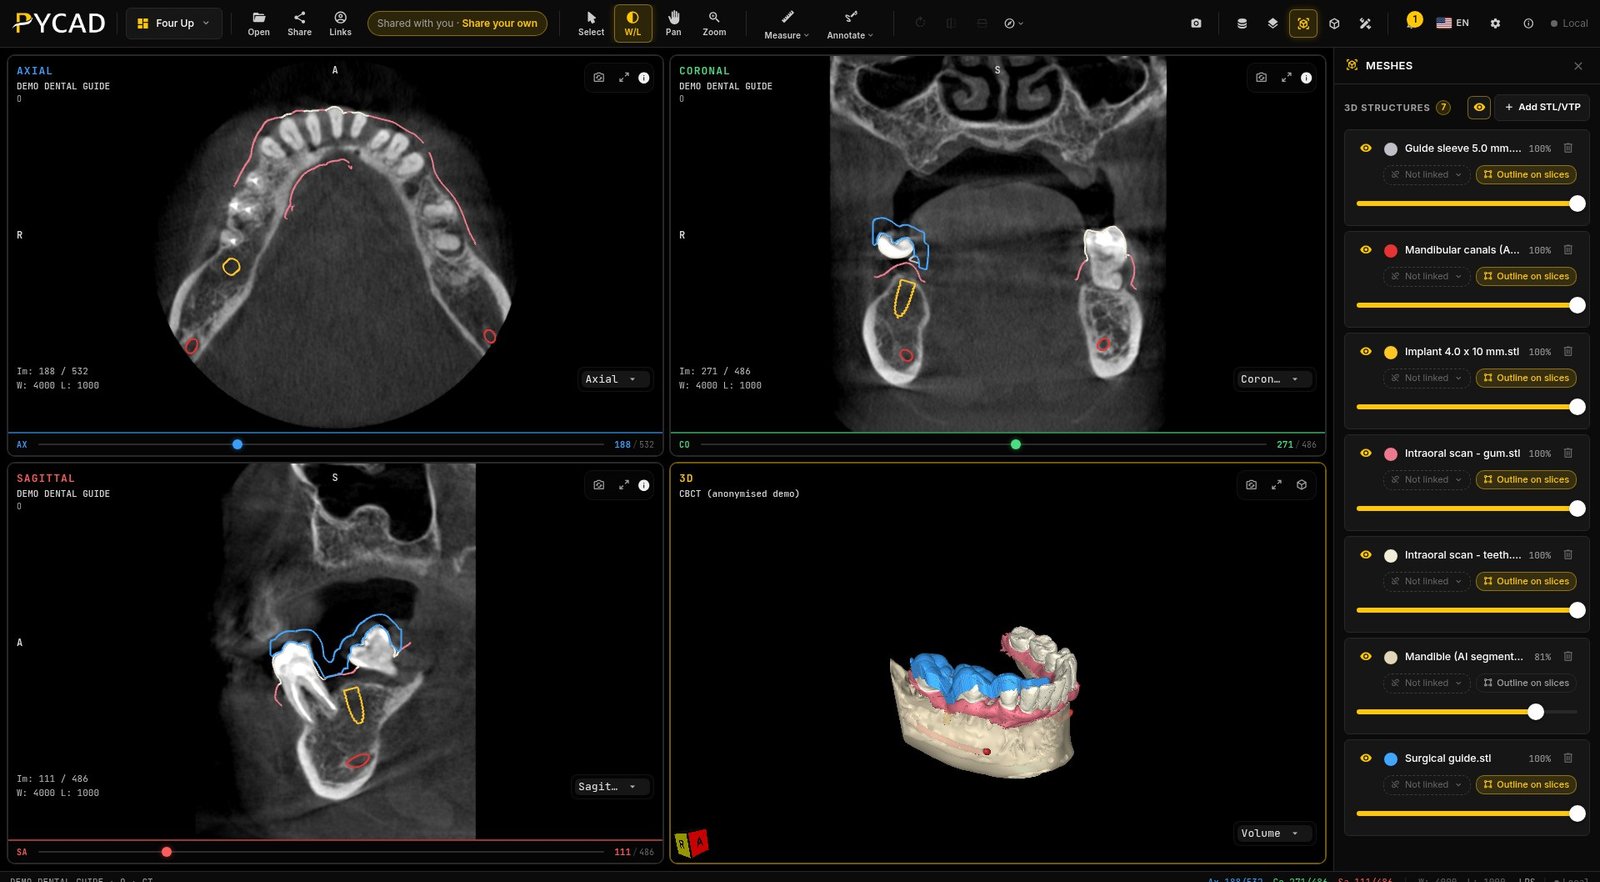
The link opens the CBCT in our DICOM viewer, in the recipient’s browser. The default layout is MPR, so they get axial, coronal, and sagittal views linked by crosshairs, plus a 3D view. They can scroll slices, adjust window and level, pan, and zoom.
The link restores the whole session: the scan, any other files you uploaded with it (implant or guide meshes, for example), and the operations you applied. If you set a window level, placed a ruler on a slice, or cropped the volume to the region you care about, the recipient sees that same state instead of starting from raw slices.
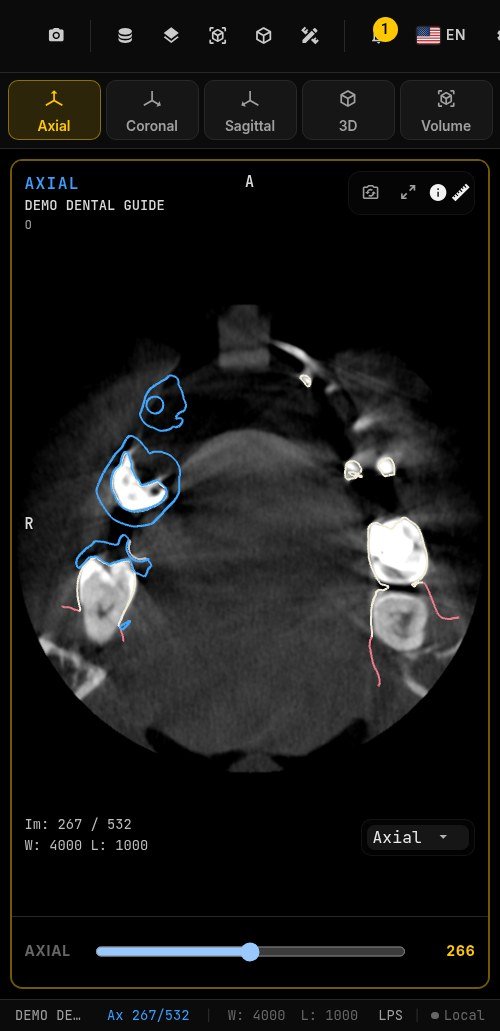
The link opens on desktop, and also on a phone or tablet, since everything happens in the browser. On a phone the viewer shows one view at a time, with tabs to switch between axial, coronal, sagittal, and 3D. A large monitor is still the better place for reading slices closely. For a patient who wants to see their own scan, or a colleague checking something between appointments, a phone is enough.
Sending implant STLs and other 3D files with the scan
A CBCT is often only part of what you want to send. A lab may have designed a guide or a restoration, or you may have an implant model you want a colleague to see in place. You can load those files into the same session as the scan before you share it.
The viewer accepts 3D meshes as STL (binary or ASCII) and VTK polydata files. If you already have label maps from your own segmentation work or from a provider, you can load those too, as NIfTI or NRRD files, and they show as colored overlays on the slices. Everything you load into the session goes out with the link.
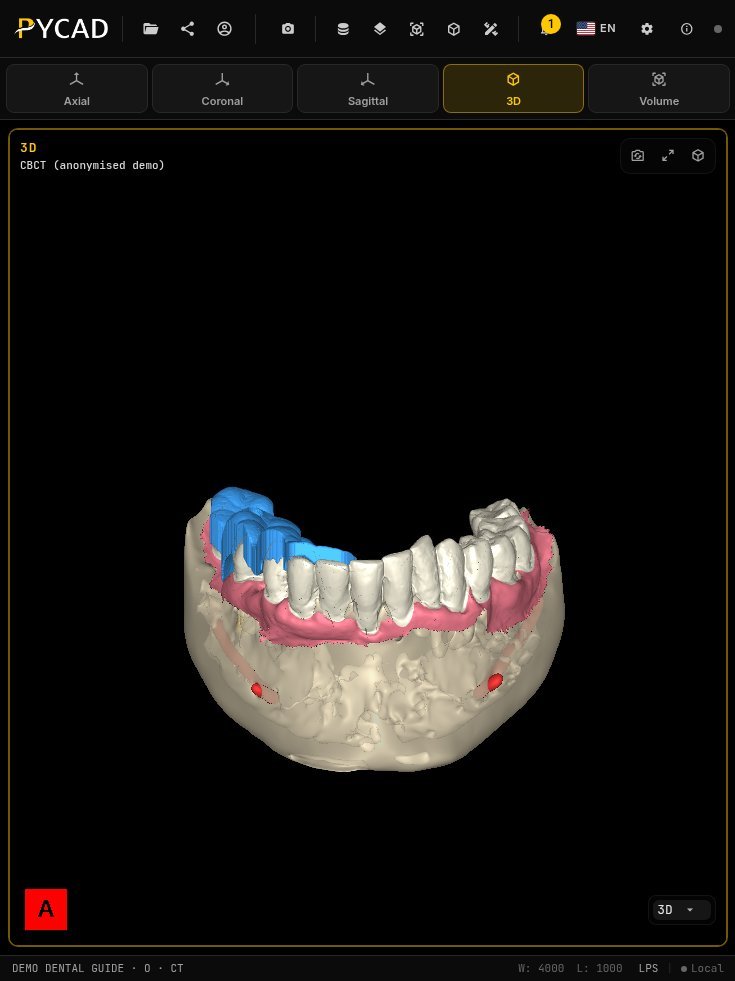
Each mesh and label map keeps the color, visibility, and opacity you set, and those settings travel with the link. So a referring dentist who opens it, on a desktop or a tablet, sees the CBCT slices and the implant STL in the 3D view, the way you arranged them.
How to share a CBCT scan as a link
- Open the CBCT in the PYCAD DICOM viewer. DICOM works as single files, a folder, or a zip. If you need help getting the files off the scanner or out of your imaging software first, my guide on how to open a CBCT scan covers that.
- If you want to, add implant STLs, other meshes, or label maps to the same session.
- Set up the views you want the recipient to see: window level, crop, measurements, which structures are visible.
- Create a free account and save the session. A share link points to a saved session, so this step is required.
- Click Share in the toolbar. In the Share Viewer dialog, pick how long the link stays active (30 days, 60 days, or 1 year), add a password if you want one, and click Generate link.
- Send that link however you normally talk to that person: email, your patient messaging system, or a text.
The recipient opens the link and sees the session. They don’t need an account.
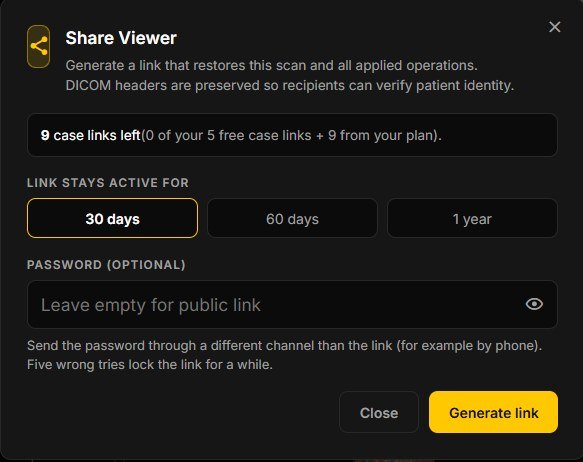
The dialog also notes that DICOM headers are preserved in the shared session, so the recipient can check that the patient details match.
If you send segmented CT or MRI cases as well as CBCTs, I wrote about that workflow in sharing a segmented CT or MRI case as a link.
Password, expiry, and revoking a link
A link that anyone can forward needs some limits, so each share link has three controls.
The password is optional. If you leave the field empty, the link is public and anyone who has it can open the session. If you add a password, only someone with both the link and the password can open it. The password must be at least six characters. Send it through a different channel than the link, for example the link by email and the password by phone or text. Five wrong password attempts lock the link for a while.
Every link expires. When you create it, you choose whether it stays active for 30 days, 60 days, or 1 year. The dialog starts on 30 days.
You can revoke a link at any time. Once you revoke it, the link stops opening the scan, even if someone saved it or forwarded it.
For a patient, I’d use a password and 30 days. For a lab, revoke the link once the case is finished, so it doesn’t stay open until it expires.
Where the scan data goes
The viewer runs in the browser. When your team uses it day to day, it loads CBCT data from your practice’s own servers or storage, or from your imaging center’s, and that data moves between the browser and those servers.
PYCAD servers come in at two points. If you use AI or 3D segmentation, that processing runs on PYCAD servers. When you click Share, the viewer packages the session (the scan, any meshes and label maps, and the applied operations) and stores a copy on PYCAD servers so the recipient can open the link. The link still opens in the recipient’s browser, and the viewer runs there.
FAQ
Can I share a CBCT scan with a patient as a link?
Yes. Save the session in the PYCAD DICOM viewer, click Share, and send the patient the link. They open it in their browser with no account and no software to install. You can add a password, and you choose whether the link stays active for 30 days, 60 days, or 1 year.
How do I send a CBCT to a referring dentist without a CD?
Open the CBCT in the viewer, set up the views they’ll need, save the session, and click Share. The referring dentist gets a browser link that opens the scan in axial, coronal, sagittal, and 3D views, with any measurements or crop you saved.
Can I include implant STL files with the shared CBCT?
Yes. Load the STL files into the same session as the CBCT before you save and share. The recipient sees the meshes in the 3D view with the scan. The viewer reads STL and VTK polydata meshes.
Can the recipient open a shared CBCT on a phone?
Yes. The link opens in a phone or tablet browser as well as on a desktop. On a phone you switch between views with tabs. For close reading of slices, a larger screen is easier to work on.
Is the shared CBCT link password protected?
It can be. The password is optional. Leave it empty and anyone with the link can open it, or set one of at least six characters so the recipient needs both the link and the password. You also pick how long the link stays active (30 days, 60 days, or 1 year), and you can revoke it whenever you want.
Using it in your practice, imaging center, or lab
You can try sharing with the demo viewer today. If you run a practice, an imaging center, or a lab and want the viewer connected to your own servers or storage, so your team can send CBCT links as part of daily work, contact us at PYCAD and tell me how you hand off scans now.