
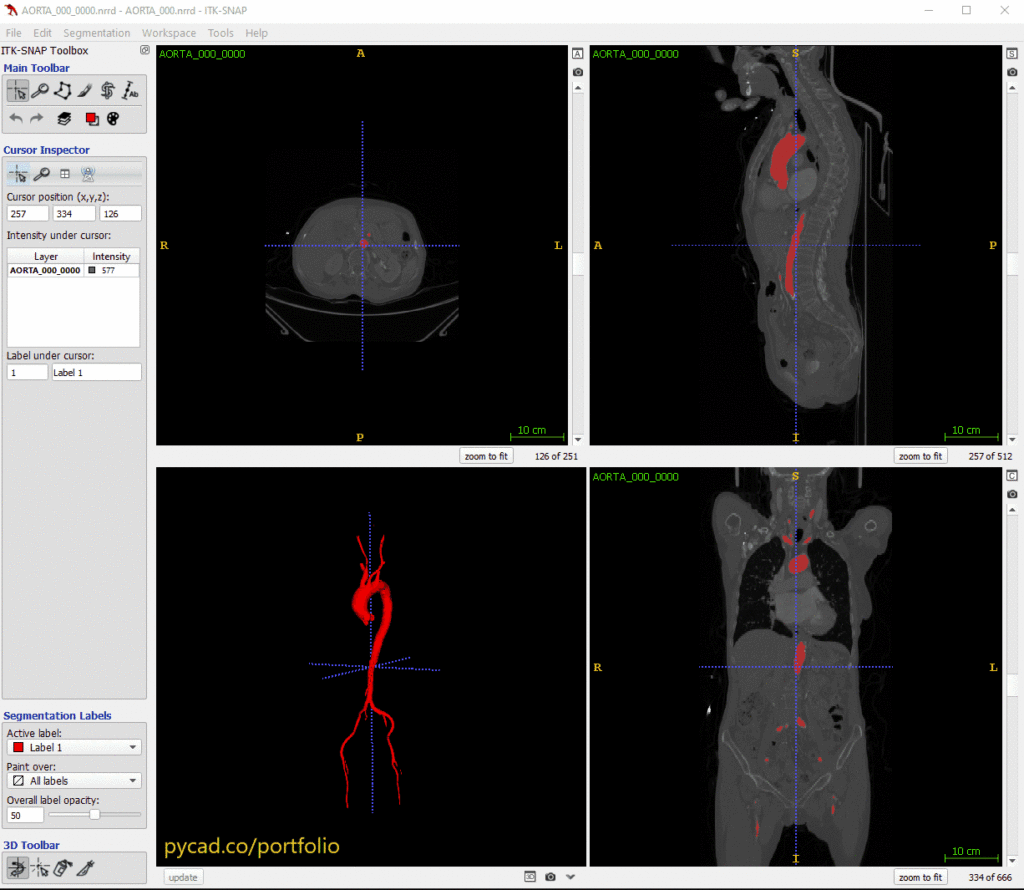
This is how I train and run nnU-Net v2 on my own data: folder layout, nnUNetv2_plan_and_preprocess, nnUNetv2_train, nnUNetv2_predict, nnUNetv2_evaluate_folder. The example is Dataset300_Aorta. It is not a generic “what is medical image segmentation” explainer — that is medical image segmentation. It is not desktop 3D Slicer calling a trained spine model — that is 3D Slicer + nnU-Net spine. It is not MONAI preprocess or augment.
I use “nnUNet” and “nnUNetv2” for the same thing here: version 2.
Hardware
MIC-DKFZ’s install notes are the source. GPU, CPU, and Apple M1/M2 are supported devices. Training on CPU is not realistic.
- Train: a GPU with at least 10 GB VRAM (RTX 2080 Ti / 3080 / 3090 / 4080 / 4090 class). Six cores (12 threads) is the floor; augmentation is CPU-bound and scales with channels and labels. Faster GPU wants a faster CPU.
- Infer: 4 GB free VRAM is enough. CPU / MPS inference is slow but usable.
- Workstation they quote: Ryzen 5800X-class, RTX 3090 or 4090, 64 GB RAM, NVMe.
- Server they quote: dual EPYC, 8× A100 PCIe, 1 TB RAM, local or fast network SSD. ~16 CPU cores per A100.
Environment
Use a venv or Miniconda. Install PyTorch first. Then nnU-Net in one of two ways:
Baseline CLI (train / infer / eval from the shell):
pip install nnunetv2Editable install (you will import it from your own inference code):
git clone https://github.com/MIC-DKFZ/nnUNet.git
cd nnUNet
pip install -e .
Three environment variables. Raw data, preprocessed cache, training output:
nnUNet_raw— datasets in the nnU-Net folder conventionnnUNet_preprocessed— written byplan_and_preprocessnnUNet_results— weights, plans, logs
export nnUNet_raw="/path/to/your/nnUNet_raw"   # Linux
set nnUNet_raw=C:pathtoyournnUNet_raw     # Windows
That is session-only. Put the exports in .bashrc (Linux) or the system environment panel (Windows) if you want them to stick.
Dataset layout — Dataset300_Aorta
The folder convention is the Medical Segmentation Decathlon layout. If you already have MSD data, convert it:
nnUNetv2_convert_MSD_dataset -hFor anything else, name the dataset folder Dataset[ID]_[Name]. ID is three digits you have not used. Mine for aorta was Dataset300_Aorta.
Inside that folder: imagesTr, labelsTr, optional imagesTs (no labels required for test).
Images:
{CASE_IDENTIFIER}_{XXXX}.{FILE_ENDING}Example: AORTA_000_0000.nrrd.
Labels:
{CASE_IDENTIFIER}.{FILE_ENDING}Example: AORTA_000.nrrd.
dataset.json next to those folders:
{
    "channel_names": {
        "0": "CT"
    },
    "labels": {
        "background": 0,
        "AORTA": 1
    },
    "numTraining": 51,
    "file_ending": ".nrrd",
    "overwrite_image_reader_writer": "SimpleITKIO"
}
overwrite_image_reader_writer is optional. I set SimpleITKIO because the files are .nrrd. Omit it and nnU-Net picks an I/O class.
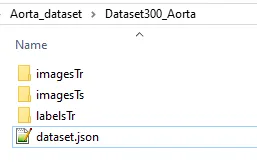
Put Dataset300_Aorta under nnUNet_raw.
Plan, preprocess, train
nnUNetv2_plan_and_preprocess -d DATASET_ID --verify_dataset_integrity -np 1DATASET_ID is 300 here. -np is worker count. A high value will OOM on a normal workstation. I use -np 1.
nnUNetv2_train 300 3d_fullres all -tr nnUNetTrainer_250epochs300— dataset ID3d_fullres— config. The others are2d,3d_lowres,3d_cascade_fullresall— train on the wholeimagesTrset, no cross-validation-tr nnUNetTrainer_250epochs— 250-epoch trainer. Other lengths live in the trainer variants. You can add your own.
Predict and evaluate
nnUNetv2_predict -i nnUNet_dirs/nnUNet_raw/Dataset300_Aorta/imagesTs -o nnUNet_dirs/nnUNet_raw/nnUNet_tests/ -d 300 -c 3d_fullres -tr nnUNetTrainer_250epochs -f allnnUNetv2_evaluate_folder /nnUNet_tests/gt/ /nnUNet_tests/predictions/ -djfile Dataset300_Aorta/nnUNetTrainer_250epochs__nnUNetPlans__3d_fullres/dataset.json -pfile Dataset300_Aorta/nnUNetTrainer_250epochs__nnUNetPlans__3d_fullres/plans.jsonFirst path is ground truth. Second is predictions. -djfile is dataset.json. -pfile is plans.json from preprocess.
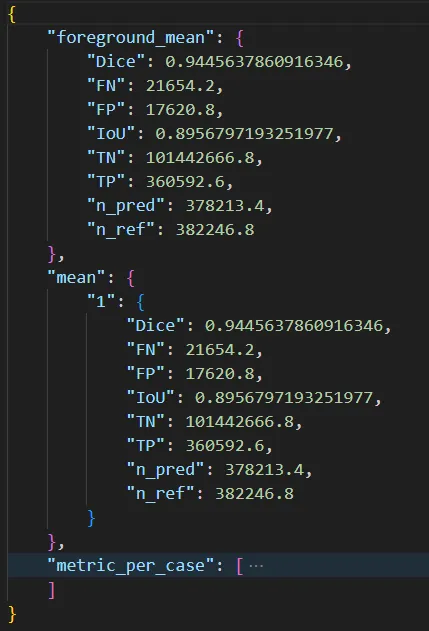
Aorta run, predicted mask vs CT:
What this page is not
- Not the methods explainer. Definition, U-Net, classical methods: medical image segmentation.
- Not Slicer. Running trained spine weights in desktop Slicer is this guide.
- Not MONAI preprocess / augment. Those how-tos are preprocessing 3D volumes and 3D augmentation.
- Not the service page. Shipping the model is MONAI / nnU-Net deployment.
Every command has more flags. Read the official how-to, run --help, and skim the GitHub issues before you invent a wrapper.
If you are scoping a clinic deploy after this, use the medical AI deployment checklist. Need the model behind an API or a viewer — contact. Case studies.
Keep Reading
Related Articles
Explore the full Segmentation HubAll services, tools, and guides on this topic — in one place.
Visit Hub →